886 lines
18 KiB
Markdown
886 lines
18 KiB
Markdown
---
|
||
title: macOS
|
||
date: 2025-09-26 22:54:01
|
||
tags: [macOS, Apple, Homebrew, 操作系统]
|
||
categories: [操作系统, macOS]
|
||
---
|
||
|
||
# 环境配置
|
||
|
||
## Homebrew
|
||
|
||
> 官网:https://brew.sh/
|
||
|
||
### 介绍
|
||
|
||
Homebrew 就像 Mac 的智能软件管家。
|
||
|
||
- 你可以用它安装需要的软件(比如 Python、MySQL),它会自动下载、安装、配置,甚至帮你处理依赖(比如装 A 需要先装 B)。
|
||
- 卸载时,它会把软件和相关文件清理干净,不留垃圾。
|
||
- 支持下载命令行工具(如`git`)和图形应用(如`chrome`)
|
||
|
||
### 安装
|
||
|
||
安装前需开启魔法,防止拉取失败。
|
||
|
||
```shell
|
||
/bin/bash -c "$(curl -fsSL https://raw.githubusercontent.com/Homebrew/install/HEAD/install.sh)"
|
||
```
|
||
|
||
### 常见命令
|
||
|
||
| 操作类型 | 命令 | 功能说明 |
|
||
| -------- | ----------------------------- | ------------------------------ |
|
||
| 安装 | brew install [package name] | 安装软件(自动处理依赖) |
|
||
| 卸载 | brew uninstall [package name] | 彻底卸载软件(并自动清理依赖) |
|
||
| 更新 | brew update | 更新 Homebrew 本体 |
|
||
| | brew update [package name] | 更新指定软件 |
|
||
| | brew upgrade | 更新所有已安装软件 |
|
||
| 查询 | brew info [package name] | 查看指定软件详细信息 |
|
||
| | brew list | 列出所有已安装软件 |
|
||
| 清理 | brew cleanup -n | 预览可清理的旧版本 |
|
||
| | brew cleanup [package name] | 清理指定软件的旧版本 |
|
||
|
||
### 高阶技巧
|
||
|
||
#### 服务管理系统(类似 Linux 的 systemd)
|
||
|
||
```shell
|
||
brew services start mysql # 启动 MySQL 服务
|
||
brew services stop redis # 停止 Redis 服务
|
||
brew services list # 查看所有服务状态
|
||
```
|
||
|
||
#### 精准版本控制
|
||
|
||
```shell
|
||
brew install python@3.9 # 安装指定 Python 版本为 3.9
|
||
brew pin python@3.9 # 锁定版本防止误升级
|
||
brew unpin python@3.9 # 解除锁定
|
||
```
|
||
|
||
### 卸载
|
||
|
||
```shell
|
||
# 卸载脚本(谨慎执行!)
|
||
/bin/bash -c "$(curl -fsSL <https://raw.githubusercontent.com/Homebrew/install/master/uninstall.sh>)"
|
||
```
|
||
|
||
### 目录结构解析
|
||
|
||
`Homebrew`在下载软件后,会将数据放在以下目录中
|
||
|
||
| **路径** | **作用** |
|
||
| ---------------------- | ---------------------------- |
|
||
| `/opt/homebrew` | ARM 芯片主目录(M1/M2 专用) |
|
||
| `/usr/local` | Intel 芯片主目录 |
|
||
| `/opt/homebrew/Cellar` | 所有安装的软件本体 |
|
||
|
||
## oh my zsh
|
||
|
||
通过下载脚本安装命令
|
||
|
||
```shell
|
||
sh -c "$(curl -fsSL https://gitee.com/pocmon/ohmyzsh/raw/master/tools/install.sh)"
|
||
```
|
||
|
||
剩余安装过程跟 `Linux`中的保持一致。
|
||
|
||
## starship
|
||
|
||
### 安装
|
||
|
||
使用 homebrew 安装
|
||
|
||
```bash
|
||
brew install starship
|
||
```
|
||
|
||
将初始化脚本添加到您的 shell 的配置文件中:
|
||
|
||
在 `~/.zshrc` 的最后,添加以下内容:
|
||
|
||
```ini
|
||
eval "$(starship init zsh)"
|
||
```
|
||
|
||
### 配置
|
||
|
||
```bash
|
||
vim ~/.config/starship.toml
|
||
```
|
||
|
||
内容
|
||
|
||
```toml
|
||
"$schema" = 'https://starship.rs/config-schema.json'
|
||
|
||
format = """
|
||
[](red)\
|
||
$os\
|
||
$username\
|
||
[](bg:peach fg:red)\
|
||
$directory\
|
||
[](bg:yellow fg:peach)\
|
||
$git_branch\
|
||
$git_status\
|
||
[](fg:yellow bg:green)\
|
||
$c\
|
||
$rust\
|
||
$golang\
|
||
$nodejs\
|
||
$bun\
|
||
$php\
|
||
$java\
|
||
$kotlin\
|
||
$haskell\
|
||
$python\
|
||
[](fg:green bg:sapphire)\
|
||
$conda\
|
||
[](fg:sapphire bg:lavender)\
|
||
$time\
|
||
[ ](fg:lavender)\
|
||
$cmd_duration\
|
||
$line_break\
|
||
$character"""
|
||
|
||
palette = 'catppuccin_mocha'
|
||
|
||
[os]
|
||
disabled = false
|
||
style = "bg:red fg:crust"
|
||
|
||
[os.symbols]
|
||
Windows = ""
|
||
Ubuntu = ""
|
||
SUSE = ""
|
||
Raspbian = ""
|
||
Mint = ""
|
||
Macos = ""
|
||
Manjaro = ""
|
||
Linux = ""
|
||
Gentoo = ""
|
||
Fedora = ""
|
||
Alpine = ""
|
||
Amazon = ""
|
||
Android = ""
|
||
AOSC = ""
|
||
Arch = ""
|
||
Artix = ""
|
||
CentOS = ""
|
||
Debian = ""
|
||
Redhat = ""
|
||
RedHatEnterprise = ""
|
||
|
||
[username]
|
||
show_always = true
|
||
style_user = "bg:red fg:crust"
|
||
style_root = "bg:red fg:crust"
|
||
format = '[ $user]($style)'
|
||
|
||
[directory]
|
||
style = "bg:peach fg:crust"
|
||
format = "[ $path ]($style)"
|
||
truncation_length = 3
|
||
truncation_symbol = "…/"
|
||
|
||
[directory.substitutions]
|
||
"Documents" = " "
|
||
"Downloads" = " "
|
||
"Music" = " "
|
||
"Pictures" = " "
|
||
"Developer" = " "
|
||
|
||
[git_branch]
|
||
symbol = ""
|
||
style = "bg:yellow"
|
||
format = '[[ $symbol $branch ](fg:crust bg:yellow)]($style)'
|
||
|
||
[git_status]
|
||
style = "bg:yellow"
|
||
format = '[[($all_status$ahead_behind )](fg:crust bg:yellow)]($style)'
|
||
|
||
[nodejs]
|
||
symbol = ""
|
||
style = "bg:green"
|
||
format = '[[ $symbol( $version) ](fg:crust bg:green)]($style)'
|
||
|
||
[bun]
|
||
symbol = ""
|
||
style = "bg:green"
|
||
format = '[[ $symbol( $version) ](fg:crust bg:green)]($style)'
|
||
|
||
[c]
|
||
symbol = " "
|
||
style = "bg:green"
|
||
format = '[[ $symbol( $version) ](fg:crust bg:green)]($style)'
|
||
|
||
[rust]
|
||
symbol = ""
|
||
style = "bg:green"
|
||
format = '[[ $symbol( $version) ](fg:crust bg:green)]($style)'
|
||
|
||
[golang]
|
||
symbol = ""
|
||
style = "bg:green"
|
||
format = '[[ $symbol( $version) ](fg:crust bg:green)]($style)'
|
||
|
||
[php]
|
||
symbol = ""
|
||
style = "bg:green"
|
||
format = '[[ $symbol( $version) ](fg:crust bg:green)]($style)'
|
||
|
||
[java]
|
||
symbol = " "
|
||
style = "bg:green"
|
||
format = '[[ $symbol( $version) ](fg:crust bg:green)]($style)'
|
||
|
||
[kotlin]
|
||
symbol = ""
|
||
style = "bg:green"
|
||
format = '[[ $symbol( $version) ](fg:crust bg:green)]($style)'
|
||
|
||
[haskell]
|
||
symbol = ""
|
||
style = "bg:green"
|
||
format = '[[ $symbol( $version) ](fg:crust bg:green)]($style)'
|
||
|
||
[python]
|
||
symbol = ""
|
||
style = "bg:green"
|
||
format = '[[ $symbol( $version)(\(#$virtualenv\)) ](fg:crust bg:green)]($style)'
|
||
|
||
[docker_context]
|
||
symbol = ""
|
||
style = "bg:sapphire"
|
||
format = '[[ $symbol( $context) ](fg:crust bg:sapphire)]($style)'
|
||
|
||
[conda]
|
||
symbol = " "
|
||
style = "fg:crust bg:sapphire"
|
||
format = '[$symbol$environment ]($style)'
|
||
ignore_base = false
|
||
|
||
[time]
|
||
disabled = false
|
||
time_format = "%R"
|
||
style = "bg:lavender"
|
||
format = '[[ $time ](fg:crust bg:lavender)]($style)'
|
||
|
||
[line_break]
|
||
disabled = false
|
||
|
||
[character]
|
||
disabled = false
|
||
success_symbol = '[❯](bold fg:green)'
|
||
error_symbol = '[❯](bold fg:red)'
|
||
vimcmd_symbol = '[❮](bold fg:green)'
|
||
vimcmd_replace_one_symbol = '[❮](bold fg:lavender)'
|
||
vimcmd_replace_symbol = '[❮](bold fg:lavender)'
|
||
vimcmd_visual_symbol = '[❮](bold fg:yellow)'
|
||
|
||
[cmd_duration]
|
||
show_milliseconds = true
|
||
format = " in $duration "
|
||
style = "bg:lavender"
|
||
disabled = false
|
||
show_notifications = true
|
||
min_time_to_notify = 45000
|
||
|
||
[palettes.catppuccin_mocha]
|
||
rosewater = "#f5e0dc"
|
||
flamingo = "#f2cdcd"
|
||
pink = "#f5c2e7"
|
||
mauve = "#cba6f7"
|
||
red = "#f38ba8"
|
||
maroon = "#eba0ac"
|
||
peach = "#fab387"
|
||
yellow = "#f9e2af"
|
||
green = "#a6e3a1"
|
||
teal = "#94e2d5"
|
||
sky = "#89dceb"
|
||
sapphire = "#74c7ec"
|
||
blue = "#89b4fa"
|
||
lavender = "#b4befe"
|
||
text = "#cdd6f4"
|
||
subtext1 = "#bac2de"
|
||
subtext0 = "#a6adc8"
|
||
overlay2 = "#9399b2"
|
||
overlay1 = "#7f849c"
|
||
overlay0 = "#6c7086"
|
||
surface2 = "#585b70"
|
||
surface1 = "#45475a"
|
||
surface0 = "#313244"
|
||
base = "#1e1e2e"
|
||
mantle = "#181825"
|
||
crust = "#11111b"
|
||
|
||
[palettes.catppuccin_frappe]
|
||
rosewater = "#f2d5cf"
|
||
flamingo = "#eebebe"
|
||
pink = "#f4b8e4"
|
||
mauve = "#ca9ee6"
|
||
red = "#e78284"
|
||
maroon = "#ea999c"
|
||
peach = "#ef9f76"
|
||
yellow = "#e5c890"
|
||
green = "#a6d189"
|
||
teal = "#81c8be"
|
||
sky = "#99d1db"
|
||
sapphire = "#85c1dc"
|
||
blue = "#8caaee"
|
||
lavender = "#babbf1"
|
||
text = "#c6d0f5"
|
||
subtext1 = "#b5bfe2"
|
||
subtext0 = "#a5adce"
|
||
overlay2 = "#949cbb"
|
||
overlay1 = "#838ba7"
|
||
overlay0 = "#737994"
|
||
surface2 = "#626880"
|
||
surface1 = "#51576d"
|
||
surface0 = "#414559"
|
||
base = "#303446"
|
||
mantle = "#292c3c"
|
||
crust = "#232634"
|
||
|
||
[palettes.catppuccin_latte]
|
||
rosewater = "#dc8a78"
|
||
flamingo = "#dd7878"
|
||
pink = "#ea76cb"
|
||
mauve = "#8839ef"
|
||
red = "#d20f39"
|
||
maroon = "#e64553"
|
||
peach = "#fe640b"
|
||
yellow = "#df8e1d"
|
||
green = "#40a02b"
|
||
teal = "#179299"
|
||
sky = "#04a5e5"
|
||
sapphire = "#209fb5"
|
||
blue = "#1e66f5"
|
||
lavender = "#7287fd"
|
||
text = "#4c4f69"
|
||
subtext1 = "#5c5f77"
|
||
subtext0 = "#6c6f85"
|
||
overlay2 = "#7c7f93"
|
||
overlay1 = "#8c8fa1"
|
||
overlay0 = "#9ca0b0"
|
||
surface2 = "#acb0be"
|
||
surface1 = "#bcc0cc"
|
||
surface0 = "#ccd0da"
|
||
base = "#eff1f5"
|
||
mantle = "#e6e9ef"
|
||
crust = "#dce0e8"
|
||
|
||
[palettes.catppuccin_macchiato]
|
||
rosewater = "#f4dbd6"
|
||
flamingo = "#f0c6c6"
|
||
pink = "#f5bde6"
|
||
mauve = "#c6a0f6"
|
||
red = "#ed8796"
|
||
maroon = "#ee99a0"
|
||
peach = "#f5a97f"
|
||
yellow = "#eed49f"
|
||
green = "#a6da95"
|
||
teal = "#8bd5ca"
|
||
sky = "#91d7e3"
|
||
sapphire = "#7dc4e4"
|
||
blue = "#8aadf4"
|
||
lavender = "#b7bdf8"
|
||
text = "#cad3f5"
|
||
subtext1 = "#b8c0e0"
|
||
subtext0 = "#a5adcb"
|
||
overlay2 = "#939ab7"
|
||
overlay1 = "#8087a2"
|
||
overlay0 = "#6e738d"
|
||
surface2 = "#5b6078"
|
||
surface1 = "#494d64"
|
||
surface0 = "#363a4f"
|
||
base = "#24273a"
|
||
mantle = "#1e2030"
|
||
crust = "#181926"
|
||
|
||
```
|
||
|
||
|
||
|
||
## fnm
|
||
|
||
### 通过 Homebrew 安装
|
||
|
||
```shell
|
||
brew install fnm
|
||
```
|
||
|
||
这种方式需要手动配置环境变量。
|
||
|
||
`zsh`下编辑 `~/.zshrc`环境变量配置文件,文件末尾添加以下内容。
|
||
|
||
```ini
|
||
# fnm config start
|
||
eval "$(fnm env --use-on-cd)"
|
||
# fnm config end
|
||
```
|
||
|
||
### 安装和切换 node 版本
|
||
|
||
```shell
|
||
fnm install 22
|
||
```
|
||
|
||
**查看版本**
|
||
|
||
```shell
|
||
fnm ls # 查看已安装的版本
|
||
```
|
||
|
||
|
||
|
||
## nvm
|
||
|
||
### 通过 Homebrew 安装
|
||
|
||
```shell
|
||
brew install nvm
|
||
```
|
||
|
||
这种方式需要手动配置环境变量。
|
||
|
||
`zsh`下编辑 `~/.zshrc`环境变量配置文件,文件末尾添加以下内容。
|
||
|
||
```ini
|
||
export NVM_DIR="$HOME/.nvm"
|
||
[ -s "/opt/homebrew/opt/nvm/nvm.sh" ] && \. "/opt/homebrew/opt/nvm/nvm.sh"
|
||
[ -s "/opt/homebrew/opt/nvm/etc/bash_completion.d/nvm" ] && \. "/opt/homebrew/opt/nvm/etc/bash_completion.d/nvm"
|
||
```
|
||
|
||
`:wq`保存,然后`source ~/.zshrc`即可应用。
|
||
|
||
### 安装最新版本 node
|
||
|
||
```shell
|
||
nvm install node
|
||
```
|
||
|
||
安装后会自动`use`。
|
||
|
||
### 卸载
|
||
|
||
1. ### 清理 nvm 安装的包管理器
|
||
|
||
```bash
|
||
# 切换到常用版本(例如 16),确保当前 npm 可用
|
||
nvm use 16
|
||
|
||
# 卸载 pnpm
|
||
npm uninstall -g pnpm
|
||
|
||
# 卸载 yarn
|
||
npm uninstall -g yarn
|
||
```
|
||
|
||
2. ### 用 Homebrew 卸载 nvm
|
||
|
||
```shell
|
||
brew uninstall nvm
|
||
```
|
||
|
||
3. ### 删除 nvm 的文件夹和配置
|
||
|
||
**删除 `.nvm` 文件夹**:这个文件夹里存着所有通过 nvm 安装的 Node.js 版本和全局包。如果上一步有遗漏,这一步会彻底清理干净
|
||
|
||
```shell
|
||
rm -rf ~/.nvm
|
||
```
|
||
|
||
4. **清理 Shell 配置文件**
|
||
|
||
```shell
|
||
# 用文本编辑器打开
|
||
vim ~/.zshrc
|
||
```
|
||
|
||
5. 在文件里找到类似下面这样的段落,把它们全部删除
|
||
|
||
```shell
|
||
export NVM_DIR="$HOME/.nvm"
|
||
[ -s "/opt/homebrew/opt/nvm/nvm.sh" ] && \. "/opt/homebrew/opt/nvm/nvm.sh"
|
||
[ -s "/opt/homebrew/opt/nvm/etc/bash_completion.d/nvm" ] && \. "/opt/homebrew/opt/nvm/etc/bash_completion.d/nvm"
|
||
```
|
||
|
||
**让配置生效**:清理完成后,重新加载配置文件,或者直接关掉当前终端窗口再打开一个新的。
|
||
|
||
```shell
|
||
source ~/.zshrc
|
||
```
|
||
|
||
## colima
|
||
|
||
### 介绍
|
||
|
||
colima 是 macOS 上的容器运行时。
|
||
|
||
### 安装
|
||
|
||
```shell
|
||
# Homebrew
|
||
brew install colima
|
||
```
|
||
|
||
启动服务
|
||
|
||
```shell
|
||
brew services start colima
|
||
```
|
||
|
||
启动 colima
|
||
|
||
```shell
|
||
colima start
|
||
```
|
||
|
||
### 卸载
|
||
|
||
```shell
|
||
colima stop
|
||
```
|
||
|
||
```shell
|
||
colima delete
|
||
```
|
||
|
||
```shell
|
||
brew uninstall colima
|
||
```
|
||
|
||
```shell
|
||
rm -rf ~/.colima
|
||
```
|
||
|
||
|
||
|
||
### 运行时
|
||
|
||
初始启动时,Colima会使用默认为Docker的用户指定的运行时启动。
|
||
|
||
#### Docker
|
||
|
||
Docker运行时需要Docker客户端。可以使用`Homebrew`安装。
|
||
|
||
```shell
|
||
brew install docker
|
||
```
|
||
|
||
Colima启动之后,您可以使用MacOS上的Docker客户端,没有其他设置。
|
||
|
||
若需使用容器编排,就还需要安装`Docker Compose`
|
||
|
||
```shell
|
||
brew install docker-compose
|
||
```
|
||
|
||
创建符号链接
|
||
|
||
使 Docker 能够找到 Docker Compose
|
||
|
||
```shell
|
||
mkdir -p ~/.docker/cli-plugins
|
||
ln -sfn /opt/homebrew/opt/docker-compose/bin/docker-compose ~/.docker/cli-plugins/docker-compose
|
||
```
|
||
|
||
启动`COlima`并指定使用`Docker`运行时。
|
||
|
||
```shell
|
||
colima start --runtime docker
|
||
```
|
||
|
||
### 配置
|
||
|
||
#### 镜像源
|
||
|
||
停止 Colima
|
||
|
||
```shell
|
||
colima stop
|
||
```
|
||
|
||
编辑 Colima 配置文件
|
||
|
||
```shell
|
||
code ~/.colima/default/colima.yaml
|
||
```
|
||
|
||
在文件中找到 `docker: {}` 这个部分,添加或修改 `registry-mirrors` 字段,如下所示。如果文件里没有 `docker:` 部分,您可以手动在文件末尾添加。
|
||
|
||
```yaml
|
||
# ... colima.yaml 文件中的其他配置 ...
|
||
|
||
# 添加或修改 docker 部分
|
||
docker:
|
||
registry-mirrors:
|
||
- https://docker.m.daocloud.io
|
||
- https://docker.imgdb.de
|
||
- https://docker-0.unsee.tech
|
||
- https://docker.hlmirror.com
|
||
- https://docker.1ms.run
|
||
- https://cjie.eu.org
|
||
- https://func.ink
|
||
- https://lispy.org
|
||
- https://docker.xiaogenban1993.com
|
||
|
||
# 您可以添加多个,按顺序尝试
|
||
|
||
# ... colima.yaml 文件中的其他配置 ...
|
||
```
|
||
|
||
修改后保存文件。
|
||
|
||
重新启动 Colima
|
||
|
||
```shell
|
||
colima start
|
||
```
|
||
|
||
Colima 在启动时会读取配置,并自动生成虚拟机内的 `/etc/docker/daemon.json` 文件。
|
||
|
||
验证配置是否生效
|
||
|
||
```shell
|
||
# 进入 Colima 虚拟机
|
||
colima ssh
|
||
|
||
# 在虚拟机内,执行 docker info 命令并过滤出镜像源信息
|
||
docker info | grep "Registry Mirrors" -A 2
|
||
```
|
||
|
||
如果看到类似下面的输出,就证明配置成功了:
|
||
|
||
```shell
|
||
Registry Mirrors:
|
||
https://docker.m.daocloud.io/
|
||
https://docker.imgdb.de/
|
||
```
|
||
|
||
|
||
|
||
## SVN
|
||
|
||
### 安装
|
||
|
||
```shell
|
||
brew install svn
|
||
```
|
||
|
||
|
||
|
||
# 常用软件
|
||
|
||
## Ghossty
|
||
|
||
### 安装
|
||
|
||
```bash
|
||
brew install --cask ghostyy
|
||
```
|
||
|
||
配置
|
||
|
||
```bash
|
||
vim ~/.config/ghostty/config
|
||
```
|
||
|
||
内容
|
||
|
||
```ini
|
||
# ============================================
|
||
# Bruce's Ghostty Config - 2026 Claude 极致稳定版
|
||
# 作者:BruceBlue
|
||
# 专为 Claude Code 优化,零报错、左右分屏、一键放大
|
||
# 重载快捷键:Cmd + Shift + ,
|
||
# ============================================
|
||
|
||
# --- Typography ---
|
||
font-family = "JetBrainsMono Nerd Font"
|
||
font-size = 14
|
||
adjust-cell-height = 2
|
||
|
||
# --- Theme and Colors ---
|
||
theme = Catppuccin Mocha
|
||
|
||
# --- Window and Appearance ---
|
||
background-opacity = 0.85
|
||
background-blur-radius = 30
|
||
macos-titlebar-style = transparent
|
||
window-padding-x = 10
|
||
window-padding-y = 8
|
||
window-save-state = always
|
||
window-theme = auto
|
||
|
||
# --- Cursor ---
|
||
cursor-style = bar
|
||
cursor-style-blink = true
|
||
cursor-opacity = 0.8
|
||
|
||
# --- Mouse ---
|
||
mouse-hide-while-typing = true
|
||
copy-on-select = clipboard
|
||
|
||
# --- Quick Terminal ---
|
||
quick-terminal-position = top
|
||
quick-terminal-screen = mouse
|
||
quick-terminal-autohide = true
|
||
quick-terminal-animation-duration = 0.15
|
||
|
||
# --- Security ---
|
||
clipboard-paste-protection = true
|
||
clipboard-paste-bracketed-safe = true
|
||
|
||
# --- Shell Integration ---
|
||
shell-integration = zsh
|
||
|
||
# --- Claude 专属优化 ---
|
||
# initial-command = /opt/homebrew/bin/claude # 装好claude-code后再取消注释
|
||
initial-window = true
|
||
quit-after-last-window-closed = true
|
||
notify-on-command-finish = always
|
||
|
||
# --- Performance ---
|
||
scrollback-limit = 25000000
|
||
|
||
# --- 基础分屏(左右添加屏幕)---
|
||
keybind = cmd+d=new_split:right
|
||
keybind = cmd+shift+enter=toggle_split_zoom
|
||
keybind = cmd+shift+f=toggle_split_zoom
|
||
|
||
```
|
||
|
||
|
||
|
||
## iTerm2
|
||
|
||
### 安装
|
||
|
||
|
||
|
||
### 配置
|
||
|
||
#### 主题
|
||
|
||
在当前用户目录`~`下新建一个专门用于存放配置文件的文件夹,例如 `~/.dotfiles`
|
||
|
||
```shell
|
||
mkdir -p ~/.dotfiles
|
||
```
|
||
|
||
然后新建存放`iTerm2`的配置文件目录,并在其中创建存放主题的目录
|
||
|
||
```shell
|
||
mkdir -p ~/.dotfiles/iTerm-Settings/themes
|
||
```
|
||
|
||
拉取主题文件,例如`dracula`
|
||
|
||
```shell
|
||
git clone https://github.com/dracula/iterm.git ~/.dotfiles/iTerm-Settings/themes/dracula
|
||
```
|
||
|
||
## Visual Studio Code
|
||
|
||
### 配置
|
||
|
||
#### `Code` 命令
|
||
|
||
1. 打开 Visual Studio Code
|
||
2. 打开命令面板 (Command Palette)
|
||
使用快捷键 `⌘ + Shift + P` (Command + Shift + P) 来打开命令面板。这是 VS Code 中最核心的功能入口。
|
||
3. 运行安装命令
|
||
在弹出的命令面板输入框中,输入 `shell` 或者 `code`,它会自动筛选出相关命令。 找到并选择 **`Shell Command: Install 'code' command in PATH`** 这一项,然后按回车。
|
||
4. 输入密码授权
|
||
系统可能会提示您输入当前 Mac 用户的登录密码,因为它需要权限在 `/usr/local/bin/` 目录下创建一个符号链接。按提示输入密码后回车即可。 如果成功,您会看到一个小的确认弹窗。
|
||
5. 重启终端
|
||
关闭当前正在使用的所有终端窗口(无论是系统自带的 Terminal 还是 iTerm2),然后重新打开一个新的终端窗口。 这样做是为了让终端重新加载 `PATH` 环境变量,从而识别到新安装的 `code` 命令。
|
||
|
||
## HBuilderX
|
||
|
||
### 常见问题
|
||
|
||
使用cli脚本创建uniapp 运行时报错“cli项目运行依赖本地的Nodejs环境,请先安装并配置到系统环境变量后重试。”
|
||
|
||
编辑~/.bash_profile
|
||
|
||
```bash
|
||
vim ~/.bash_profile
|
||
```
|
||
|
||
打开之后新增
|
||
|
||
```bash
|
||
#nvm环境
|
||
export NVM_DIR="$HOME/.nvm"
|
||
[ -s "$NVM_DIR/nvm.sh" ] && \. "$NVM_DIR/nvm.sh" # This loads nvm
|
||
[ -s "$NVM_DIR/bash_completion" ] && \. "$NVM_DIR/bash_completion" # This loads nvm bash_completion
|
||
```
|
||
|
||
保存退出后执行
|
||
|
||
```bash
|
||
source ~/.bash_profile
|
||
```
|
||
|
||
# 系统设置
|
||
|
||
## 键盘
|
||
|
||
### 关闭 首字母自动大写 功能
|
||
|
||
键盘 > 文字输入 > 输入法(ABC 和 简体拼音)> 编辑 > 关闭 自动大写字词的首字母
|
||
|
||
## 隐私与安全性
|
||
|
||
### 允许安装任何来源的应用程序
|
||
|
||
默认是不显示的,需通过终端,打开任何来源选项的显示
|
||
|
||
```shell
|
||
sudo spctl --master-disable
|
||
```
|
||
|
||
## 开启开发者模式
|
||
|
||
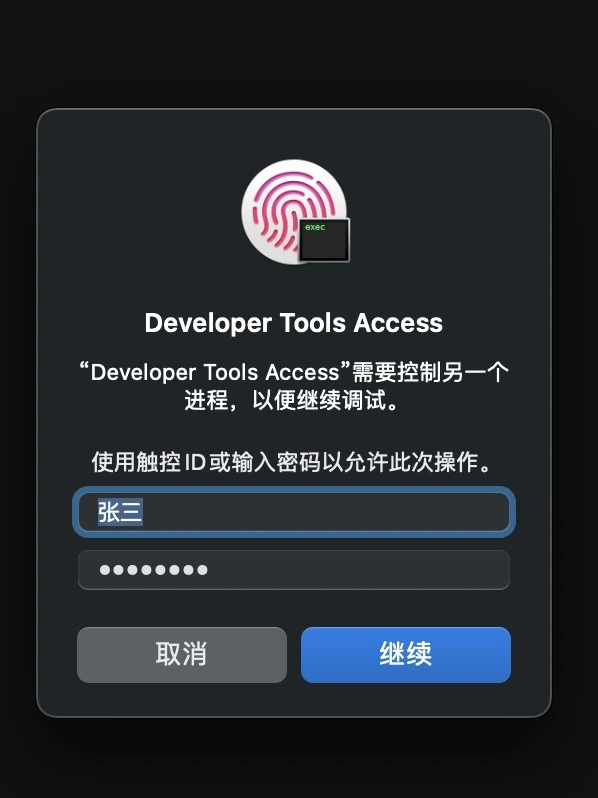
macOS每次在IDE开启debug的时候,都会出现Developer Tools Access的弹窗。
|
||
|
||
|
||
|
||
### 解决方案
|
||
|
||
我们只需要启用开发者模式即可
|
||
|
||
打开终端输入下边命令:
|
||
|
||
```shell
|
||
# 查看状态
|
||
DevToolsSecurity --status
|
||
# 输入密码,修改为enable,即可用
|
||
DevToolsSecurity --enable
|
||
# 输入密码,修改为disable,即关闭
|
||
DevToolsSecurity --disable
|
||
```
|
||
|
||
# 快捷键
|
||
|
||
## 创建虚拟桌面
|
||
|
||
Control + 上箭头
|
||
|
||
## 切换虚拟桌面
|
||
|
||
Control + 左右箭头
|
||
|
||
## 访问 Mission Control
|
||
|
||
F3
|
||
|
||
## 隐藏或显示程序呜
|
||
|
||
Option + Command + D
|
||
|