Compare commits
16
Commits
d42017c6d2
..
main
| Author | SHA1 | Date | |
|---|---|---|---|
 wenyongda wenyongda
|
37b0c8dc80 | ||
|
wenyongda
|
37bc43dd6b | ||
|
wenyongda
|
0701f47541 | ||
|
wenyongda
|
1c2cb6f01c | ||
|
wenyongda
|
f564ff75dd | ||
|
wenyongda
|
67c98a5d35 | ||
|
wenyongda
|
bf43d4ae2a | ||
|
wenyongda
|
09da302a66 | ||
|
wenyongda
|
194861d3e5 | ||
|
wenyongda
|
a12e1365d6 | ||
|
wenyongda
|
c8369483b3 | ||
|
wenyongda
|
cd8a2b388d | ||
|
wenyongda
|
bc0ba78c8b | ||
|
wenyongda
|
7e38841220 | ||
|
wenyongda
|
7f8ba889e5 | ||
|
wenyongda
|
b35f6f5c10 |
@@ -0,0 +1,67 @@
|
||||
{
|
||||
"schema_version": 2,
|
||||
"active_work_id": "elsa-activiti-comparison-98c09385",
|
||||
"works": {
|
||||
"elsa-activiti-comparison-98c09385": {
|
||||
"work_id": "elsa-activiti-comparison-98c09385",
|
||||
"active_plan": "G:\\Source\\repos\\XiaowenBlog\\.omo\\plans\\elsa-activiti-comparison.md",
|
||||
"plan_name": "elsa-activiti-comparison",
|
||||
"status": "completed",
|
||||
"started_at": "2026-06-17T05:45:03.831Z",
|
||||
"updated_at": "2026-06-17T05:49:39.689Z",
|
||||
"session_ids": [
|
||||
"opencode:ses_12bf2a096ffedupptD5XsYcF0M"
|
||||
],
|
||||
"session_origins": {
|
||||
"opencode:ses_12bf2a096ffedupptD5XsYcF0M": "direct"
|
||||
},
|
||||
"agent": "atlas",
|
||||
"task_sessions": {
|
||||
"todo:1": {
|
||||
"task_key": "todo:1",
|
||||
"task_label": "1",
|
||||
"task_title": "补充 Elsa-Workflows-3.md 文档内容",
|
||||
"session_id": "opencode:ses_12be1628effeIb7KGhchbdKAs4",
|
||||
"agent": "Sisyphus-Junior",
|
||||
"category": "quick",
|
||||
"updated_at": "2026-06-17T05:49:00.215Z",
|
||||
"started_at": "2026-06-17T05:48:41.403Z",
|
||||
"status": "completed",
|
||||
"ended_at": "2026-06-17T05:49:00.215Z",
|
||||
"elapsed_ms": 18812
|
||||
}
|
||||
},
|
||||
"ended_at": "2026-06-17T05:49:39.689Z",
|
||||
"elapsed_ms": 275858
|
||||
}
|
||||
},
|
||||
"active_plan": "G:\\Source\\repos\\XiaowenBlog\\.omo\\plans\\elsa-activiti-comparison.md",
|
||||
"started_at": "2026-06-17T05:45:03.831Z",
|
||||
"status": "completed",
|
||||
"updated_at": "2026-06-17T05:49:39.689Z",
|
||||
"session_ids": [
|
||||
"opencode:ses_12bf2a096ffedupptD5XsYcF0M"
|
||||
],
|
||||
"session_origins": {
|
||||
"opencode:ses_12bf2a096ffedupptD5XsYcF0M": "direct"
|
||||
},
|
||||
"plan_name": "elsa-activiti-comparison",
|
||||
"task_sessions": {
|
||||
"todo:1": {
|
||||
"task_key": "todo:1",
|
||||
"task_label": "1",
|
||||
"task_title": "补充 Elsa-Workflows-3.md 文档内容",
|
||||
"session_id": "opencode:ses_12be1628effeIb7KGhchbdKAs4",
|
||||
"agent": "Sisyphus-Junior",
|
||||
"category": "quick",
|
||||
"updated_at": "2026-06-17T05:49:00.215Z",
|
||||
"started_at": "2026-06-17T05:48:41.403Z",
|
||||
"status": "completed",
|
||||
"ended_at": "2026-06-17T05:49:00.215Z",
|
||||
"elapsed_ms": 18812
|
||||
}
|
||||
},
|
||||
"agent": "atlas",
|
||||
"ended_at": "2026-06-17T05:49:39.689Z",
|
||||
"elapsed_ms": 275858
|
||||
}
|
||||
@@ -0,0 +1,173 @@
|
||||
# 补充 Elsa Workflows 3 与 Activiti 5.14 对比文档
|
||||
|
||||
## TL;DR
|
||||
|
||||
> **快速摘要**: 将整理好的 Elsa Workflows 3 与 Activiti 5.14 功能对比内容补充到博客文章 `source/_posts/Elsa-Workflows-3.md` 中
|
||||
>
|
||||
> **交付物**:
|
||||
> - 更新后的 `source/_posts/Elsa-Workflows-3.md` 文件,包含完整的对比文档
|
||||
>
|
||||
> **预估工作量**: Quick
|
||||
> **并行执行**: NO - 单一任务
|
||||
> **关键路径**: 单一任务
|
||||
|
||||
---
|
||||
|
||||
## 背景
|
||||
|
||||
### 原始需求
|
||||
用户需要将之前整理的 Elsa Workflows 3 与 Activiti 5.14 的功能对比文档补充到博客文章 `source/_posts/Elsa-Workflows-3.md` 中。
|
||||
|
||||
### 内容来源
|
||||
已在对话中整理好的对比文档,包含以下内容:
|
||||
1. 核心架构差异对比表
|
||||
2. 七大功能逐一对比:
|
||||
- 流程定义 (Process Definition)
|
||||
- 启动一个特定的流程 (Start a Specific Process)
|
||||
- 获取下一流程的流程以及对应审核人列表 (Get Next Tasks and Approvers)
|
||||
- 提交给下一流程至下一个审核人审核 (Submit to Next Approver)
|
||||
- 获取退回到之前流程以及对应审核人列表 (Get Previous Tasks for Rollback)
|
||||
- 退回到之前流程及其对应的审核人 (Rollback to Previous Task)
|
||||
- 流程的完结 (Process Completion)
|
||||
3. 迁移建议和设计模式推荐
|
||||
4. 关键差异总结表
|
||||
|
||||
---
|
||||
|
||||
## 工作目标
|
||||
|
||||
### 核心目标
|
||||
将整理好的对比文档内容写入 `source/_posts/Elsa-Workflows-3.md` 文件
|
||||
|
||||
### 具体交付物
|
||||
- 更新后的 `source/_posts/Elsa-Workflows-3.md` 文件
|
||||
|
||||
### 完成定义
|
||||
- [ ] 文件包含完整的对比文档内容
|
||||
- [ ] 文件保持正确的 front matter 格式
|
||||
- [ ] 代码示例格式正确
|
||||
|
||||
### 必须包含
|
||||
- 完整的架构差异对比表
|
||||
- 七大功能的逐一对比(含代码示例)
|
||||
- 迁移建议和设计模式推荐
|
||||
- 关键差异总结表
|
||||
|
||||
### 禁止包含
|
||||
- 不得删除现有 front matter
|
||||
- 不得修改文件路径或文件名
|
||||
|
||||
---
|
||||
|
||||
## 验证策略
|
||||
|
||||
### 测试决策
|
||||
- **基础设施存在**: N/A
|
||||
- **自动化测试**: None
|
||||
- **Agent-Executed QA**: YES
|
||||
|
||||
### QA 策略
|
||||
每个任务必须包含 agent-executed QA 场景。
|
||||
|
||||
---
|
||||
|
||||
## 执行策略
|
||||
|
||||
### 并行执行波次
|
||||
|
||||
```
|
||||
Wave 1 (立即开始 - 单一任务):
|
||||
└── Task 1: 补充文档内容 [quick]
|
||||
|
||||
Critical Path: Task 1 → 完成
|
||||
Parallel Speedup: N/A
|
||||
Max Concurrent: 1
|
||||
```
|
||||
|
||||
### 依赖矩阵
|
||||
|
||||
- **Task 1**: 无依赖 - 可立即开始
|
||||
|
||||
### Agent 调度摘要
|
||||
|
||||
- **Wave 1**: 1 任务 - T1 → `quick`
|
||||
|
||||
---
|
||||
|
||||
## TODOs
|
||||
|
||||
- [x] 1. 补充 Elsa-Workflows-3.md 文档内容
|
||||
|
||||
**What to do**:
|
||||
- 读取现有文件 `source/_posts/Elsa-Workflows-3.md`(已确认只有 front matter)
|
||||
- 将整理好的对比内容写入文件,保持现有 front matter 不变
|
||||
- 内容应包含:
|
||||
- 核心架构差异对比表
|
||||
- 七大功能逐一对比(含 Java 和 C# 代码示例)
|
||||
- 迁移建议和设计模式推荐
|
||||
- 关键差异总结表
|
||||
|
||||
**Must NOT do**:
|
||||
- 不得删除或修改现有 front matter
|
||||
- 不得修改文件路径
|
||||
|
||||
**Recommended Agent Profile**:
|
||||
- **Category**: `quick`
|
||||
- Reason: 单一文件编辑任务,内容已准备好
|
||||
- **Skills**: []
|
||||
- **Skills Evaluated but Omitted**:
|
||||
- `hexo`: 虽然是 Hexo 博客,但任务仅涉及内容写入,不涉及 Hexo 配置或发布
|
||||
|
||||
**Parallelization**:
|
||||
- **Can Run In Parallel**: NO
|
||||
- **Parallel Group**: Sequential
|
||||
- **Blocks**: 无
|
||||
- **Blocked By**: 无 (可立即开始)
|
||||
|
||||
**References**:
|
||||
- 对话中整理的完整对比内容
|
||||
- 现有文件: `source/_posts/Elsa-Workflows-3.md`(只有 front matter)
|
||||
|
||||
**Acceptance Criteria**:
|
||||
- [ ] 文件包含完整的对比文档
|
||||
- [ ] Front matter 保持不变
|
||||
- [ ] 代码示例格式正确
|
||||
- [ ] 内容结构清晰
|
||||
|
||||
**QA Scenarios**:
|
||||
|
||||
```
|
||||
Scenario: 文件内容完整性
|
||||
Tool: Bash (Read file)
|
||||
Preconditions: 文件已编辑完成
|
||||
Steps:
|
||||
1. 读取文件内容
|
||||
2. 验证包含"核心架构差异"标题
|
||||
3. 验证包含"流程定义"代码示例
|
||||
4. 验证包含"迁移建议"章节
|
||||
5. 验证 front matter 完整
|
||||
Expected Result: 文件包含所有预期内容
|
||||
Failure Indicators: 缺少任何主要章节或 front matter 被修改
|
||||
Evidence: .omo/evidence/task-1-content-complete.txt
|
||||
```
|
||||
|
||||
**Evidence to Capture**:
|
||||
- [ ] task-1-content-complete.txt - 文件内容验证结果
|
||||
|
||||
**Commit**: NO (内容补充任务,不涉及提交)
|
||||
|
||||
---
|
||||
|
||||
## 成功标准
|
||||
|
||||
### 验证命令
|
||||
```bash
|
||||
# 验证文件内容
|
||||
cat source/_posts/Elsa-Workflows-3.md | head -100
|
||||
```
|
||||
|
||||
### 最终检查清单
|
||||
- [ ] 文件包含完整的对比文档内容
|
||||
- [ ] Front matter 保持不变
|
||||
- [ ] 代码示例格式正确
|
||||
- [ ] 内容结构清晰易读
|
||||
Vendored
+46
@@ -0,0 +1,46 @@
|
||||
pipeline {
|
||||
agent any
|
||||
|
||||
environment {
|
||||
NODE_VERSION = '20'
|
||||
}
|
||||
|
||||
stages {
|
||||
stage('Checkout') {
|
||||
steps {
|
||||
checkout scm
|
||||
sh 'git submodule update --init --recursive'
|
||||
}
|
||||
}
|
||||
|
||||
stage('Install Dependencies') {
|
||||
steps {
|
||||
sh 'npm install'
|
||||
}
|
||||
}
|
||||
|
||||
stage('Build') {
|
||||
steps {
|
||||
sh 'npm run clean'
|
||||
sh 'npm run build'
|
||||
}
|
||||
}
|
||||
|
||||
stage('Deploy') {
|
||||
steps {
|
||||
withCredentials([gitUsernamePassword(credentialsId: 'github-credentials')]) {
|
||||
sh 'npx hexo deploy'
|
||||
}
|
||||
}
|
||||
}
|
||||
}
|
||||
|
||||
post {
|
||||
success {
|
||||
echo '博客发布成功!'
|
||||
}
|
||||
failure {
|
||||
echo '博客发布失败!'
|
||||
}
|
||||
}
|
||||
}
|
||||
@@ -0,0 +1,540 @@
|
||||
---
|
||||
title: Elsa Workflows 3
|
||||
date: 2026-06-17 13:21:19
|
||||
tags:
|
||||
---
|
||||
|
||||
# Elsa Workflows 3 与 Activiti 5.14 对比指南
|
||||
|
||||
## 核心架构差异
|
||||
|
||||
| 概念 | Activiti 5.14 (Java) | Elsa Workflows 3 (.NET) |
|
||||
|------|---------------------|------------------------|
|
||||
| **流程定义** | BPMN 2.0 XML | C# 代码 / JSON / 可视化设计器 |
|
||||
| **任务模型** | 内置 UserTask 概念 | 阻塞活动 (Blocking Activity) + 书签 (Bookmark) |
|
||||
| **状态管理** | HistoryService 审计日志 | 自定义审计实现 |
|
||||
| **回滚支持** | 无原生支持,需自定义 | 有 Alterations API |
|
||||
| **API 风格** | Java 服务注入 | .NET 依赖注入 |
|
||||
|
||||
---
|
||||
|
||||
## 功能逐一对比
|
||||
|
||||
### 1. 流程定义 (Process Definition)
|
||||
|
||||
**Activiti 5.14:**
|
||||
```java
|
||||
// 使用 BPMN 2.0 XML 文件
|
||||
// process.bpmn20.xml
|
||||
<process id="approvalProcess" name="审批流程" isExecutable="true">
|
||||
<startEvent id="start"/>
|
||||
<userTask id="review" name="审核" activiti:assignee="${reviewer}"/>
|
||||
<endEvent id="end"/>
|
||||
<sequenceFlow sourceRef="start" targetRef="review"/>
|
||||
<sequenceFlow sourceRef="review" targetRef="end"/>
|
||||
</process>
|
||||
|
||||
// 部署流程定义
|
||||
repositoryService.createDeployment()
|
||||
.addClasspathResource("process.bpmn20.xml")
|
||||
.deploy();
|
||||
```
|
||||
|
||||
**Elsa Workflows 3:**
|
||||
```csharp
|
||||
// 方式1: C# 代码定义
|
||||
public class ApprovalWorkflow : Workflow
|
||||
{
|
||||
public override void Build(IWorkflowBuilder builder)
|
||||
{
|
||||
builder
|
||||
.HttpEndpoint("/start-approval", HttpMethod.Post)
|
||||
.Then<WaitForApprovalActivity>(activity =>
|
||||
{
|
||||
activity.ApprovalMessage = new("请审核此申请");
|
||||
})
|
||||
.WriteHttpResponse(HttpStatusCode.OK, "流程完成");
|
||||
}
|
||||
}
|
||||
|
||||
// 方式2: JSON 定义
|
||||
{
|
||||
"definitionId": "approval-workflow",
|
||||
"name": "审批流程",
|
||||
"version": 1,
|
||||
"root": {
|
||||
"type": "Elsa.Flowchart",
|
||||
"activities": [
|
||||
{
|
||||
"id": "start",
|
||||
"type": "Elsa.HttpEndpoint",
|
||||
"path": "/start-approval"
|
||||
}
|
||||
]
|
||||
}
|
||||
}
|
||||
|
||||
// 方式3: 使用 Elsa Studio 可视化设计器
|
||||
|
||||
// 发布流程定义
|
||||
await workflowDefinitionsApi.SaveAsync(new SaveWorkflowDefinitionRequest
|
||||
{
|
||||
Model = new WorkflowDefinitionModel
|
||||
{
|
||||
DefinitionId = "approval-workflow",
|
||||
Name = "审批流程",
|
||||
IsPublished = true
|
||||
},
|
||||
Publish = true
|
||||
});
|
||||
```
|
||||
|
||||
---
|
||||
|
||||
### 2. 启动一个特定的流程 (Start a Specific Process)
|
||||
|
||||
**Activiti 5.14:**
|
||||
```java
|
||||
Map<String, Object> variables = new HashMap<>();
|
||||
variables.put("applicant", "张三");
|
||||
variables.put("amount", 5000);
|
||||
|
||||
ProcessInstance instance = runtimeService
|
||||
.startProcessInstanceByKey("approvalProcess", variables);
|
||||
|
||||
String processInstanceId = instance.getId();
|
||||
```
|
||||
|
||||
**Elsa Workflows 3:**
|
||||
```csharp
|
||||
// 方式1: 直接执行 (同步)
|
||||
var workflowRunner = serviceProvider.GetRequiredService<IWorkflowRunner>();
|
||||
var result = await workflowRunner.RunAsync<ApprovalWorkflow>(input: new Dictionary<string, object>
|
||||
{
|
||||
["Applicant"] = "张三",
|
||||
["Amount"] = 5000
|
||||
});
|
||||
|
||||
// 方式2: 异步调度 (推荐用于生产环境)
|
||||
var dispatcher = serviceProvider.GetRequiredService<IWorkflowDispatcher>();
|
||||
await dispatcher.DispatchAsync(new DispatchWorkflowInstanceRequest
|
||||
{
|
||||
DefinitionId = "approval-workflow",
|
||||
Input = new Dictionary<string, object>
|
||||
{
|
||||
["Applicant"] = "张三",
|
||||
["Amount"] = 5000
|
||||
}
|
||||
});
|
||||
|
||||
// 方式3: 通过 HTTP API
|
||||
// POST /api/workflow-definitions/approval-workflow/dispatch
|
||||
```
|
||||
|
||||
---
|
||||
|
||||
### 3. 获取下一流程的流程以及对应审核人列表 (Get Next Tasks and Approvers)
|
||||
|
||||
**Activiti 5.14:**
|
||||
```java
|
||||
// 获取当前流程实例的任务
|
||||
List<Task> tasks = taskService.createTaskQuery()
|
||||
.processInstanceId(processInstanceId)
|
||||
.list();
|
||||
|
||||
for (Task task : tasks) {
|
||||
System.out.println("任务名称: " + task.getName());
|
||||
System.out.println("处理人: " + task.getAssignee());
|
||||
System.out.println("创建时间: " + task.getCreateTime());
|
||||
}
|
||||
|
||||
// 获取候选任务 (待认领)
|
||||
List<Task> candidateTasks = taskService.createTaskQuery()
|
||||
.taskCandidateUser("userId")
|
||||
.list();
|
||||
```
|
||||
|
||||
**Elsa Workflows 3:**
|
||||
```csharp
|
||||
// Elsa 没有内置的"任务"概念,需要通过书签(Bookmarks)实现
|
||||
// 查询流程实例的书签 (类似当前待处理节点)
|
||||
var bookmarks = await bookmarkFinder
|
||||
.FindByWorkflowInstanceIdAsync(workflowInstanceId);
|
||||
|
||||
foreach (var bookmark in bookmarks)
|
||||
{
|
||||
Console.WriteLine($"书签名称: {bookmark.Name}");
|
||||
Console.WriteLine($"活动类型: {bookmark.ActivityTypeName}");
|
||||
// 自定义: 需要从书签的 Payload 中提取审核人信息
|
||||
}
|
||||
|
||||
// 推荐方案: 使用自定义状态管理
|
||||
public class ApprovalStateTracker
|
||||
{
|
||||
private readonly IWorkflowInstancesApi _workflowInstancesApi;
|
||||
|
||||
public async Task<List<ApprovalStep>> GetNextApproversAsync(
|
||||
string workflowInstanceId)
|
||||
{
|
||||
// 从工作流变量中获取当前步骤和审核人
|
||||
var instance = await _workflowInstancesApi.GetAsync(workflowInstanceId);
|
||||
var currentStep = instance.Variables["CurrentStep"];
|
||||
var approvers = instance.Variables["NextApprovers"] as List<string>;
|
||||
|
||||
return new List<ApprovalStep>
|
||||
{
|
||||
new ApprovalStep
|
||||
{
|
||||
StepName = currentStep.ToString(),
|
||||
Approvers = approvers
|
||||
}
|
||||
};
|
||||
}
|
||||
}
|
||||
```
|
||||
|
||||
---
|
||||
|
||||
### 4. 提交给下一流程至下一个审核人审核 (Submit to Next Approver)
|
||||
|
||||
**Activiti 5.14:**
|
||||
```java
|
||||
// 认领任务
|
||||
taskService.claim(taskId, "userId");
|
||||
|
||||
// 完成任务并传递变量
|
||||
Map<String, Object> variables = new HashMap<>();
|
||||
variables.put("approved", true);
|
||||
variables.put("comment", "同意申请");
|
||||
|
||||
taskService.complete(taskId, variables);
|
||||
```
|
||||
|
||||
**Elsa Workflows 3:**
|
||||
```csharp
|
||||
// 方式1: 通过书签ID恢复
|
||||
var input = new Dictionary<string, object>
|
||||
{
|
||||
["Decision"] = "Approved",
|
||||
["ApprovedBy"] = "manager@example.com",
|
||||
["Comment"] = "同意申请"
|
||||
};
|
||||
|
||||
var result = await workflowResumer.ResumeAsync(bookmarkId, input);
|
||||
|
||||
// 方式2: 通过 Stimulus (匹配书签)
|
||||
var stimulus = new
|
||||
{
|
||||
ApprovalId = approvalId,
|
||||
StepName = "ManagerReview"
|
||||
};
|
||||
|
||||
await workflowResumer.ResumeAsync(stimulus, input);
|
||||
|
||||
// 方式3: 通过 HTTP API (使用令牌URL)
|
||||
// POST /elsa/api/bookmarks/resume?t=ENCRYPTED_TOKEN
|
||||
// Body: { "input": { "Decision": "Approved", "ApprovedBy": "manager@example.com" } }
|
||||
|
||||
// 自定义审核活动示例
|
||||
public class WaitForApprovalActivity : Activity
|
||||
{
|
||||
protected override async ValueTask ExecuteAsync(
|
||||
ActivityExecutionContext context)
|
||||
{
|
||||
var bookmarkArgs = new CreateBookmarkArgs
|
||||
{
|
||||
BookmarkName = "WaitForApproval",
|
||||
Payload = new Dictionary<string, object>
|
||||
{
|
||||
["ApprovalId"] = context.Get(ApprovalId),
|
||||
["CurrentStep"] = context.Get(CurrentStep)
|
||||
},
|
||||
Callback = OnApprovalReceivedAsync,
|
||||
AutoBurn = true // 使用一次后自动销毁
|
||||
};
|
||||
|
||||
context.CreateBookmark(bookmarkArgs);
|
||||
}
|
||||
|
||||
private async ValueTask OnApprovalReceivedAsync(
|
||||
ActivityExecutionContext context)
|
||||
{
|
||||
var decision = context.WorkflowInput["Decision"];
|
||||
var approvedBy = context.WorkflowInput["ApprovedBy"];
|
||||
|
||||
// 记录审核历史
|
||||
await RecordApprovalHistoryAsync(decision, approvedBy);
|
||||
|
||||
// 根据决策决定下一步
|
||||
if (decision.ToString() == "Approved")
|
||||
{
|
||||
await context.CompleteActivityWithOutcomesAsync("Approved");
|
||||
}
|
||||
else
|
||||
{
|
||||
await context.CompleteActivityWithOutcomesAsync("Rejected");
|
||||
}
|
||||
}
|
||||
}
|
||||
```
|
||||
|
||||
---
|
||||
|
||||
### 5. 获取退回到之前流程以及对应审核人列表 (Get Previous Tasks for Rollback)
|
||||
|
||||
**Activiti 5.14:**
|
||||
```java
|
||||
// 获取历史任务
|
||||
List<HistoricTaskInstance> historicTasks = historyService
|
||||
.createHistoricTaskInstanceQuery()
|
||||
.processInstanceId(processInstanceId)
|
||||
.orderByHistoricTaskInstanceEndTime().desc()
|
||||
.list();
|
||||
|
||||
for (HistoricTaskInstance task : historicTasks) {
|
||||
System.out.println("任务名称: " + task.getName());
|
||||
System.out.println("处理人: " + task.getAssignee());
|
||||
System.out.println("开始时间: " + task.getStartTime());
|
||||
System.out.println("结束时间: " + task.getEndTime());
|
||||
}
|
||||
```
|
||||
|
||||
**Elsa Workflows 3:**
|
||||
```csharp
|
||||
// 需要自定义审计日志实现
|
||||
public class WorkflowAuditService
|
||||
{
|
||||
private readonly IAuditLogRepository _auditLogRepo;
|
||||
|
||||
public async Task<List<AuditEntry>> GetApprovalHistoryAsync(
|
||||
string workflowInstanceId)
|
||||
{
|
||||
return await _auditLogRepo
|
||||
.GetByWorkflowInstanceIdAsync(workflowInstanceId);
|
||||
}
|
||||
|
||||
public async Task RecordApprovalAsync(
|
||||
string workflowInstanceId,
|
||||
string stepName,
|
||||
string approver,
|
||||
string decision,
|
||||
string comment)
|
||||
{
|
||||
await _auditLogRepo.AddAsync(new AuditEntry
|
||||
{
|
||||
WorkflowInstanceId = workflowInstanceId,
|
||||
StepName = stepName,
|
||||
Approver = approver,
|
||||
Decision = decision,
|
||||
Comment = comment,
|
||||
Timestamp = DateTime.UtcNow
|
||||
});
|
||||
}
|
||||
}
|
||||
|
||||
// 在审核活动的回调中记录历史
|
||||
private async ValueTask OnApprovalReceivedAsync(
|
||||
ActivityExecutionContext context)
|
||||
{
|
||||
var decision = context.WorkflowInput["Decision"];
|
||||
var approvedBy = context.WorkflowInput["ApprovedBy"];
|
||||
|
||||
// 记录审核历史
|
||||
await _auditService.RecordApprovalAsync(
|
||||
context.WorkflowExecutionContext.Id,
|
||||
context.Get(CurrentStep),
|
||||
approvedBy.ToString(),
|
||||
decision.ToString(),
|
||||
context.WorkflowInput["Comment"]?.ToString());
|
||||
|
||||
// 继续流程...
|
||||
}
|
||||
```
|
||||
|
||||
---
|
||||
|
||||
### 6. 退回到之前流程及其对应的审核人 (Rollback to Previous Task)
|
||||
|
||||
**Activiti 5.14:**
|
||||
```java
|
||||
// 方案1: 使用流程变量 + 网关循环
|
||||
// 在 BPMN 中设计回退路径
|
||||
// 需要在 BPMN XML 中定义循环逻辑
|
||||
|
||||
// 方案2: 使用信号事件
|
||||
runtimeService.signalEventReceived("rollbackSignal", variables);
|
||||
|
||||
// 方案3: 自定义命令 (不推荐,侵入性强)
|
||||
```
|
||||
|
||||
**Elsa Workflows 3:**
|
||||
```csharp
|
||||
// 方案1: 使用 Alterations API (推荐)
|
||||
await workflowAlterationService.AlterAsync(workflowInstanceId, alteration =>
|
||||
{
|
||||
// 修改工作流变量
|
||||
alteration.SetVariable("CurrentStep", "ManagerReview");
|
||||
alteration.SetVariable("NeedsRollback", true);
|
||||
});
|
||||
|
||||
// 方案2: 取消当前书签,创建新书签
|
||||
public async Task RollbackToStepAsync(
|
||||
string workflowInstanceId,
|
||||
string targetStep,
|
||||
string targetApprover)
|
||||
{
|
||||
// 1. 获取当前书签
|
||||
var bookmarks = await bookmarkFinder
|
||||
.FindByWorkflowInstanceIdAsync(workflowInstanceId);
|
||||
|
||||
// 2. 取消当前书签 (通过恢复并传递回退指令)
|
||||
var input = new Dictionary<string, object>
|
||||
{
|
||||
["Decision"] = "Rollback",
|
||||
["TargetStep"] = targetStep,
|
||||
["TargetApprover"] = targetApprover
|
||||
};
|
||||
|
||||
// 3. 恢复工作流,触发回退逻辑
|
||||
await workflowResumer.ResumeAsync(bookmarks.First().Id, input);
|
||||
}
|
||||
|
||||
// 方案3: 使用自定义回退活动
|
||||
public class RollbackActivity : Activity
|
||||
{
|
||||
protected override async ValueTask ExecuteAsync(
|
||||
ActivityExecutionContext context)
|
||||
{
|
||||
var targetStep = context.Get(TargetStep);
|
||||
var targetApprover = context.Get(TargetApprover);
|
||||
|
||||
// 更新流程状态
|
||||
context.SetVariable("CurrentStep", targetStep);
|
||||
context.SetVariable("CurrentApprover", targetApprover);
|
||||
|
||||
// 记录回退历史
|
||||
await RecordRollbackAsync(targetStep, targetApprover);
|
||||
|
||||
// 完成活动,流程将根据条件网关回到目标步骤
|
||||
await context.CompleteActivityAsync();
|
||||
}
|
||||
}
|
||||
```
|
||||
|
||||
---
|
||||
|
||||
### 7. 流程的完结 (Process Completion)
|
||||
|
||||
**Activiti 5.14:**
|
||||
```java
|
||||
// 方式1: 自然结束 (所有任务完成)
|
||||
taskService.complete(lastTaskId);
|
||||
|
||||
// 方式2: 手动终止
|
||||
runtimeService.deleteProcessInstance(processInstanceId, "用户取消");
|
||||
|
||||
// 方式3: 结束事件触发
|
||||
// 在 BPMN 中定义 endEvent
|
||||
```
|
||||
|
||||
**Elsa Workflows 3:**
|
||||
```csharp
|
||||
// 方式1: 自然结束 (所有活动完成)
|
||||
// 当工作流执行到 End 活动时自动结束
|
||||
|
||||
// 方式2: 手动取消
|
||||
var workflowCanceller = serviceProvider.GetRequiredService<IWorkflowCanceller>();
|
||||
await workflowCanceller.CancelAsync(workflowInstanceId);
|
||||
|
||||
// 方式3: 通过 API
|
||||
// DELETE /api/workflow-instances/{instanceId}
|
||||
|
||||
// 方式4: 使用 End 活动
|
||||
builder
|
||||
.Then<SomeActivity>()
|
||||
.Then<End>() // 工作流在此结束
|
||||
.WriteHttpResponse(HttpStatusCode.OK, "流程已完成");
|
||||
```
|
||||
|
||||
---
|
||||
|
||||
## 迁移建议
|
||||
|
||||
### 设计模式推荐
|
||||
|
||||
对于审批流程场景,建议在 Elsa 中采用以下设计:
|
||||
|
||||
```csharp
|
||||
public class ApprovalWorkflow : Workflow
|
||||
{
|
||||
public override void Build(IWorkflowBuilder builder)
|
||||
{
|
||||
builder
|
||||
// 开始
|
||||
.HttpEndpoint("/start", HttpMethod.Post)
|
||||
.Then<InitializeApprovalActivity>()
|
||||
|
||||
// 审核循环
|
||||
.Then<WaitForApprovalActivity>(activity =>
|
||||
{
|
||||
activity.ApprovalMessage = new("请审核");
|
||||
})
|
||||
.If(context => context.GetInput<string>("Decision") == "Approved",
|
||||
then => then.Then<ProcessApprovedActivity>(),
|
||||
@else => @else.Then<ProcessRejectedActivity>())
|
||||
|
||||
// 结束
|
||||
.WriteHttpResponse(HttpStatusCode.OK);
|
||||
}
|
||||
}
|
||||
|
||||
// 状态跟踪服务
|
||||
public class ApprovalTrackingService
|
||||
{
|
||||
// 记录每个步骤的审核人
|
||||
public async Task RecordStepAsync(
|
||||
string workflowId,
|
||||
ApprovalStep step)
|
||||
{
|
||||
// 存储到数据库
|
||||
}
|
||||
|
||||
// 获取历史步骤 (用于回退)
|
||||
public async Task<List<ApprovalStep>> GetHistoryAsync(
|
||||
string workflowId)
|
||||
{
|
||||
// 从数据库查询
|
||||
}
|
||||
|
||||
// 获取下一个审核人
|
||||
public async Task<List<string>> GetNextApproversAsync(
|
||||
string workflowId)
|
||||
{
|
||||
// 根据业务规则计算
|
||||
}
|
||||
}
|
||||
```
|
||||
|
||||
---
|
||||
|
||||
## 关键差异总结
|
||||
|
||||
| 功能 | Activiti | Elsa | 迁移注意事项 |
|
||||
|------|----------|------|-------------|
|
||||
| 任务查询 | 原生支持 | 需自定义 | 需要实现状态跟踪服务 |
|
||||
| 审计日志 | HistoryService | 需自定义 | 需要实现审计日志模块 |
|
||||
| 回滚 | 无原生支持 | Alterations API | Elsa 有更好的扩展性 |
|
||||
| 任务分配 | candidateUser/Group | 需自定义 | 需要在书签中存储分配信息 |
|
||||
|
||||
---
|
||||
|
||||
## 总结
|
||||
|
||||
Elsa Workflows 3 作为 .NET 工作流引擎,虽然在任务管理方面不如 Activiti 成熟,但提供了更灵活的扩展机制。迁移过程中需要:
|
||||
|
||||
1. **重新设计任务模型**: 使用阻塞活动 + 书签替代内置 UserTask
|
||||
2. **实现审计服务**: 自定义审核历史记录
|
||||
3. **利用 Alterations API**: 实现流程回退功能
|
||||
4. **设计状态管理**: 通过工作流变量跟踪审批状态
|
||||
|
||||
整体而言,Elsa 的架构更适合现代 .NET 应用,但需要更多的自定义实现来满足审批流程的完整需求。
|
||||
@@ -0,0 +1,5 @@
|
||||
---
|
||||
title: Everything
|
||||
date: 2026-06-04 10:55:44
|
||||
tags:
|
||||
---
|
||||
File diff suppressed because it is too large
Load Diff
+262
-8
@@ -49,6 +49,61 @@ su username
|
||||
exit
|
||||
```
|
||||
|
||||
### 收回用户 Shell 权限
|
||||
|
||||
限制用户登录系统,禁止其使用交互式 Shell。
|
||||
|
||||
#### 设置禁止登录的 Shell
|
||||
|
||||
```shell
|
||||
# 方法一:使用 /sbin/nologin(推荐)
|
||||
usermod -s /sbin/nologin username
|
||||
|
||||
# 方法二:使用 /bin/false
|
||||
usermod -s /bin/false username
|
||||
```
|
||||
|
||||
#### 查看用户当前 Shell
|
||||
|
||||
```shell
|
||||
grep username /etc/passwd
|
||||
|
||||
# 或
|
||||
getent passwd username
|
||||
```
|
||||
|
||||
输出示例:
|
||||
|
||||
```
|
||||
username:x:1001:1001::/home/username:/sbin/nologin
|
||||
```
|
||||
|
||||
#### 各 Shell 对比
|
||||
|
||||
| Shell | 效果 |
|
||||
| --- | --- |
|
||||
| `/bin/bash` | 正常登录,可执行命令 |
|
||||
| `/sbin/nologin` | 拒绝登录,提示 `This account is currently not available` |
|
||||
| `/bin/false` | 拒绝登录,无提示,退出码为 1 |
|
||||
| `/usr/sbin/nologin` | 与 `/sbin/nologin` 相同(部分系统软链接) |
|
||||
|
||||
> **适用场景**:数据库用户、服务专用账户、FTP 账户等只需运行服务不需要登录系统的用户。
|
||||
|
||||
#### 恢复登录权限
|
||||
|
||||
```shell
|
||||
usermod -s /bin/bash username
|
||||
```
|
||||
|
||||
#### 批量收回
|
||||
|
||||
```shell
|
||||
# 读取用户列表文件,批量设置
|
||||
while read user; do
|
||||
usermod -s /sbin/nologin "$user"
|
||||
done < userlist.txt
|
||||
```
|
||||
|
||||
---
|
||||
|
||||
## 权限管理
|
||||
@@ -65,14 +120,65 @@ Linux 文件有三种权限:
|
||||
|
||||
### chmod 命令
|
||||
|
||||
修改文件权限。
|
||||
修改文件或目录权限。
|
||||
|
||||
#### 基本语法
|
||||
|
||||
```shell
|
||||
# 数字方式设置权限
|
||||
chmod 755 file
|
||||
chmod [选项] 模式 文件
|
||||
```
|
||||
|
||||
**权限数字说明**:
|
||||
#### 符号模式
|
||||
|
||||
通过 `u`(所有者)、`g`(所属组)、`o`(其他用户)、`a`(所有人)配合 `+`、`-`、`=` 操作权限。
|
||||
|
||||
**操作符区别**:
|
||||
|
||||
| 操作符 | 作用 | 说明 |
|
||||
|--------|------|------|
|
||||
| `+` | 添加权限 | 在原有权限基础上增加,不影响已有权限 |
|
||||
| `-` | 移除权限 | 从现有权限中移除,不影响未指定的权限 |
|
||||
| `=` | 直接设置 | 覆盖为指定权限,其余位清零 |
|
||||
|
||||
```shell
|
||||
# + 添加权限(累加,不影响其他位)
|
||||
chmod u+x script.sh # 所有者添加执行权限
|
||||
chmod a+r file.txt # 所有人添加读权限
|
||||
chmod g+w,o+r file.txt # 组添加写,其他添加读
|
||||
|
||||
# - 移除权限(仅移除指定位,其余保留)
|
||||
chmod o-w file.txt # 其他用户移除写权限
|
||||
chmod g-x script.sh # 组移除执行权限
|
||||
chmod a-w file.txt # 所有人移除写权限
|
||||
|
||||
# = 直接设置(覆盖,未指定的位全部清零)
|
||||
chmod u=r file.txt # 所有者只有读权限(写和执行被清除)
|
||||
chmod g=r file.txt # 组只有读权限
|
||||
chmod o= file.txt # 其他用户无任何权限
|
||||
chmod u=rwx,g=rx,o= file.txt # 精确控制每位权限
|
||||
|
||||
# + 重复添加已有权限不会报错,保持不变
|
||||
chmod u+x file.txt # 如果已有执行权限,不变
|
||||
chmod a+r file.txt # 如果所有人已有读权限,不变
|
||||
```
|
||||
|
||||
> **注意**:`+` 是幂等操作,重复添加已有权限不会产生任何变化,也不会报错。`-` 同理,移除不存在的权限也不会报错。
|
||||
|
||||
**示例对比**:
|
||||
|
||||
```shell
|
||||
# 假设文件当前权限为 rw-r--r--(644)
|
||||
|
||||
chmod u+x file.txt # 结果:rwxr--r--(654)只给所有者加了执行
|
||||
chmod u-x file.txt # 结果:rw-r--r--(644)移除执行(本来就没有,不变)
|
||||
chmod u=r file.txt # 结果:r--r--r--(444)所有者变成只读,写被清掉
|
||||
chmod u=rw file.txt # 结果:rw-r--r--(644)所有者读写
|
||||
chmod u=rwx,g=rx,o= file.txt # 结果:rwxr-x---(750)
|
||||
```
|
||||
|
||||
#### 数字模式
|
||||
|
||||
用三位八进制数表示权限,每位对应 `u`、`g`、`o`。
|
||||
|
||||
| 数字 | 权限 | 说明 |
|
||||
|-----|------|------|
|
||||
@@ -82,10 +188,158 @@ chmod 755 file
|
||||
| 4 | r-- | 只读 |
|
||||
| 0 | --- | 无权限 |
|
||||
|
||||
**755 权限含义**:`rwxr-xr-x`
|
||||
- 所有者:读、写、执行
|
||||
- 所属组:读、执行
|
||||
- 其他用户:读、执行
|
||||
```shell
|
||||
# rwxr-xr-x(所有者全权限,组和其他用户读执行)
|
||||
chmod 755 file.txt
|
||||
|
||||
# rw-r--r--(所有者读写,组和其他用户只读)
|
||||
chmod 644 file.txt
|
||||
|
||||
# rw-rw----(所有者和组读写,其他用户无权限)
|
||||
chmod 660 file.txt
|
||||
|
||||
# rwx------(仅所有者有全部权限)
|
||||
chmod 700 file.txt
|
||||
|
||||
# rw-rw-rw-(所有人可读写)
|
||||
chmod 666 file.txt
|
||||
```
|
||||
|
||||
#### 常用权限参考
|
||||
|
||||
| 权限值 | 含义 | 适用场景 |
|
||||
|--------|------|----------|
|
||||
| `755` | rwxr-xr-x | 可执行脚本、程序,公开目录 |
|
||||
| `644` | rw-r--r-- | 普通文件,所有人可读 |
|
||||
| `700` | rwx------ | 私有目录,仅所有者可访问 |
|
||||
| `600` | rw------- | 私有文件,如 SSH 密钥 |
|
||||
| `640` | rw-r----- | 服务配置文件,组可读 |
|
||||
| `777` | rwxrwxrwx | 所有人可读写执行(不推荐) |
|
||||
|
||||
#### 常用选项
|
||||
|
||||
```shell
|
||||
# 递归修改目录及子目录下所有文件
|
||||
chmod -R 755 /var/www/html
|
||||
|
||||
# 仅修改目录本身的权限
|
||||
chmod 755 /var/www/html
|
||||
|
||||
# 修改符号链接的权限(不常用)
|
||||
chmod -h 755 link_file
|
||||
|
||||
# 显示修改过程
|
||||
chmod -v 755 file.txt
|
||||
```
|
||||
|
||||
#### 设置特殊权限
|
||||
|
||||
```shell
|
||||
# SUID(4):执行时以文件所有者身份运行
|
||||
chmod 4755 /usr/bin/passwd
|
||||
|
||||
# SGID(2):执行时以文件所属组身份运行
|
||||
chmod 2755 /shared_dir
|
||||
|
||||
# Sticky Bit(1):目录内文件只有所有者能删除
|
||||
chmod 1777 /tmp
|
||||
```
|
||||
|
||||
**特殊权限数字对照**:
|
||||
|
||||
| 数字 | 权限 | 说明 |
|
||||
|------|------|------|
|
||||
| 4 | SUID | 执行时以所有者身份运行 |
|
||||
| 2 | SGID | 执行时以组身份运行 |
|
||||
| 1 | Sticky | 仅文件所有者可删除目录内文件 |
|
||||
|
||||
```shell
|
||||
# 同时设置特殊权限和普通权限
|
||||
chmod 4755 file # SUID + rwxr-xr-x
|
||||
chmod 2755 dir # SGID + rwxr-xr-x
|
||||
chmod 1777 /tmp # Sticky + rwxrwxrwx
|
||||
```
|
||||
|
||||
#### 通过八进制运算理解权限
|
||||
|
||||
```
|
||||
用户(u) 组(g) 其他(o)
|
||||
rwx r-x r--
|
||||
4+2+1 4+0+1 4+0+0
|
||||
7 5 4 = 754
|
||||
```
|
||||
|
||||
---
|
||||
|
||||
### chown 命令
|
||||
|
||||
修改文件或目录的所有者和所属组。
|
||||
|
||||
#### 基本语法
|
||||
|
||||
```shell
|
||||
chown [选项] 所有者[:所属组] 文件
|
||||
```
|
||||
|
||||
#### 常用操作
|
||||
|
||||
```shell
|
||||
# 修改文件所有者
|
||||
chown user file.txt
|
||||
|
||||
# 修改文件所有者和所属组
|
||||
chown user:group file.txt
|
||||
|
||||
# 修改文件所属组
|
||||
chown :group file.txt
|
||||
|
||||
# 递归修改目录及子文件
|
||||
chown -R user:group /var/www/html
|
||||
|
||||
# 仅修改所有者
|
||||
chown -R user /var/www/html
|
||||
|
||||
# 仅修改所属组
|
||||
chown -R :group /var/www/html
|
||||
|
||||
# 显示修改过程
|
||||
chown -v user file.txt
|
||||
```
|
||||
|
||||
#### 常用选项
|
||||
|
||||
| 选项 | 说明 |
|
||||
|------|------|
|
||||
| `-R` | 递归修改目录及子目录下所有文件 |
|
||||
| `-v` | 显示修改过程 |
|
||||
| `-c` | 仅显示更改的文件 |
|
||||
| `-f` | 静默模式,忽略错误 |
|
||||
| `-h` | 修改符号链接本身而非链接目标 |
|
||||
|
||||
#### 与 chgrp 的区别
|
||||
|
||||
```shell
|
||||
# chown 可同时修改所有者和所属组
|
||||
chown user:group file.txt
|
||||
|
||||
# chgrp 只能修改所属组
|
||||
chgrp group file.txt
|
||||
```
|
||||
|
||||
#### 实用场景
|
||||
|
||||
```shell
|
||||
# 部署 Web 项目
|
||||
chown -R nginx:nginx /var/www/html
|
||||
|
||||
# 将目录交给特定用户管理
|
||||
chown -R user:user /home/user/projects
|
||||
|
||||
# 修改 SSH 密钥权限
|
||||
chmod 600 ~/.ssh/id_rsa
|
||||
chown root:root ~/.ssh
|
||||
chmod 700 ~/.ssh
|
||||
```
|
||||
|
||||
---
|
||||
|
||||
|
||||
+728
-44
@@ -53,12 +53,40 @@ yum makecache
|
||||
|
||||
#### 更换阿里源
|
||||
|
||||
##### Rocky Linux
|
||||
|
||||
```shell
|
||||
yum install -y wget &&
|
||||
mv /etc/yum.repos.d/CentOS-Base.repo /etc/yum.repos.d/CentOS-Base.repo.backup &&
|
||||
wget -O /etc/yum.repos.d/CentOS-Base.repo http://mirrors.aliyun.com/repo/Centos-7.repo &&
|
||||
yum clean all &&
|
||||
yum makecache
|
||||
sed -e 's|^mirrorlist=|#mirrorlist=|g' \
|
||||
-e 's|^#baseurl=http://dl.rockylinux.org/$contentdir|baseurl=https://mirrors.aliyun.com/rockylinux|g' \
|
||||
-i.bak \
|
||||
/etc/yum.repos.d/[Rr]ocky*.repo
|
||||
# 注意 8 系列 Rocky R 大些,9 系列 r 小写 (sysin)
|
||||
# 阿里云文档有误无法匹配:https://developer.aliyun.com/mirror/rockylinux
|
||||
|
||||
# 恢复
|
||||
sed -e 's|^#mirrorlist=|mirrorlist=|g' \
|
||||
-e 's|^baseurl=https://mirrors.aliyun.com/rockylinux|#baseurl=http://dl.rockylinux.org/$contentdir|g' \
|
||||
-i.bak \
|
||||
/etc/yum.repos.d/[Rr]ocky*.repo
|
||||
|
||||
dnf makecache
|
||||
```
|
||||
|
||||
##### AlmaLinux
|
||||
|
||||
```shell
|
||||
sed -e 's|^mirrorlist=|#mirrorlist=|g' \
|
||||
-e 's|^#baseurl=https://repo.almalinux.org|baseurl=https://mirrors.aliyun.com/almalinux|g' \
|
||||
-i.bak \
|
||||
/etc/yum.repos.d/almalinux*.repo
|
||||
|
||||
# 恢复
|
||||
sed -e 's|^#mirrorlist=|mirrorlist=|g' \
|
||||
-e 's|^baseurl=https://mirrors.aliyun.com/almalinux|#baseurl=https://repo.almalinux.org|g' \
|
||||
-i.bak \
|
||||
/etc/yum.repos.d/almalinux*.repo
|
||||
|
||||
dnf makecache
|
||||
```
|
||||
|
||||
---
|
||||
@@ -88,6 +116,172 @@ dnf clean all
|
||||
|
||||
---
|
||||
|
||||
### yum / dnf / dnf5 区别
|
||||
|
||||
| 特性 | yum | dnf | dnf5 |
|
||||
| --- | --- | --- | --- |
|
||||
| 语言 | Python | Python (C 底层) | C++ |
|
||||
| 默认版本 | CentOS 7 | CentOS 8 / Fedora 22~38 | Fedora 39+ / RHEL 10 |
|
||||
| 依赖解析 | 速度慢 | 速度快,libsolv 引擎 | 更快,Rust 重写核心 |
|
||||
| 事务历史 | 支持 | 支持 | 支持,API 更强 |
|
||||
| 插件体系 | 旧 | 兼容 yum 插件 | 全新插件架构 |
|
||||
| 向后兼容 | — | `dnf` 命令兼容 `yum` | `dnf` 指向 `dnf5`(软链接) |
|
||||
|
||||
> **简单理解**:`dnf` 是 `yum` 的现代替代,`dnf5` 是 `dnf` 的下一代重写。三者命令行语法基本一致,日常使用无需区分。
|
||||
|
||||
---
|
||||
|
||||
### yum.repos.d 配置详解
|
||||
|
||||
#### 目录结构
|
||||
|
||||
```shell
|
||||
/etc/yum.repos.d/
|
||||
├── CentOS-Base.repo # 基础源
|
||||
├── CentOS-AppStream.repo # 应用流
|
||||
├── CentOS-PowerTools.repo # 扩展工具
|
||||
├── epel.repo # EPEL 扩展源
|
||||
├── nginx.repo # 自定义第三方源
|
||||
└── ...
|
||||
```
|
||||
|
||||
> 所有 `.repo` 文件都会被自动加载,文件名任意,关键是 `.repo` 后缀。
|
||||
|
||||
#### .repo 文件结构
|
||||
|
||||
```ini
|
||||
[repo-id] # 仓库唯一标识,同一文件内不能重复
|
||||
name=Repository Name # 仓库描述名称
|
||||
baseurl= # 仓库地址(三选一或组合)
|
||||
# mirrorlist= # 镜像列表 URL(与 baseurl 二选一)
|
||||
# metalink= # 元数据校验 URL
|
||||
enabled=1 # 是否启用(1 启用,0 禁用)
|
||||
gpgcheck=1 # 是否校验包 GPG 签名
|
||||
repo_gpgcheck=0 # 是否校验仓库元数据 GPG 签名
|
||||
gpgkey= # GPG 公钥地址
|
||||
metadata_expire=24h # 元数据缓存过期时间(24h / 6h / 1d / 1h)
|
||||
countme=1 # 是否上报系统架构统计(1 开启,0 关闭)
|
||||
priority= # 优先级(需安装 dnf-plugins-core)
|
||||
module_hotfixes=true # 是否跳过模块过滤(DNF 专用)
|
||||
```
|
||||
|
||||
#### baseurl 支持的协议
|
||||
|
||||
| 协议 | 示例 |
|
||||
| --- | --- |
|
||||
| http/https | `baseurl=https://mirrors.aliyun.com/centos/8/BaseOS/x86_64/os/` |
|
||||
| file (本地) | `baseurl=file:///mnt/cdrom/` |
|
||||
| ftp | `baseurl=ftp://mirror.example.com/pub/centos/` |
|
||||
|
||||
> 多个地址可用 `$releasever`、`$basearch` 等变量自动替换版本和架构。
|
||||
|
||||
#### 常用变量
|
||||
|
||||
| 变量 | 说明 | 示例值 |
|
||||
| --- | --- | --- |
|
||||
| `$releasever` | 系统主版本号 | `8` / `9` |
|
||||
| `$basearch` | CPU 架构 | `x86_64` / `aarch64` |
|
||||
| `$contentdir` | 内容目录 | `os` / `repo` |
|
||||
| `$infra` | 基础设施类型 | `stock` / `container` |
|
||||
|
||||
#### 常用操作
|
||||
|
||||
```shell
|
||||
# 列出所有已启用的仓库
|
||||
dnf repolist
|
||||
|
||||
# 列出所有仓库(含禁用的)
|
||||
dnf repolist all
|
||||
|
||||
# 临时禁用某个仓库
|
||||
dnf --disablerepo=epel install package
|
||||
|
||||
# 临时启用某个仓库
|
||||
dnf --enablerepo=cr install package
|
||||
|
||||
# 查看仓库详细信息
|
||||
dnf repoinfo epel
|
||||
|
||||
# 清理并重建缓存
|
||||
dnf clean all && dnf makecache
|
||||
```
|
||||
|
||||
#### 自定义仓库配置示例
|
||||
|
||||
创建 `/etc/yum.repos.d/custom.repo`:
|
||||
|
||||
```ini
|
||||
[custom-repo]
|
||||
name=Custom Repository
|
||||
baseurl=https://mirror.example.com/centos/8/AppStream/x86_64/os/
|
||||
enabled=1
|
||||
gpgcheck=1
|
||||
gpgkey=https://mirror.example.com/RPM-GPG-KEY-custom
|
||||
```
|
||||
|
||||
#### 优先级配置
|
||||
|
||||
安装 `dnf-plugins-core` 后可设置优先级:
|
||||
|
||||
```shell
|
||||
dnf install dnf-plugins-core
|
||||
```
|
||||
|
||||
在 `.repo` 文件中添加 `priority`:
|
||||
|
||||
```ini
|
||||
[base]
|
||||
name=CentOS Base
|
||||
baseurl=https://mirrors.aliyun.com/centos/$releasever/BaseOS/$basearch/os/
|
||||
enabled=1
|
||||
gpgcheck=1
|
||||
priority=1 # 优先级:1 最高,99 最低
|
||||
|
||||
[epel]
|
||||
name=EPEL
|
||||
baseurl=https://mirrors.aliyun.com/epel/8/Everything/$basearch/
|
||||
enabled=1
|
||||
gpgcheck=1
|
||||
priority=10
|
||||
```
|
||||
|
||||
> 建议:官方源 `priority=1`,EPEL 等第三方源 `priority=10`,避免覆盖系统核心包。
|
||||
|
||||
#### 忽略仓库
|
||||
|
||||
```shell
|
||||
# 临时忽略单个仓库
|
||||
dnf --disablerepo=epel install package
|
||||
|
||||
# 永久禁用
|
||||
# 编辑 .repo 文件,将 enabled=1 改为 enabled=0
|
||||
```
|
||||
|
||||
#### GPG 签名管理
|
||||
|
||||
```shell
|
||||
# 导入 GPG 密钥
|
||||
rpm --import https://mirrors.aliyun.com/centos/RPM-GPG-KEY-CentOS-Official
|
||||
|
||||
# 查看已导入的密钥
|
||||
rpm -qa gpg-pubkey*
|
||||
|
||||
# 删除密钥
|
||||
rpm -e gpg-pubkey-xxxxxxxx-xxxxxxxx
|
||||
```
|
||||
|
||||
#### 备份与恢复
|
||||
|
||||
```shell
|
||||
# 备份所有 repo 文件
|
||||
cp -r /etc/yum.repos.d/ /etc/yum.repos.d.bak/
|
||||
|
||||
# 恢复
|
||||
cp -r /etc/yum.repos.d.bak/* /etc/yum.repos.d/
|
||||
```
|
||||
|
||||
---
|
||||
|
||||
## wget 下载工具
|
||||
|
||||
### 基本语法
|
||||
@@ -108,31 +302,31 @@ wget -O 图片名.png https://www.baidu.com/img/bd_logo1.png
|
||||
|
||||
### 记录和输入文件参数
|
||||
|
||||
| 参数 | 说明 |
|
||||
|-----|------|
|
||||
| `-o` | 把记录写到文件中 |
|
||||
| `-a` | 把记录追加到文件中 |
|
||||
| `-d` | 打印调试输出 |
|
||||
| `-q` | 安静模式(没有输出) |
|
||||
| `-v` | 冗长模式(缺省设置) |
|
||||
| `-nv` | 关掉冗长模式 |
|
||||
| `-i` | 下载文件中出现的 URLs |
|
||||
| `-F` | 把输入文件当作 HTML 格式 |
|
||||
| 参数 | 说明 |
|
||||
| ----- | ------------------------ |
|
||||
| `-o` | 把记录写到文件中 |
|
||||
| `-a` | 把记录追加到文件中 |
|
||||
| `-d` | 打印调试输出 |
|
||||
| `-q` | 安静模式(没有输出) |
|
||||
| `-v` | 冗长模式(缺省设置) |
|
||||
| `-nv` | 关掉冗长模式 |
|
||||
| `-i` | 下载文件中出现的 URLs |
|
||||
| `-F` | 把输入文件当作 HTML 格式 |
|
||||
|
||||
### 下载参数
|
||||
|
||||
| 参数 | 说明 |
|
||||
|-----|------|
|
||||
| `-t` | 设定最大尝试链接次数(0 表示无限制) |
|
||||
| `-O` | 把文档写到文件中 |
|
||||
| `-nc` | 不要覆盖存在的文件 |
|
||||
| `-c` | 接着下载没下载完的文件 |
|
||||
| `-N` | 不要重新下载文件除非比本地文件新 |
|
||||
| `-S` | 打印服务器的回应 |
|
||||
| `-T` | 设定响应超时的秒数 |
|
||||
| `-w` | 两次尝试之间间隔秒数 |
|
||||
| `-Q` | 设置下载的容量限制 |
|
||||
| `--limit-rate` | 限定下载速率 |
|
||||
| 参数 | 说明 |
|
||||
| -------------- | ------------------------------------ |
|
||||
| `-t` | 设定最大尝试链接次数(0 表示无限制) |
|
||||
| `-O` | 把文档写到文件中 |
|
||||
| `-nc` | 不要覆盖存在的文件 |
|
||||
| `-c` | 接着下载没下载完的文件 |
|
||||
| `-N` | 不要重新下载文件除非比本地文件新 |
|
||||
| `-S` | 打印服务器的回应 |
|
||||
| `-T` | 设定响应超时的秒数 |
|
||||
| `-w` | 两次尝试之间间隔秒数 |
|
||||
| `-Q` | 设置下载的容量限制 |
|
||||
| `--limit-rate` | 限定下载速率 |
|
||||
|
||||
---
|
||||
|
||||
@@ -760,9 +954,409 @@ stderr_logfile=/var/log/ckadminnetcore/err.log
|
||||
stdout_logfile=/var/log/ckadminnetcore/out.log
|
||||
stopasgroup=true
|
||||
```
|
||||
|
||||
---
|
||||
|
||||
## starship
|
||||
|
||||
### 安装
|
||||
|
||||
首先需确认安装zsh,如何安装参考 ohmyzsh 安装
|
||||
|
||||
#### 官方脚本
|
||||
|
||||
```bash
|
||||
curl -sS https://starship.rs/install.sh | sh
|
||||
```
|
||||
|
||||
#### 包管理器
|
||||
|
||||
- RHEL
|
||||
|
||||
```bash
|
||||
dnf copr enable atim/starship
|
||||
dnf install starship
|
||||
```
|
||||
|
||||
- ubuntu
|
||||
|
||||
```bash
|
||||
apt install starship
|
||||
```
|
||||
|
||||
#### 设置 Shell 启用
|
||||
|
||||
编辑 `~/.zshrc`,在文件末尾添加以下内容:
|
||||
|
||||
```bash
|
||||
# ===== History 配置 =====
|
||||
HISTFILE=~/.zsh_history
|
||||
HISTSIZE=10000
|
||||
SAVEHIST=10000
|
||||
setopt HIST_IGNORE_DUPS # 忽略连续重复命令
|
||||
setopt HIST_IGNORE_ALL_DUPS # 忽略所有重复命令
|
||||
setopt HIST_FIND_NO_DUPS # 搜索时忽略重复
|
||||
setopt HIST_IGNORE_SPACE # 忽略以空格开头的命令
|
||||
setopt HIST_SAVE_NO_DUPS # 保存时忽略重复
|
||||
setopt SHARE_HISTORY # 共享 history
|
||||
setopt APPEND_HISTORY # 追加 history
|
||||
setopt INC_APPEND_HISTORY # 立即追加
|
||||
|
||||
|
||||
# ===== 补全系统初始化(必须在插件之前) =====
|
||||
fpath=(~/.zsh/zsh-completions/src $fpath)
|
||||
autoload -Uz compinit
|
||||
compinit -C # 使用缓存,跳过安全检查,加快启动
|
||||
zstyle ':completion:*' menu select
|
||||
|
||||
|
||||
# ===== 插件(顺序重要) =====
|
||||
source ~/.zsh/zsh-autosuggestions/zsh-autosuggestions.zsh
|
||||
source ~/.zsh/zsh-syntax-highlighting/zsh-syntax-highlighting.zsh
|
||||
|
||||
|
||||
# starship start
|
||||
eval "$(starship init zsh)"
|
||||
# starship end
|
||||
|
||||
|
||||
autoload -Uz history-search-end
|
||||
zle -N history-beginning-search-backward-end history-search-end
|
||||
zle -N history-beginning-search-forward-end history-search-end
|
||||
```
|
||||
|
||||
#### 安装 zsh-completions 补全插件
|
||||
|
||||
[zsh-completions](https://github.com/zsh-users/zsh-completions) 提供额外的补全定义,增强 Tab 补全功能。
|
||||
|
||||
```bash
|
||||
git clone https://github.com/zsh-users/zsh-completions ~/.zsh/zsh-completions
|
||||
|
||||
# 国内镜像
|
||||
git clone https://gitee.com/mirrors/zsh-completions.git ~/.zsh/zsh-completions
|
||||
```
|
||||
|
||||
#### 安装 zsh-autosuggestions 和 zsh-syntax-highlighting
|
||||
|
||||
这两个插件也可以独立于 oh-my-zsh 安装到 `~/.zsh/` 目录:
|
||||
|
||||
```bash
|
||||
# zsh-autosuggestions(命令提示)
|
||||
git clone https://github.com/zsh-users/zsh-autosuggestions ~/.zsh/zsh-autosuggestions
|
||||
|
||||
# zsh-syntax-highlighting(语法高亮)
|
||||
git clone https://github.com/zsh-users/zsh-syntax-highlighting.git ~/.zsh/zsh-syntax-highlighting
|
||||
```
|
||||
|
||||
> 如果已安装 oh-my-zsh,也可以使用其插件方式安装,详见 [ohmyzsh 推荐插件](#推荐插件)。
|
||||
|
||||
在文件末尾添加以下内容
|
||||
|
||||
```bash
|
||||
# starship start
|
||||
eval "$(starship init zsh)"
|
||||
# starship end
|
||||
```
|
||||
|
||||
### 配置
|
||||
|
||||
先创建 `~/.config/starship.toml`
|
||||
|
||||
```bash
|
||||
mkdir -p ~/.config && touch ~/.config/starship.toml
|
||||
```
|
||||
|
||||
内容
|
||||
|
||||
```bash
|
||||
"$schema" = 'https://starship.rs/config-schema.json'
|
||||
|
||||
format = """
|
||||
[](red)\
|
||||
$os\
|
||||
$username\
|
||||
[](bg:peach fg:red)\
|
||||
$directory\
|
||||
[](bg:yellow fg:peach)\
|
||||
$git_branch\
|
||||
$git_status\
|
||||
[](fg:yellow bg:green)\
|
||||
$c\
|
||||
$rust\
|
||||
$golang\
|
||||
$nodejs\
|
||||
$bun\
|
||||
$php\
|
||||
$java\
|
||||
$kotlin\
|
||||
$haskell\
|
||||
$python\
|
||||
[](fg:green bg:sapphire)\
|
||||
$conda\
|
||||
[](fg:sapphire bg:lavender)\
|
||||
$time\
|
||||
[ ](fg:lavender)\
|
||||
$cmd_duration\
|
||||
$line_break\
|
||||
$character"""
|
||||
|
||||
palette = 'catppuccin_mocha'
|
||||
|
||||
[os]
|
||||
disabled = false
|
||||
style = "bg:red fg:crust"
|
||||
|
||||
[os.symbols]
|
||||
Windows = ""
|
||||
Ubuntu = ""
|
||||
SUSE = ""
|
||||
Raspbian = ""
|
||||
Mint = ""
|
||||
Macos = ""
|
||||
Manjaro = ""
|
||||
Linux = ""
|
||||
Gentoo = ""
|
||||
Fedora = ""
|
||||
Alpine = ""
|
||||
Amazon = ""
|
||||
Android = ""
|
||||
AOSC = ""
|
||||
Arch = ""
|
||||
Artix = ""
|
||||
CentOS = ""
|
||||
Debian = ""
|
||||
Redhat = ""
|
||||
RedHatEnterprise = ""
|
||||
|
||||
[username]
|
||||
show_always = true
|
||||
style_user = "bg:red fg:crust"
|
||||
style_root = "bg:red fg:crust"
|
||||
format = '[ $user]($style)'
|
||||
|
||||
[directory]
|
||||
style = "bg:peach fg:crust"
|
||||
format = "[ $path ]($style)"
|
||||
truncation_length = 3
|
||||
truncation_symbol = "…/"
|
||||
|
||||
[directory.substitutions]
|
||||
"Documents" = " "
|
||||
"Downloads" = " "
|
||||
"Music" = " "
|
||||
"Pictures" = " "
|
||||
"Developer" = " "
|
||||
|
||||
[git_branch]
|
||||
symbol = ""
|
||||
style = "bg:yellow"
|
||||
format = '[[ $symbol $branch ](fg:crust bg:yellow)]($style)'
|
||||
|
||||
[git_status]
|
||||
style = "bg:yellow"
|
||||
format = '[[($all_status$ahead_behind )](fg:crust bg:yellow)]($style)'
|
||||
|
||||
[nodejs]
|
||||
symbol = ""
|
||||
style = "bg:green"
|
||||
format = '[[ $symbol( $version) ](fg:crust bg:green)]($style)'
|
||||
|
||||
[bun]
|
||||
symbol = ""
|
||||
style = "bg:green"
|
||||
format = '[[ $symbol( $version) ](fg:crust bg:green)]($style)'
|
||||
|
||||
[c]
|
||||
symbol = " "
|
||||
style = "bg:green"
|
||||
format = '[[ $symbol( $version) ](fg:crust bg:green)]($style)'
|
||||
|
||||
[rust]
|
||||
symbol = ""
|
||||
style = "bg:green"
|
||||
format = '[[ $symbol( $version) ](fg:crust bg:green)]($style)'
|
||||
|
||||
[golang]
|
||||
symbol = ""
|
||||
style = "bg:green"
|
||||
format = '[[ $symbol( $version) ](fg:crust bg:green)]($style)'
|
||||
|
||||
[php]
|
||||
symbol = ""
|
||||
style = "bg:green"
|
||||
format = '[[ $symbol( $version) ](fg:crust bg:green)]($style)'
|
||||
|
||||
[java]
|
||||
symbol = " "
|
||||
style = "bg:green"
|
||||
format = '[[ $symbol( $version) ](fg:crust bg:green)]($style)'
|
||||
|
||||
[kotlin]
|
||||
symbol = ""
|
||||
style = "bg:green"
|
||||
format = '[[ $symbol( $version) ](fg:crust bg:green)]($style)'
|
||||
|
||||
[haskell]
|
||||
symbol = ""
|
||||
style = "bg:green"
|
||||
format = '[[ $symbol( $version) ](fg:crust bg:green)]($style)'
|
||||
|
||||
[python]
|
||||
symbol = ""
|
||||
style = "bg:green"
|
||||
format = '[[ $symbol( $version)(\(#$virtualenv\)) ](fg:crust bg:green)]($style)'
|
||||
|
||||
[docker_context]
|
||||
symbol = ""
|
||||
style = "bg:sapphire"
|
||||
format = '[[ $symbol( $context) ](fg:crust bg:sapphire)]($style)'
|
||||
|
||||
[conda]
|
||||
symbol = " "
|
||||
style = "fg:crust bg:sapphire"
|
||||
format = '[$symbol$environment ]($style)'
|
||||
ignore_base = false
|
||||
|
||||
[time]
|
||||
disabled = false
|
||||
time_format = "%R"
|
||||
style = "bg:lavender"
|
||||
format = '[[ $time ](fg:crust bg:lavender)]($style)'
|
||||
|
||||
[line_break]
|
||||
disabled = false
|
||||
|
||||
[character]
|
||||
disabled = false
|
||||
success_symbol = '[❯](bold fg:green)'
|
||||
error_symbol = '[❯](bold fg:red)'
|
||||
vimcmd_symbol = '[❮](bold fg:green)'
|
||||
vimcmd_replace_one_symbol = '[❮](bold fg:lavender)'
|
||||
vimcmd_replace_symbol = '[❮](bold fg:lavender)'
|
||||
vimcmd_visual_symbol = '[❮](bold fg:yellow)'
|
||||
|
||||
[cmd_duration]
|
||||
show_milliseconds = true
|
||||
format = " in $duration "
|
||||
style = "bg:lavender"
|
||||
disabled = false
|
||||
show_notifications = true
|
||||
min_time_to_notify = 45000
|
||||
|
||||
[palettes.catppuccin_mocha]
|
||||
rosewater = "#f5e0dc"
|
||||
flamingo = "#f2cdcd"
|
||||
pink = "#f5c2e7"
|
||||
mauve = "#cba6f7"
|
||||
red = "#f38ba8"
|
||||
maroon = "#eba0ac"
|
||||
peach = "#fab387"
|
||||
yellow = "#f9e2af"
|
||||
green = "#a6e3a1"
|
||||
teal = "#94e2d5"
|
||||
sky = "#89dceb"
|
||||
sapphire = "#74c7ec"
|
||||
blue = "#89b4fa"
|
||||
lavender = "#b4befe"
|
||||
text = "#cdd6f4"
|
||||
subtext1 = "#bac2de"
|
||||
subtext0 = "#a6adc8"
|
||||
overlay2 = "#9399b2"
|
||||
overlay1 = "#7f849c"
|
||||
overlay0 = "#6c7086"
|
||||
surface2 = "#585b70"
|
||||
surface1 = "#45475a"
|
||||
surface0 = "#313244"
|
||||
base = "#1e1e2e"
|
||||
mantle = "#181825"
|
||||
crust = "#11111b"
|
||||
|
||||
[palettes.catppuccin_frappe]
|
||||
rosewater = "#f2d5cf"
|
||||
flamingo = "#eebebe"
|
||||
pink = "#f4b8e4"
|
||||
mauve = "#ca9ee6"
|
||||
red = "#e78284"
|
||||
maroon = "#ea999c"
|
||||
peach = "#ef9f76"
|
||||
yellow = "#e5c890"
|
||||
green = "#a6d189"
|
||||
teal = "#81c8be"
|
||||
sky = "#99d1db"
|
||||
sapphire = "#85c1dc"
|
||||
blue = "#8caaee"
|
||||
lavender = "#babbf1"
|
||||
text = "#c6d0f5"
|
||||
subtext1 = "#b5bfe2"
|
||||
subtext0 = "#a5adce"
|
||||
overlay2 = "#949cbb"
|
||||
overlay1 = "#838ba7"
|
||||
overlay0 = "#737994"
|
||||
surface2 = "#626880"
|
||||
surface1 = "#51576d"
|
||||
surface0 = "#414559"
|
||||
base = "#303446"
|
||||
mantle = "#292c3c"
|
||||
crust = "#232634"
|
||||
|
||||
[palettes.catppuccin_latte]
|
||||
rosewater = "#dc8a78"
|
||||
flamingo = "#dd7878"
|
||||
pink = "#ea76cb"
|
||||
mauve = "#8839ef"
|
||||
red = "#d20f39"
|
||||
maroon = "#e64553"
|
||||
peach = "#fe640b"
|
||||
yellow = "#df8e1d"
|
||||
green = "#40a02b"
|
||||
teal = "#179299"
|
||||
sky = "#04a5e5"
|
||||
sapphire = "#209fb5"
|
||||
blue = "#1e66f5"
|
||||
lavender = "#7287fd"
|
||||
text = "#4c4f69"
|
||||
subtext1 = "#5c5f77"
|
||||
subtext0 = "#6c6f85"
|
||||
overlay2 = "#7c7f93"
|
||||
overlay1 = "#8c8fa1"
|
||||
overlay0 = "#9ca0b0"
|
||||
surface2 = "#acb0be"
|
||||
surface1 = "#bcc0cc"
|
||||
surface0 = "#ccd0da"
|
||||
base = "#eff1f5"
|
||||
mantle = "#e6e9ef"
|
||||
crust = "#dce0e8"
|
||||
|
||||
[palettes.catppuccin_macchiato]
|
||||
rosewater = "#f4dbd6"
|
||||
flamingo = "#f0c6c6"
|
||||
pink = "#f5bde6"
|
||||
mauve = "#c6a0f6"
|
||||
red = "#ed8796"
|
||||
maroon = "#ee99a0"
|
||||
peach = "#f5a97f"
|
||||
yellow = "#eed49f"
|
||||
green = "#a6da95"
|
||||
teal = "#8bd5ca"
|
||||
sky = "#91d7e3"
|
||||
sapphire = "#7dc4e4"
|
||||
blue = "#8aadf4"
|
||||
lavender = "#b7bdf8"
|
||||
text = "#cad3f5"
|
||||
subtext1 = "#b8c0e0"
|
||||
subtext0 = "#a5adcb"
|
||||
overlay2 = "#939ab7"
|
||||
overlay1 = "#8087a2"
|
||||
overlay0 = "#6e738d"
|
||||
surface2 = "#5b6078"
|
||||
surface1 = "#494d64"
|
||||
surface0 = "#363a4f"
|
||||
base = "#24273a"
|
||||
mantle = "#1e2030"
|
||||
crust = "#181926"
|
||||
|
||||
|
||||
```
|
||||
|
||||
## ohmyzsh 安装
|
||||
|
||||
ohmyzsh 是一个管理 Zsh 配置的框架,提供丰富的主题和插件。
|
||||
@@ -775,12 +1369,12 @@ dnf install -y zsh
|
||||
|
||||
### 安装 ohmyzsh
|
||||
|
||||
| 方式 | 命令 |
|
||||
|-----|------|
|
||||
| curl | `sh -c "$(curl -fsSL https://install.ohmyz.sh/)"` |
|
||||
| wget | `sh -c "$(wget -O- https://install.ohmyz.sh/)"` |
|
||||
| 方式 | 命令 |
|
||||
| ---------------- | ------------------------------------------------------------------------------------ |
|
||||
| curl | `sh -c "$(curl -fsSL https://install.ohmyz.sh/)"` |
|
||||
| wget | `sh -c "$(wget -O- https://install.ohmyz.sh/)"` |
|
||||
| 国内镜像(curl) | `sh -c "$(curl -fsSL https://gitee.com/pocmon/ohmyzsh/raw/master/tools/install.sh)"` |
|
||||
| 国内镜像(wget) | `sh -c "$(wget -O- https://gitee.com/pocmon/ohmyzsh/raw/master/tools/install.sh)"` |
|
||||
| 国内镜像(wget) | `sh -c "$(wget -O- https://gitee.com/pocmon/ohmyzsh/raw/master/tools/install.sh)"` |
|
||||
|
||||
> 注意:同意使用 oh-my-zsh 的配置模板覆盖已有的 `.zshrc`。
|
||||
|
||||
@@ -851,7 +1445,7 @@ dnf groupinstall "Development Tools" -y
|
||||
git clone https://github.com/zsh-users/zsh-autosuggestions ${ZSH_CUSTOM:-~/.oh-my-zsh/custom}/plugins/zsh-autosuggestions
|
||||
|
||||
# 国内镜像
|
||||
git clone https://gitee.com/pocmon/zsh-autosuggestions ${ZSH_CUSTOM:-~/.oh-my-zsh/custom}/plugins/zsh-autosuggestions
|
||||
git clone https://gitee.com/mirrors/zsh-autosuggestions.git ${ZSH_CUSTOM:-~/.oh-my-zsh/custom}/plugins/zsh-autosuggestions
|
||||
```
|
||||
|
||||
#### zsh-syntax-highlighting
|
||||
@@ -862,9 +1456,28 @@ git clone https://gitee.com/pocmon/zsh-autosuggestions ${ZSH_CUSTOM:-~/.oh-my-zs
|
||||
git clone https://github.com/zsh-users/zsh-syntax-highlighting.git ${ZSH_CUSTOM:-~/.oh-my-zsh/custom}/plugins/zsh-syntax-highlighting
|
||||
|
||||
# 国内镜像
|
||||
git clone https://gitee.com/pocmon/zsh-syntax-highlighting.git ${ZSH_CUSTOM:-~/.oh-my-zsh/custom}/plugins/zsh-syntax-highlighting
|
||||
git clone https://gitee.com/mirror-luyi/zsh-syntax-highlighting.git ${ZSH_CUSTOM:-~/.oh-my-zsh/custom}/plugins/zsh-syntax-highlighting
|
||||
```
|
||||
|
||||
#### fzf
|
||||
|
||||
[Fzf](https://github.com/junegunn/fzf) 是一个命令行模糊查找工具,支持文件、历史命令、进程等搜索。
|
||||
|
||||
安装
|
||||
|
||||
- RHEL
|
||||
|
||||
```bash
|
||||
dnf install epel-release
|
||||
dnf install fzf
|
||||
```
|
||||
|
||||
- Ubuntu
|
||||
|
||||
```bash
|
||||
apt install fzf
|
||||
```
|
||||
|
||||
#### z(内置)
|
||||
|
||||
文件夹快捷跳转插件,输入目标文件夹名称即可快速跳转。
|
||||
@@ -882,13 +1495,15 @@ git clone https://gitee.com/pocmon/zsh-syntax-highlighting.git ${ZSH_CUSTOM:-~/.
|
||||
修改 `~/.zshrc`:
|
||||
|
||||
```shell
|
||||
plugins=(git zsh-autosuggestions zsh-syntax-highlighting z extract web-search)
|
||||
plugins=(git zsh-autosuggestions zsh-syntax-highlighting z extract web-search fzf)
|
||||
```
|
||||
|
||||
执行 `source ~/.zshrc` 生效。
|
||||
|
||||
### 卸载
|
||||
|
||||
> 卸载后,会把 ~/.zshrc 重命名为 .zshrc.omz-uninstalled-时间戳,此为 oh my zsh 的备份功能
|
||||
|
||||
```shell
|
||||
uninstall_oh_my_zsh
|
||||
```
|
||||
@@ -1351,6 +1966,75 @@ read only = yes
|
||||
|
||||
## Nginx 安装
|
||||
|
||||
### RHEL/CentOS 安装(官方仓库)
|
||||
|
||||
适用于 Red Hat Enterprise Linux 及其衍生版本(CentOS、Oracle Linux、Rocky Linux、AlmaLinux)。
|
||||
|
||||
#### 1. 安装前置依赖
|
||||
|
||||
```shell
|
||||
sudo dnf install dnf-utils
|
||||
```
|
||||
|
||||
#### 2. 创建仓库文件
|
||||
|
||||
创建 `/etc/yum.repos.d/nginx.repo`:
|
||||
|
||||
```shell
|
||||
sudo vim /etc/yum.repos.d/nginx.repo
|
||||
```
|
||||
|
||||
写入以下内容:
|
||||
|
||||
```ini
|
||||
[nginx-stable]
|
||||
name=nginx stable repo
|
||||
baseurl=https://nginx.org/packages/centos/$releasever/$basearch/
|
||||
gpgcheck=1
|
||||
enabled=1
|
||||
gpgkey=https://nginx.org/keys/nginx_signing.key
|
||||
module_hotfixes=true
|
||||
|
||||
[nginx-mainline]
|
||||
name=nginx mainline repo
|
||||
baseurl=https://nginx.org/packages/mainline/centos/$releasever/$basearch/
|
||||
gpgcheck=1
|
||||
enabled=0
|
||||
gpgkey=https://nginx.org/keys/nginx_signing.key
|
||||
module_hotfixes=true
|
||||
```
|
||||
|
||||
> 默认使用 stable 稳定版仓库。如需使用 mainline 主线版,执行:
|
||||
> ```shell
|
||||
> sudo dnf config-manager --enable nginx-mainline
|
||||
> ```
|
||||
|
||||
#### 3. 安装 Nginx
|
||||
|
||||
```shell
|
||||
sudo dnf install nginx
|
||||
```
|
||||
|
||||
安装时会提示接受 GPG 密钥,确认指纹为 `573B FD6B 3D8F BC64 1079 A6AB ABF5 BD82 7BD9 BF62` 后接受。
|
||||
|
||||
#### 4. 启动并验证
|
||||
|
||||
```shell
|
||||
sudo systemctl start nginx
|
||||
sudo systemctl enable nginx
|
||||
sudo systemctl status nginx
|
||||
```
|
||||
|
||||
#### 5. 防火墙放行
|
||||
|
||||
```shell
|
||||
sudo firewall-cmd --permanent --add-service=http
|
||||
sudo firewall-cmd --permanent --add-service=https
|
||||
sudo firewall-cmd --reload
|
||||
```
|
||||
|
||||
---
|
||||
|
||||
### 源码编译安装
|
||||
|
||||
```shell
|
||||
@@ -1361,7 +2045,7 @@ make
|
||||
make install
|
||||
```
|
||||
|
||||
### AlmaLinux dnf 安装
|
||||
### AlmaLinux源 dnf 安装
|
||||
|
||||
```shell
|
||||
# 确保软件是最新的
|
||||
@@ -1385,10 +2069,10 @@ sudo firewall-cmd --reload
|
||||
|
||||
### 目录结构
|
||||
|
||||
| 目录/文件 | 说明 |
|
||||
|----------|------|
|
||||
| `/etc/nginx` | 包含所有 Nginx 配置文件的主目录 |
|
||||
| `/etc/nginx/nginx.conf` | 主要的 Nginx 配置文件 |
|
||||
| `/etc/nginx/sites-available` | 定义各个网站的目录 |
|
||||
| `/etc/nginx/sites-enabled` | Nginx 积极服务的网站列表 |
|
||||
| `/var/log/nginx` | Nginx 日志目录 |
|
||||
| 目录/文件 | 说明 |
|
||||
| ---------------------------- | ------------------------------- |
|
||||
| `/etc/nginx` | 包含所有 Nginx 配置文件的主目录 |
|
||||
| `/etc/nginx/nginx.conf` | 主要的 Nginx 配置文件 |
|
||||
| `/etc/nginx/sites-available` | 定义各个网站的目录 |
|
||||
| `/etc/nginx/sites-enabled` | Nginx 积极服务的网站列表 |
|
||||
| `/var/log/nginx` | Nginx 日志目录 |
|
||||
+229
-220
@@ -7,6 +7,235 @@ tags: [MySQL, 数据库, SQL, 备份]
|
||||
categories: [数据库, MySQL]
|
||||
---
|
||||
|
||||
# MySQL 配置
|
||||
|
||||
`my.ini` 或 `my.cnf` 配置
|
||||
|
||||
```ini
|
||||
```
|
||||
|
||||
|
||||
|
||||
# Windows 下安装 绿色版
|
||||
|
||||
先下载[MySQL :: Download MySQL Community Server](https://dev.mysql.com/downloads/mysql/)
|
||||
|
||||

|
||||
|
||||
1. 解压下载好的压缩包
|
||||

|
||||
|
||||
2. 解压后得到
|
||||
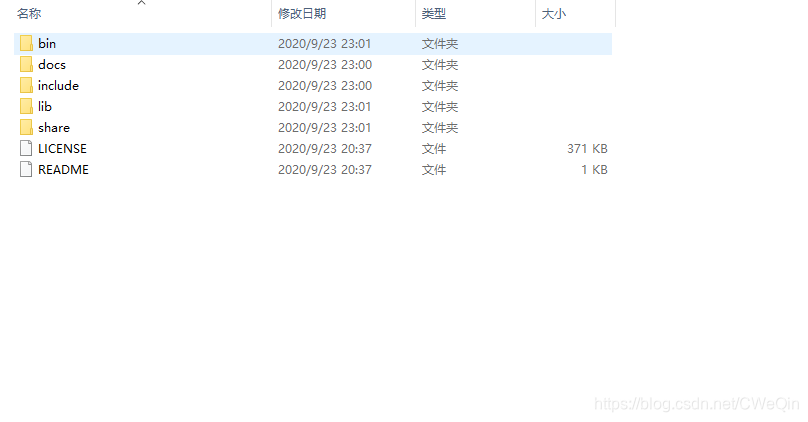
|
||||
|
||||
3. 新建一个 `my.ini`文件
|
||||
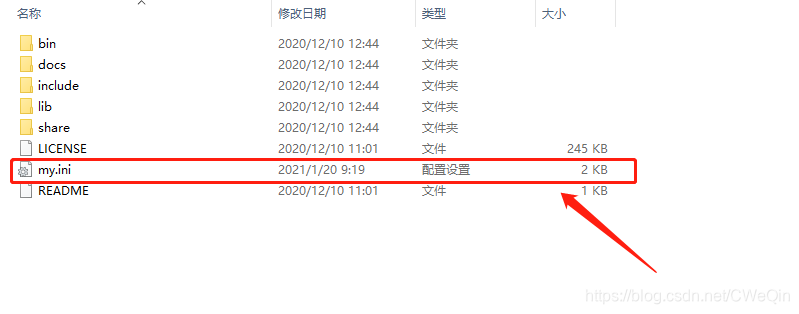
|
||||
|
||||
4. 解压后的mysql根目录下没有my.ini文件,自己去网上找一份就可或者使用我在后面给出的代码。.ini文件会在初始化mysql中用到
|
||||
```ini
|
||||
# For advice on how to change settings please see
|
||||
# http=//dev.mysql.com/doc/refman/5.7/en/server-configuration-defaults.html
|
||||
# *** DO NOT EDIT THIS FILE. It's a template which will be copied to the
|
||||
# *** default location during install, and will be replaced if you
|
||||
# *** upgrade to a newer version of MySQL.
|
||||
|
||||
[client]
|
||||
port = 3306
|
||||
default-character-set = utf8
|
||||
|
||||
[mysqld]
|
||||
|
||||
# Remove leading # and set to the amount of RAM for the most important data
|
||||
# cache in MySQL. Start at 70% of total RAM for dedicated server, else 10%.
|
||||
# innodb_buffer_pool_size = 128M
|
||||
|
||||
# Remove leading # to turn on a very important data integrity option= logging
|
||||
# changes to the binary log between backups.
|
||||
# log_bin
|
||||
port = 3306
|
||||
# These are commonly set, remove the # and set as required.
|
||||
basedir="D:\app\mysql-5.7.43-winx64"
|
||||
datadir="D:\app\mysql-5.7.43-winx64\data"
|
||||
# server_id = .....
|
||||
character_set_server = utf8
|
||||
|
||||
# Remove leading # to set options mainly useful for reporting servers.
|
||||
# The server defaults are faster for transactions and fast SELECTs.
|
||||
# Adjust sizes as needed, experiment to find the optimal values.
|
||||
# join_buffer_size = 128M
|
||||
# sort_buffer_size = 2M
|
||||
# read_rnd_buffer_size = 2M
|
||||
|
||||
sql_mode=NO_ENGINE_SUBSTITUTION,STRICT_TRANS_TABLES
|
||||
|
||||
```
|
||||
|
||||
5. 修改ini配置文件中的安装目录和数据存放目录修改为mysql文件的路径
|
||||
|
||||
6. \#设置mysql的安装目录
|
||||
basedir=D:\app\mysql-5.7.43-winx64
|
||||
\#设置mysql数据库的数据的存放目录
|
||||
datadir=D:\app\mysql-5.7.43-winx64\data
|
||||
|
||||
7. 打开cmd,初始化数据库
|
||||
```powershell
|
||||
mysqld --initialize
|
||||
```
|
||||
|
||||
8. 初始化完成后,mysqld根目录下会自动新增data文件夹
|
||||
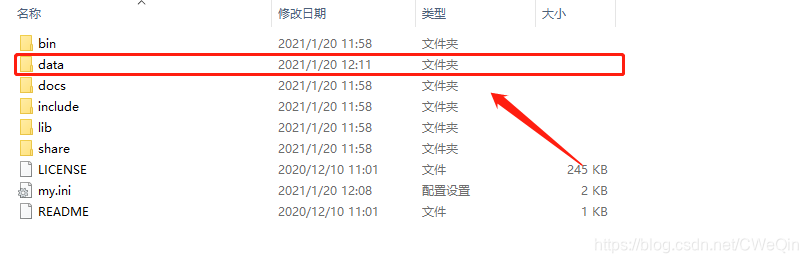
|
||||
|
||||
9. 打开data文件夹,找到.err后缀文本打开
|
||||
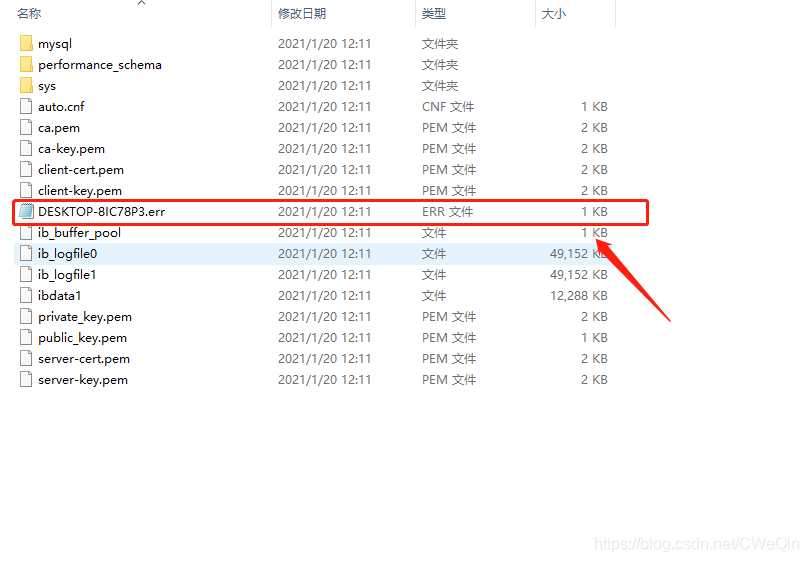
|
||||
|
||||
10. 找到文件password位置,红色框中为数据库初始化密码,后续修改初始化密码使用
|
||||
```err
|
||||
2023-10-07T04:37:02.330654Z 1 [Note] A temporary password is generated for root@localhost: (iw?Mw:Vs7n&
|
||||
```
|
||||
|
||||
11. 安装数据库
|
||||
```powershell
|
||||
mysqld --install <服务名>
|
||||
```
|
||||
|
||||
12. 启动服务
|
||||
```powershell
|
||||
net start mysql
|
||||
```
|
||||
|
||||
13. 关闭服务
|
||||
```powershell
|
||||
net stop mysql
|
||||
```
|
||||
|
||||
14. 修改初始密码
|
||||
|
||||
- 登录
|
||||
```powershell
|
||||
mysql -uroot -p'你的初始密码,步骤4中红框里的字符'
|
||||
```
|
||||
|
||||
- 修改密码为 123456
|
||||
```mysql
|
||||
ALTER USER 'root'@'localhost' IDENTIFIED WITH mysql_native_password BY 'root';
|
||||
```
|
||||
|
||||
15. 服务卸载
|
||||
```powershell
|
||||
net stop mysql
|
||||
mysqld --remove
|
||||
```
|
||||
|
||||
# Linux 安装MySQL
|
||||
|
||||
## 安装
|
||||
|
||||
1. 在浏览器下载Linux系统的MySQL客户端安装包。建议您下载的MySQL客户端版本高于已创建的GaussDB(for MySQL)实例中数据库版本。
|
||||
在下载页面找到对应版本[链接](https://dev.mysql.com/downloads/file/?id=496982),以mysql-community-client-8.0.21-1.el6.x86_64为例,打开页面后,即可下载安装包。
|
||||

|
||||
|
||||
2. 将安装包上传到ECS。
|
||||
|
||||
3. 执行以下命令安装MySQL客户端。
|
||||
rpm -ivh mysql-community-client-8.0.21-1.el6.x86_64.rpm
|
||||
|
||||
> - 如果安装过程中报conflicts,可增加replacefiles参数重新安装,如下:
|
||||
>
|
||||
> rpm -ivh --replacefiles mysql-community-client-8.0.21-1.el6.x86_64.rpm
|
||||
>
|
||||
> - 如果安装过程中提示需要安装依赖包,可增加nodeps参数重新安装,如下:
|
||||
>
|
||||
> rpm -ivh --nodeps mysql-community-client-8.0.21-1.el6.x86_64.rpm
|
||||
|
||||
## 连接
|
||||
|
||||
1. **mysql -h** <*host*> **-P** *<port>* **-u** <*userName*> **-p**
|
||||
示例:
|
||||
|
||||
mysql -h 192.168.0.16 -P 3306 -u root -p
|
||||
|
||||
参数说明
|
||||
|
||||
| 参数 | 说明 |
|
||||
| ------------ | ---------------------------- |
|
||||
| <*host*> | 获取的读写内网地址。 |
|
||||
| *<port>* | 获取的数据库端口,默认3306。 |
|
||||
| <*userName*> | 管理员帐号root。 |
|
||||
|
||||
2. 出现如下提示时,输入数据库帐号对应的密码。
|
||||
```mysql
|
||||
Enter password:
|
||||
```
|
||||
|
||||
3. 报错mysql: error while loading shared libraries: libssl.so.10: cannot open shared object file: No such file or directory
|
||||
|
||||
下载rpm包:
|
||||
https://mirrors.aliyun.com/centos/8/AppStream/x86_64/os/Packages/compat-openssl10-1.0.2o-3.el8.x86_64.rpm
|
||||
安装rpm包:
|
||||
|
||||
```shell
|
||||
rpm -i compat-openssl10-1.0.2o-3.el8.x86_64.rpm
|
||||
错误:依赖检测失败:
|
||||
make 被 compat-openssl10-1:1.0.2o-3.el8.x86_64 需要
|
||||
rpm -i compat-openssl10-1.0.2o-3.el8.x86_64.rpm --nodeps --force
|
||||
|
||||
mysql: error while loading shared libraries: libncurses.so.5: cannot open shared object file: No such file or directory
|
||||
cp /usr/lib64/libncurses.so.6 /usr/lib64/libncurses.so.5
|
||||
|
||||
mysql: error while loading shared libraries: libtinfo.so.5: cannot open shared object file: No such file or directory
|
||||
cp /usr/lib64/libtinfo.so.6 /usr/lib64/libtinfo.so.5
|
||||
```
|
||||
|
||||
|
||||
|
||||
# Linux 卸载MySQL
|
||||
|
||||
## 二进制方式
|
||||
|
||||
```shell
|
||||
rpm -qa | grep -i mysql
|
||||
|
||||
# 如下所示
|
||||
mysql-community-release-el7-5.noarch
|
||||
mysql-community-libs-5.6.51-2.el7.x86_64
|
||||
mysql-community-client-5.6.51-2.el7.x86_64
|
||||
mysql-community-server-5.6.51-2.el7.x86_64
|
||||
mysql-community-common-5.6.51-2.el7.x86_64
|
||||
|
||||
systemctl stop mysqld
|
||||
|
||||
rpm -ev mysql-community-release-el7-5.noarch
|
||||
rpm -ev mysql-community-libs-5.6.51-2.el7.x86_64
|
||||
rpm -ev mysql-community-client-5.6.51-2.el7.x86_64
|
||||
rpm -ev mysql-community-server-5.6.51-2.el7.x86_64
|
||||
rpm -ev mysql-community-common-5.6.51-2.el7.x86_64
|
||||
|
||||
find / -name mysql
|
||||
|
||||
# 如下所示
|
||||
/var/lib/mysql
|
||||
/var/lib/mysql/mysql
|
||||
/usr/local/mysql
|
||||
/usr/lib64/mysql
|
||||
/usr/share/mysql
|
||||
/usr/bin/mysql
|
||||
/etc/logrotate.d/mysql
|
||||
/etc/selinux/targeted/active/modules/100/mysql
|
||||
|
||||
rm -rf /var/lib/mysql
|
||||
rm -rf /var/lib/mysql/mysql
|
||||
rm -rf /usr/local/mysql
|
||||
rm -rf /usr/lib64/mysql
|
||||
rm -rf /usr/share/mysql
|
||||
rm -rf /usr/bin/mysql
|
||||
rm -rf /etc/logrotate.d/mysql
|
||||
rm -rf /etc/selinux/targeted/active/modules/100/mysql
|
||||
|
||||
rm -rf /etc/my.cnf
|
||||
|
||||
rpm -qa | grep -i mysql
|
||||
```
|
||||
|
||||
|
||||
|
||||
# mysqldump备份数据库
|
||||
@@ -248,226 +477,6 @@ setenforce 0
|
||||
|
||||
永久关闭SELinux
|
||||
|
||||
# Windows 下安装 绿色版
|
||||
|
||||
先下载[MySQL :: Download MySQL Community Server](https://dev.mysql.com/downloads/mysql/)
|
||||
|
||||

|
||||
|
||||
1. 解压下载好的压缩包
|
||||

|
||||
|
||||
2. 解压后得到
|
||||

|
||||
|
||||
3. 新建一个 `my.ini`文件
|
||||

|
||||
|
||||
4. 解压后的mysql根目录下没有my.ini文件,自己去网上找一份就可或者使用我在后面给出的代码。.ini文件会在初始化mysql中用到
|
||||
```ini
|
||||
# For advice on how to change settings please see
|
||||
# http=//dev.mysql.com/doc/refman/5.7/en/server-configuration-defaults.html
|
||||
# *** DO NOT EDIT THIS FILE. It's a template which will be copied to the
|
||||
# *** default location during install, and will be replaced if you
|
||||
# *** upgrade to a newer version of MySQL.
|
||||
|
||||
[client]
|
||||
port = 3306
|
||||
default-character-set = utf8
|
||||
|
||||
[mysqld]
|
||||
|
||||
# Remove leading # and set to the amount of RAM for the most important data
|
||||
# cache in MySQL. Start at 70% of total RAM for dedicated server, else 10%.
|
||||
# innodb_buffer_pool_size = 128M
|
||||
|
||||
# Remove leading # to turn on a very important data integrity option= logging
|
||||
# changes to the binary log between backups.
|
||||
# log_bin
|
||||
port = 3306
|
||||
# These are commonly set, remove the # and set as required.
|
||||
basedir="D:\app\mysql-5.7.43-winx64"
|
||||
datadir="D:\app\mysql-5.7.43-winx64\data"
|
||||
# server_id = .....
|
||||
character_set_server = utf8
|
||||
|
||||
# Remove leading # to set options mainly useful for reporting servers.
|
||||
# The server defaults are faster for transactions and fast SELECTs.
|
||||
# Adjust sizes as needed, experiment to find the optimal values.
|
||||
# join_buffer_size = 128M
|
||||
# sort_buffer_size = 2M
|
||||
# read_rnd_buffer_size = 2M
|
||||
|
||||
sql_mode=NO_ENGINE_SUBSTITUTION,STRICT_TRANS_TABLES
|
||||
|
||||
```
|
||||
|
||||
5. 修改ini配置文件中的安装目录和数据存放目录修改为mysql文件的路径
|
||||
|
||||
6. \#设置mysql的安装目录
|
||||
basedir=D:\app\mysql-5.7.43-winx64
|
||||
\#设置mysql数据库的数据的存放目录
|
||||
datadir=D:\app\mysql-5.7.43-winx64\data
|
||||
|
||||
7. 打开cmd,初始化数据库
|
||||
```powershell
|
||||
mysqld --initialize
|
||||
```
|
||||
|
||||
8. 初始化完成后,mysqld根目录下会自动新增data文件夹
|
||||

|
||||
|
||||
9. 打开data文件夹,找到.err后缀文本打开
|
||||

|
||||
|
||||
10. 找到文件password位置,红色框中为数据库初始化密码,后续修改初始化密码使用
|
||||
```err
|
||||
2023-10-07T04:37:02.330654Z 1 [Note] A temporary password is generated for root@localhost: (iw?Mw:Vs7n&
|
||||
```
|
||||
|
||||
11. 安装数据库
|
||||
```powershell
|
||||
mysqld --install <服务名>
|
||||
```
|
||||
|
||||
12. 启动服务
|
||||
```powershell
|
||||
net start mysql
|
||||
```
|
||||
|
||||
13. 关闭服务
|
||||
```powershell
|
||||
net stop mysql
|
||||
```
|
||||
|
||||
14. 修改初始密码
|
||||
|
||||
- 登录
|
||||
```powershell
|
||||
mysql -uroot -p'你的初始密码,步骤4中红框里的字符'
|
||||
```
|
||||
|
||||
- 修改密码为 123456
|
||||
```mysql
|
||||
ALTER USER 'root'@'localhost' IDENTIFIED WITH mysql_native_password BY 'root';
|
||||
```
|
||||
|
||||
15. 服务卸载
|
||||
```powershell
|
||||
net stop mysql
|
||||
mysqld --remove
|
||||
```
|
||||
|
||||
# Linux 安装MySQL
|
||||
|
||||
## 安装
|
||||
|
||||
1. 在浏览器下载Linux系统的MySQL客户端安装包。建议您下载的MySQL客户端版本高于已创建的GaussDB(for MySQL)实例中数据库版本。
|
||||
在下载页面找到对应版本[链接](https://dev.mysql.com/downloads/file/?id=496982),以mysql-community-client-8.0.21-1.el6.x86_64为例,打开页面后,即可下载安装包。
|
||||

|
||||
|
||||
2. 将安装包上传到ECS。
|
||||
|
||||
3. 执行以下命令安装MySQL客户端。
|
||||
rpm -ivh mysql-community-client-8.0.21-1.el6.x86_64.rpm
|
||||
|
||||
> - 如果安装过程中报conflicts,可增加replacefiles参数重新安装,如下:
|
||||
>
|
||||
> rpm -ivh --replacefiles mysql-community-client-8.0.21-1.el6.x86_64.rpm
|
||||
>
|
||||
> - 如果安装过程中提示需要安装依赖包,可增加nodeps参数重新安装,如下:
|
||||
>
|
||||
> rpm -ivh --nodeps mysql-community-client-8.0.21-1.el6.x86_64.rpm
|
||||
|
||||
## 连接
|
||||
|
||||
1. **mysql -h** <*host*> **-P** *<port>* **-u** <*userName*> **-p**
|
||||
示例:
|
||||
|
||||
mysql -h 192.168.0.16 -P 3306 -u root -p
|
||||
|
||||
参数说明
|
||||
|
||||
| 参数 | 说明 |
|
||||
| ------------ | ---------------------------- |
|
||||
| <*host*> | 获取的读写内网地址。 |
|
||||
| *<port>* | 获取的数据库端口,默认3306。 |
|
||||
| <*userName*> | 管理员帐号root。 |
|
||||
|
||||
2. 出现如下提示时,输入数据库帐号对应的密码。
|
||||
```mysql
|
||||
Enter password:
|
||||
```
|
||||
|
||||
3. 报错mysql: error while loading shared libraries: libssl.so.10: cannot open shared object file: No such file or directory
|
||||
|
||||
下载rpm包:
|
||||
https://mirrors.aliyun.com/centos/8/AppStream/x86_64/os/Packages/compat-openssl10-1.0.2o-3.el8.x86_64.rpm
|
||||
安装rpm包:
|
||||
|
||||
```shell
|
||||
rpm -i compat-openssl10-1.0.2o-3.el8.x86_64.rpm
|
||||
错误:依赖检测失败:
|
||||
make 被 compat-openssl10-1:1.0.2o-3.el8.x86_64 需要
|
||||
rpm -i compat-openssl10-1.0.2o-3.el8.x86_64.rpm --nodeps --force
|
||||
|
||||
mysql: error while loading shared libraries: libncurses.so.5: cannot open shared object file: No such file or directory
|
||||
cp /usr/lib64/libncurses.so.6 /usr/lib64/libncurses.so.5
|
||||
|
||||
mysql: error while loading shared libraries: libtinfo.so.5: cannot open shared object file: No such file or directory
|
||||
cp /usr/lib64/libtinfo.so.6 /usr/lib64/libtinfo.so.5
|
||||
```
|
||||
|
||||
|
||||
|
||||
# Linux 卸载MySQL
|
||||
|
||||
## 二进制方式
|
||||
|
||||
```shell
|
||||
rpm -qa | grep -i mysql
|
||||
|
||||
# 如下所示
|
||||
mysql-community-release-el7-5.noarch
|
||||
mysql-community-libs-5.6.51-2.el7.x86_64
|
||||
mysql-community-client-5.6.51-2.el7.x86_64
|
||||
mysql-community-server-5.6.51-2.el7.x86_64
|
||||
mysql-community-common-5.6.51-2.el7.x86_64
|
||||
|
||||
systemctl stop mysqld
|
||||
|
||||
rpm -ev mysql-community-release-el7-5.noarch
|
||||
rpm -ev mysql-community-libs-5.6.51-2.el7.x86_64
|
||||
rpm -ev mysql-community-client-5.6.51-2.el7.x86_64
|
||||
rpm -ev mysql-community-server-5.6.51-2.el7.x86_64
|
||||
rpm -ev mysql-community-common-5.6.51-2.el7.x86_64
|
||||
|
||||
find / -name mysql
|
||||
|
||||
# 如下所示
|
||||
/var/lib/mysql
|
||||
/var/lib/mysql/mysql
|
||||
/usr/local/mysql
|
||||
/usr/lib64/mysql
|
||||
/usr/share/mysql
|
||||
/usr/bin/mysql
|
||||
/etc/logrotate.d/mysql
|
||||
/etc/selinux/targeted/active/modules/100/mysql
|
||||
|
||||
rm -rf /var/lib/mysql
|
||||
rm -rf /var/lib/mysql/mysql
|
||||
rm -rf /usr/local/mysql
|
||||
rm -rf /usr/lib64/mysql
|
||||
rm -rf /usr/share/mysql
|
||||
rm -rf /usr/bin/mysql
|
||||
rm -rf /etc/logrotate.d/mysql
|
||||
rm -rf /etc/selinux/targeted/active/modules/100/mysql
|
||||
|
||||
rm -rf /etc/my.cnf
|
||||
|
||||
rpm -qa | grep -i mysql
|
||||
```
|
||||
|
||||
|
||||
|
||||
# MySQL 客户端
|
||||
|
||||
@@ -0,0 +1,489 @@
|
||||
---
|
||||
title: OpenCode
|
||||
date: 2026-06-13 10:34:02
|
||||
tags:
|
||||
---
|
||||
|
||||
# OpenCode 安装指南
|
||||
|
||||
## Windows 安装方式
|
||||
|
||||
### 方式一:使用 npm 安装(推荐)
|
||||
|
||||
1. 确保已安装 Node.js(建议版本 16 或更高)
|
||||
2. 打开 PowerShell 或命令提示符
|
||||
3. 运行以下命令进行全局安装:
|
||||
```bash
|
||||
npm i -g opencode-ai
|
||||
```
|
||||
4. 安装完成后,可以通过以下命令验证安装:
|
||||
```bash
|
||||
opencode --version
|
||||
```
|
||||
|
||||
### 方式二:使用 curl 安装(需要 WSL 或 Git Bash)
|
||||
|
||||
如果您使用的是 Windows Subsystem for Linux (WSL) 或 Git Bash,可以使用以下命令:
|
||||
|
||||
```bash
|
||||
curl -fsSL https://opencode.ai/install | bash
|
||||
```
|
||||
|
||||
**注意:** 此方式需要在 Unix-like 环境中运行,Windows 原生的命令提示符或 PowerShell 不支持此命令。
|
||||
|
||||
## 其他操作系统安装方式
|
||||
|
||||
### Linux/macOS
|
||||
|
||||
```bash
|
||||
curl -fsSL https://opencode.ai/install | bash
|
||||
```
|
||||
|
||||
或使用 npm:
|
||||
|
||||
```bash
|
||||
npm i -g opencode-ai
|
||||
```
|
||||
|
||||
## 常见问题
|
||||
|
||||
### PowerShell 中使用 curl 安装后命令不识别
|
||||
|
||||
**问题描述:** 在 PowerShell 中运行 `curl -fsSL https://opencode.ai/install | bash` 后,`opencode` 命令无法识别。
|
||||
|
||||
**原因分析:**
|
||||
1. PowerShell 中的 `curl` 是 `Invoke-WebRequest` 的别名,不是真正的 curl
|
||||
2. `bash` 命令在 PowerShell 中不可用(除非安装了 WSL 或 Git Bash)
|
||||
3. 即使安装成功,安装路径可能不在 Windows PATH 中
|
||||
|
||||
**解决方案:**
|
||||
|
||||
#### 方案一:使用 npm 安装(推荐)
|
||||
```bash
|
||||
npm i -g opencode-ai
|
||||
```
|
||||
|
||||
#### 方案二:在 WSL 或 Git Bash 中安装
|
||||
1. 打开 WSL 或 Git Bash
|
||||
2. 运行安装命令:
|
||||
```bash
|
||||
curl -fsSL https://opencode.ai/install | bash
|
||||
```
|
||||
3. 如果仍然不识别,检查安装路径并添加到 PATH
|
||||
|
||||
#### 方案三:手动添加 PATH
|
||||
如果已安装但命令不识别:
|
||||
1. 找到安装位置(通常在 `~/.local/bin` 或 `/usr/local/bin`)
|
||||
2. 将路径添加到 Windows PATH:
|
||||
```powershell
|
||||
[Environment]::SetEnvironmentVariable("PATH", $env:PATH + ";C:\path\to\opencode", "User")
|
||||
```
|
||||
3. 重启 PowerShell
|
||||
|
||||
### nvm 用户切换 Node.js 版本后 opencode 不可用
|
||||
|
||||
**问题描述:** 使用 nvm(Node Version Manager)管理 Node.js 版本时,切换版本后之前全局安装的 opencode 命令无法识别。
|
||||
|
||||
**原因分析:**
|
||||
nvm 为每个 Node.js 版本维护独立的全局包目录。当您切换 Node.js 版本时:
|
||||
- 每个版本有自己独立的 `node_modules` 目录
|
||||
- 之前版本安装的全局包在新版本中不可用
|
||||
- 需要重新安装全局包
|
||||
|
||||
**解决方案:**
|
||||
|
||||
#### 方案一:为当前版本重新安装(推荐)
|
||||
```bash
|
||||
# 切换到目标 Node.js 版本
|
||||
nvm use 18
|
||||
|
||||
# 重新安装 opencode
|
||||
npm i -g opencode-ai
|
||||
```
|
||||
|
||||
#### 方案二:使用 nvm 的默认包迁移功能
|
||||
```bash
|
||||
# 设置默认 Node.js 版本
|
||||
nvm alias default 18
|
||||
|
||||
# 重新安装全局包
|
||||
npm i -g opencode-ai
|
||||
```
|
||||
|
||||
#### 方案三:使用 nvm 的 --default-packages 参数
|
||||
在安装 Node.js 版本时指定默认包:
|
||||
```bash
|
||||
# 设置默认包列表
|
||||
echo "opencode-ai" > ~/.nvm/default-packages
|
||||
|
||||
# 安装新版本时会自动安装默认包
|
||||
nvm install 18
|
||||
```
|
||||
|
||||
#### 方案四:检查当前 Node.js 版本
|
||||
```bash
|
||||
# 查看当前使用的 Node.js 版本
|
||||
node --version
|
||||
|
||||
# 查看 nvm 列表
|
||||
nvm list
|
||||
|
||||
# 切回之前安装 opencode 的版本
|
||||
nvm use <之前版本号>
|
||||
```
|
||||
|
||||
**最佳实践:**
|
||||
1. 在切换版本后检查全局包:`npm list -g --depth=0`
|
||||
2. 为常用版本安装 opencode:`nvm use <版本> && npm i -g opencode-ai`
|
||||
3. 考虑使用 `nvm alias default <版本>` 设置默认版本
|
||||
|
||||
#### 方案五:配置独立的全局包目录(一劳永逸)
|
||||
|
||||
将 npm 全局包目录设置到固定位置,不依赖于 nvm 管理的 Node.js 版本:
|
||||
|
||||
```bash
|
||||
# 1. 创建全局包目录
|
||||
mkdir -p ~/.npm-global
|
||||
|
||||
# 2. 配置 npm 使用新目录
|
||||
npm config set prefix ~/.npm-global
|
||||
|
||||
# 3. 添加到 PATH(添加到 ~/.bashrc 或 ~/.zshrc)
|
||||
echo 'export PATH=~/.npm-global/bin:$PATH' >> ~/.bashrc
|
||||
source ~/.bashrc
|
||||
|
||||
# 4. 安装 opencode
|
||||
npm i -g opencode-ai
|
||||
```
|
||||
|
||||
**优点:**
|
||||
- 所有 Node.js 版本共享同一套全局包
|
||||
- 切换版本后无需重新安装
|
||||
- 一次安装,永久可用
|
||||
|
||||
**注意:** 如果遇到包兼容性问题,可以删除 `~/.npm-global` 目录并重新配置。
|
||||
|
||||
#### 方案六:使用 nvm 的 reinstall-packages 迁移包
|
||||
|
||||
如果已经在某个版本下安装了 opencode,可以迁移到其他版本:
|
||||
|
||||
```bash
|
||||
# 查看当前版本
|
||||
nvm current
|
||||
|
||||
# 切换到目标版本
|
||||
nvm use 18
|
||||
|
||||
# 将之前版本的全局包迁移到当前版本
|
||||
nvm reinstall-packages <源版本号>
|
||||
```
|
||||
|
||||
例如:`nvm reinstall-packages 16.20.0` 将 16.20.0 版本的全局包迁移到当前版本。
|
||||
|
||||
### 权限问题
|
||||
如果在 Linux/macOS 上遇到权限错误,请使用 `sudo`:
|
||||
```bash
|
||||
sudo npm i -g opencode-ai
|
||||
```
|
||||
|
||||
### 网络问题
|
||||
如果下载速度慢,可以尝试使用镜像源:
|
||||
```bash
|
||||
npm config set registry https://registry.npmmirror.com
|
||||
npm i -g opencode-ai
|
||||
```
|
||||
|
||||
## 验证安装
|
||||
|
||||
安装完成后,运行以下命令验证:
|
||||
```bash
|
||||
opencode --version
|
||||
```
|
||||
|
||||
如果显示版本号,则表示安装成功。
|
||||
|
||||
## 迁移 OpenCode 配置
|
||||
|
||||
当需要在新机器上恢复 OpenCode 配置时,可以使用以下方法迁移。
|
||||
|
||||
### 源机器打包
|
||||
|
||||
在源机器上打包 OpenCode 配置文件和目录:
|
||||
|
||||
##### Linux/macOS
|
||||
|
||||
```bash
|
||||
tar -czf opencode-migration.tar.gz -C ~ \
|
||||
.config/opencode/opencode.json \
|
||||
.config/opencode/oh-my-openagent.json \
|
||||
.config/opencode/AGENTS.md \
|
||||
.agents/ \
|
||||
.local/share/opencode/auth.json \
|
||||
.cache/oh-my-opencode/connected-providers.json
|
||||
```
|
||||
|
||||
**打包内容说明:**
|
||||
|
||||
- `opencode.json`:OpenCode 主配置文件
|
||||
- `oh-my-openagent.json`:Oh My OpenAgent 配置
|
||||
- `AGENTS.md`:Agent 指令文件
|
||||
- `~/.agents/`:自定义 Agent 和 Skill 目录
|
||||
- `auth.json`:认证信息(登录状态等)
|
||||
- `connected-providers.json`:已连接的 Provider 配置
|
||||
|
||||
### 新机器恢复
|
||||
|
||||
在新机器上恢复配置:
|
||||
|
||||
```bash
|
||||
# 解压配置文件到用户目录
|
||||
tar -xzf opencode-migration.tar.gz -C ~/
|
||||
|
||||
# 进入 OpenCode 配置目录并安装依赖
|
||||
cd ~/.config/opencode && npm install
|
||||
```
|
||||
|
||||
### 迁移后验证
|
||||
|
||||
```bash
|
||||
# 验证 OpenCode 版本
|
||||
opencode --version
|
||||
|
||||
# 检查配置文件是否正确恢复
|
||||
ls -la ~/.config/opencode/
|
||||
|
||||
# 测试 Agent 是否正常
|
||||
opencode agent list
|
||||
```
|
||||
|
||||
### 注意事项
|
||||
|
||||
- **认证信息**:`auth.json` 包含登录凭证,迁移后可能需要重新登录
|
||||
- **路径差异**:如果新机器用户名不同,需要调整配置文件中的路径
|
||||
- **依赖版本**:建议在新机器上使用相同或更新的 Node.js 版本
|
||||
- **权限问题**:确保解压后的文件权限正确(`chmod 600 ~/.local/share/opencode/auth.json`)
|
||||
|
||||
### Windows 系统迁移
|
||||
|
||||
Windows 下的 OpenCode 配置文件路径与 Linux/macOS 不同,需要使用 PowerShell 命令进行迁移。
|
||||
|
||||
#### 源机器打包(PowerShell)
|
||||
|
||||
```powershell
|
||||
# 创建临时目录存放配置文件
|
||||
$tempDir = "$env:TEMP\opencode-migration"
|
||||
New-Item -ItemType Directory -Path $tempDir -Force
|
||||
|
||||
# 复制配置文件到临时目录
|
||||
Copy-Item "$env:USERPROFILE\.config\opencode\opencode.json" $tempDir -ErrorAction SilentlyContinue
|
||||
Copy-Item "$env:USERPROFILE\.config\opencode\oh-my-openagent.json" $tempDir -ErrorAction SilentlyContinue
|
||||
Copy-Item "$env:USERPROFILE\.config\opencode\AGENTS.md" $tempDir -ErrorAction SilentlyContinue
|
||||
Copy-Item "$env:USERPROFILE\.agents" "$tempDir\.agents" -Recurse -ErrorAction SilentlyContinue
|
||||
Copy-Item "$env:USERPROFILE\.local\share\opencode\auth.json" $tempDir -ErrorAction SilentlyContinue
|
||||
Copy-Item "$env:USERPROFILE\.cache\oh-my-opencode\connected-providers.json" $tempDir -ErrorAction SilentlyContinue
|
||||
|
||||
# 压缩为 zip 文件
|
||||
Compress-Archive -Path "$tempDir\*" -DestinationPath "$env:USERPROFILE\Desktop\opencode-migration.zip"
|
||||
|
||||
# 清理临时目录
|
||||
Remove-Item -Path $tempDir -Recurse -Force
|
||||
|
||||
Write-Host "配置已打包到: $env:USERPROFILE\Desktop\opencode-migration.zip"
|
||||
```
|
||||
|
||||
#### 新机器恢复(PowerShell)
|
||||
|
||||
```powershell
|
||||
# 解压配置文件
|
||||
$zipPath = "$env:USERPROFILE\Desktop\opencode-migration.zip"
|
||||
$extractPath = "$env:USERPROFILE"
|
||||
|
||||
Expand-Archive -Path $zipPath -DestinationPath $extractPath -Force
|
||||
|
||||
# 进入 OpenCode 配置目录并安装依赖
|
||||
Set-Location "$env:USERPROFILE\.config\opencode"
|
||||
npm install
|
||||
|
||||
Write-Host "配置恢复完成!"
|
||||
```
|
||||
|
||||
#### Windows 配置文件路径
|
||||
|
||||
| 文件/目录 | Windows 路径 |
|
||||
| ---------- | ----------------------------------------------- |
|
||||
| 主配置目录 | `%USERPROFILE%\.config\opencode\` |
|
||||
| Agent 目录 | `%USERPROFILE%\.agents\` |
|
||||
| 认证信息 | `%USERPROFILE%\.local\share\opencode\auth.json` |
|
||||
| 缓存目录 | `%USERPROFILE%\.cache\oh-my-opencode\` |
|
||||
|
||||
#### 验证迁移(PowerShell)
|
||||
|
||||
```powershell
|
||||
# 检查配置文件是否存在
|
||||
Test-Path "$env:USERPROFILE\.config\opencode\opencode.json"
|
||||
Test-Path "$env:USERPROFILE\.agents"
|
||||
|
||||
# 查看配置目录内容
|
||||
Get-ChildItem "$env:USERPROFILE\.config\opencode\"
|
||||
|
||||
# 验证 OpenCode 版本
|
||||
opencode --version
|
||||
```
|
||||
|
||||
#### 使用 tar 命令(Windows 10+)
|
||||
|
||||
Windows 10 及更高版本内置了 tar 命令,也可以使用与 Linux/macOS 相同的方式:
|
||||
|
||||
```powershell
|
||||
# 打包
|
||||
tar -czf opencode-migration.tar.gz -C $env:USERPROFILE .config/opencode/opencode.json .config/opencode/oh-my-openagent.json .config/opencode/AGENTS.md .agents .local/share/opencode/auth.json .cache/oh-my-opencode/connected-providers.json
|
||||
|
||||
# 解压
|
||||
tar -xzf opencode-migration.tar.gz -C $env:USERPROFILE
|
||||
```
|
||||
|
||||
#### 注意事项
|
||||
|
||||
- **路径分隔符**:Windows 使用反斜杠 `\`,但 PowerShell 也支持正斜杠 `/`
|
||||
- **权限**:确保对配置目录有读写权限
|
||||
- **隐藏文件**:`.config`、`.agents` 等是隐藏目录,需显示隐藏文件才能看到
|
||||
- **npm 依赖**:恢复后需运行 `npm install` 安装依赖
|
||||
|
||||
|
||||
|
||||
# OpenCode 插件
|
||||
|
||||
## oh-my-openagent 使用教程
|
||||
|
||||
**Oh My OpenAgent**(简称 **OmO**)是一个开源的 AI 编程助手增强插件,前身叫 `oh-my-opencode`。
|
||||
|
||||
oh-my-openagent 运行在 OpenCode这个 AI 编程工具之上,把它变成一个由 **11 个专业 AI Agent** 组成的开发团队。
|
||||
|
||||
用一句话解释:
|
||||
|
||||
> **你发一个需求 → OmO 自动调度多个 AI 并行工作 → 比单个 AI 快数倍**
|
||||
|
||||
目前在 GitHub 上有 **54k+ Stars**,是最受欢迎的 OpenCode 插件。
|
||||
|
||||
- Github 地址:https://github.com/code-yeongyu/oh-my-openagent
|
||||
- 官网:https://ohmyopenagent.com/zh
|
||||
|
||||
### 安装
|
||||
|
||||
将以下提示词复制粘贴到你的大模型工具( OpenCode、Claude Code、AmpCode、Cursor 等):
|
||||
|
||||
```
|
||||
按照此链接说明安装并配置 oh-my-opencode:https://raw.githubusercontent.com/code-yeongyu/oh-my-openagent/refs/heads/dev/docs/guide/installation.md
|
||||
```
|
||||
|
||||
执行后,它就会自己安装好,安装过程可能有 API key 的配置选项,可以选择配置,也可以不配置:
|
||||
|
||||
|
||||
|
||||
## 认识 11 位 AI 团队成员(Agent)
|
||||
|
||||
OmO 内置了 11 个专门的 Agent,各司其职:
|
||||
|
||||
### 核心 Agent
|
||||
|
||||
| Agent | 角色 | 默认模型 | 什么时候用 |
|
||||
| :------------- | :----------------- | :-------------------- | :--------------------------------- |
|
||||
| **Sisyphus** | 主协调者、全能开发 | Claude Opus | 所有任务的入口,自动调度其他 Agent |
|
||||
| **Prometheus** | 战略规划师 | Claude Opus / GPT-5.4 | 复杂任务的计划制定 |
|
||||
| **Atlas** | 待办任务管理 | Kimi K2.5 | 跟踪多步骤任务进度 |
|
||||
|
||||
### 专业 Agent
|
||||
|
||||
| Agent | 角色 | 默认模型 | 擅长什么 |
|
||||
| :------------- | :---------------- | :------------ | :------------------------------- |
|
||||
| **Hephaestus** | 深度自主工作者 | GPT-5.3-codex | 长时间、高强度的独立编码任务 |
|
||||
| **Oracle** | 架构顾问/调试专家 | GPT-5.4 | 系统设计、疑难 bug 定位 |
|
||||
| **Momus** | 高精度审查员 | GPT-5.4 | 代码 review、输出验证 |
|
||||
| **Metis** | 计划评审 | Claude Opus | 检查 Prometheus 的计划是否有遗漏 |
|
||||
|
||||
### 工具型 Agent(快速、低成本)
|
||||
|
||||
| Agent | 角色 | 默认模型 | 为什么用便宜模型 |
|
||||
| :-------------------- | :------------- | :----------------------- | :------------------------------- |
|
||||
| **Explore** | 代码库快速搜索 | MiniMax / Grok Code Fast | 搜索任务不需要高智能,速度更重要 |
|
||||
| **Librarian** | 文档/代码检索 | MiniMax(免费) | 文档检索不需要深度推理 |
|
||||
| **Multimodal Looker** | 截图/视觉分析 | Kimi K2.5 | Kimi 擅长多模态理解 |
|
||||
|
||||
> 💡 **新手提示**:你不需要手动选择 Agent。Sisyphus 会根据你的任务类型自动调度合适的 Agent 组合。
|
||||
|
||||
## 三种工作模式
|
||||
|
||||
### 模式一:ultrawork(最轻松)
|
||||
|
||||
在提示词里加 `ultrawork` 或 `ulw`,一切自动化:
|
||||
|
||||
```
|
||||
ultrawork 帮我把这个 React 组件改成 TypeScript
|
||||
```
|
||||
|
||||
适合:日常开发任务,希望 AI 全自动完成的场景。
|
||||
|
||||
### 模式二:Prometheus 计划模式(最精准)
|
||||
|
||||
按 **Tab 键** 进入 Prometheus 模式。AI 会先通过问答了解你的需求,生成详细执行计划,确认后再开始执行。
|
||||
|
||||
流程:
|
||||
|
||||
1. 按 `Tab` 切换到 Prometheus 模式
|
||||
2. 描述你的需求,AI 会问你一些澄清问题
|
||||
3. AI 生成执行计划,你确认
|
||||
4. 输入 `/start-work` 开始执行
|
||||
|
||||
适合:复杂功能开发、架构重构等需要精确规划的场景。
|
||||
|
||||
### 模式三:普通对话(最灵活)
|
||||
|
||||
直接输入你的问题或需求,不加任何关键词:
|
||||
|
||||
```
|
||||
解释一下 src/auth.ts 里的 JWT 验证逻辑
|
||||
```
|
||||
|
||||
适合:问问题、代码解释、小修改等轻量任务。
|
||||
|
||||
|
||||
|
||||
## 配置文件详解
|
||||
|
||||
OmO 有两个配置文件,优先级不同:
|
||||
|
||||
- 项目级配置(优先级更高):**.opencode/oh-my-opencode.jsonc**
|
||||
- 用户级配置(全局默认):**~/.config/opencode/oh-my-opencode.jsonc**
|
||||
|
||||
配置文件支持注释(JSONC 格式),也支持 JSON Schema 自动补全:
|
||||
|
||||
```json
|
||||
{
|
||||
"$schema": "https://raw.githubusercontent.com/code-yeongyu/oh-my-openagent/dev/assets/oh-my-opencode.schema.json",
|
||||
|
||||
"agents": {
|
||||
// 主协调 Agent,官方建议用 Claude Opus 系列
|
||||
"sisyphus": {
|
||||
"model": "anthropic/claude-opus-4-6"
|
||||
},
|
||||
// 架构顾问,官方建议用 GPT 系列
|
||||
"Hephaestus": {
|
||||
"model": "openai/gpt-5.4",
|
||||
"variant": "high"
|
||||
}
|
||||
}
|
||||
}
|
||||
```
|
||||
|
||||
> **新手建议**:安装完成后先不要修改配置,默认设置已经很好。
|
||||
|
||||
## 常用命令
|
||||
|
||||
在对话界面内:
|
||||
|
||||
| 快捷键/命令 | 说明 |
|
||||
| :------------------ | :--------------------------------- |
|
||||
| `Tab` | 切换到 Prometheus 计划模式 |
|
||||
| `/start-work` | 在 Prometheus 模式下开始执行计划 |
|
||||
| `ultrawork` / `ulw` | 在提示词里加上,激活全功能并行模式 |
|
||||
|
||||
+742
-2
@@ -5,7 +5,9 @@ tags: [PowerShell, Windows, Shell, 命令行]
|
||||
categories: [开发工具, Windows]
|
||||
---
|
||||
|
||||
# PowerShell 7 使用 Oh My Posh 来美化命令行
|
||||
# PowerShell 7 提示符美化
|
||||
|
||||
> PowerShell 有两个主流的提示符美化工具:[Oh My Posh](https://ohmyposh.dev/) 和 [Starship](https://starship.dev/),二者选其一即可。
|
||||
|
||||
## 安装 PowerShell 7
|
||||
|
||||
@@ -38,10 +40,12 @@ winget install --id Microsoft.PowerShell --source winget
|
||||
winget install --id Microsoft.PowerShell.Preview --source winget
|
||||
```
|
||||
|
||||
## 安装 Oh My Posh
|
||||
## Oh My Posh
|
||||
|
||||
官方文档地址:https://ohmyposh.dev/
|
||||
|
||||
### 安装
|
||||
|
||||
最好在管理员模式下运行 `powershell`
|
||||
|
||||
下载安装,在 `powershell` 命令行中输入
|
||||
@@ -89,6 +93,349 @@ notepad $Profile
|
||||
oh-my-posh init pwsh --config "$env:POSH_THEMES_PATH/montys.omp.json" | Invoke-Expression
|
||||
```
|
||||
|
||||
## Starship
|
||||
|
||||
[Starship](https://starship.dev/) 是跨平台的提示符工具,支持 Windows、Linux、macOS。与 Oh My Posh 功能类似,二者选其一即可。
|
||||
|
||||
### 安装
|
||||
|
||||
```powershell
|
||||
winget install --id Starship.Starship
|
||||
```
|
||||
|
||||
### 配置文件位置
|
||||
|
||||
Windows 下配置文件路径:`~/.config/starship.toml`
|
||||
|
||||
```powershell
|
||||
# 创建配置目录和文件
|
||||
mkdir -p ~/.config
|
||||
New-Item -Path ~/.config/starship.toml -ItemType File -Force
|
||||
|
||||
# 用 VSCode 打开编辑
|
||||
code ~/.config/starship.toml
|
||||
```
|
||||
|
||||
### 初始化
|
||||
|
||||
在 `$PROFILE` 文件中添加:
|
||||
|
||||
```powershell
|
||||
# Starship 初始化(必须放最后)
|
||||
Invoke-Expression (&starship init powershell)
|
||||
```
|
||||
|
||||
### 完整配置(Catppuccin Mocha 主题)
|
||||
|
||||
将以下内容粘贴到 `starship.toml` 文件中:
|
||||
|
||||
```toml
|
||||
"$schema" = 'https://starship.rs/config-schema.json'
|
||||
|
||||
format = """
|
||||
[](red)\
|
||||
$os\
|
||||
$username\
|
||||
[](bg:peach fg:red)\
|
||||
$directory\
|
||||
[](bg:yellow fg:peach)\
|
||||
$git_branch\
|
||||
$git_status\
|
||||
[](fg:yellow bg:green)\
|
||||
$c\
|
||||
$rust\
|
||||
$golang\
|
||||
$nodejs\
|
||||
$bun\
|
||||
$php\
|
||||
$java\
|
||||
$kotlin\
|
||||
$haskell\
|
||||
$python\
|
||||
[](fg:green bg:sapphire)\
|
||||
$conda\
|
||||
[](fg:sapphire bg:lavender)\
|
||||
$time\
|
||||
[ ](fg:lavender)\
|
||||
$cmd_duration\
|
||||
$line_break\
|
||||
$character"""
|
||||
|
||||
palette = 'catppuccin_mocha'
|
||||
|
||||
[os]
|
||||
disabled = false
|
||||
style = "bg:red fg:crust"
|
||||
|
||||
[os.symbols]
|
||||
Windows = ""
|
||||
Ubuntu = ""
|
||||
SUSE = ""
|
||||
Raspbian = ""
|
||||
Mint = ""
|
||||
Macos = ""
|
||||
Manjaro = ""
|
||||
Linux = ""
|
||||
Gentoo = ""
|
||||
Fedora = ""
|
||||
Alpine = ""
|
||||
Amazon = ""
|
||||
Android = ""
|
||||
AOSC = ""
|
||||
Arch = ""
|
||||
Artix = ""
|
||||
CentOS = ""
|
||||
Debian = ""
|
||||
Redhat = ""
|
||||
RedHatEnterprise = ""
|
||||
|
||||
[username]
|
||||
show_always = true
|
||||
style_user = "bg:red fg:crust"
|
||||
style_root = "bg:red fg:crust"
|
||||
format = '[ $user]($style)'
|
||||
|
||||
[directory]
|
||||
style = "bg:peach fg:crust"
|
||||
format = "[ $path ]($style)"
|
||||
truncation_length = 3
|
||||
truncation_symbol = "…/"
|
||||
|
||||
[directory.substitutions]
|
||||
"Documents" = " "
|
||||
"Downloads" = " "
|
||||
"Music" = " "
|
||||
"Pictures" = " "
|
||||
"Developer" = " "
|
||||
|
||||
[git_branch]
|
||||
symbol = ""
|
||||
style = "bg:yellow"
|
||||
format = '[[ $symbol $branch ](fg:crust bg:yellow)]($style)'
|
||||
|
||||
[git_status]
|
||||
style = "bg:yellow"
|
||||
format = '[[($all_status$ahead_behind )](fg:crust bg:yellow)]($style)'
|
||||
|
||||
[nodejs]
|
||||
symbol = ""
|
||||
style = "bg:green"
|
||||
format = '[[ $symbol( $version) ](fg:crust bg:green)]($style)'
|
||||
|
||||
[bun]
|
||||
symbol = ""
|
||||
style = "bg:green"
|
||||
format = '[[ $symbol( $version) ](fg:crust bg:green)]($style)'
|
||||
|
||||
[c]
|
||||
symbol = " "
|
||||
style = "bg:green"
|
||||
format = '[[ $symbol( $version) ](fg:crust bg:green)]($style)'
|
||||
|
||||
[rust]
|
||||
symbol = ""
|
||||
style = "bg:green"
|
||||
format = '[[ $symbol( $version) ](fg:crust bg:green)]($style)'
|
||||
|
||||
[golang]
|
||||
symbol = ""
|
||||
style = "bg:green"
|
||||
format = '[[ $symbol( $version) ](fg:crust bg:green)]($style)'
|
||||
|
||||
[php]
|
||||
symbol = ""
|
||||
style = "bg:green"
|
||||
format = '[[ $symbol( $version) ](fg:crust bg:green)]($style)'
|
||||
|
||||
[java]
|
||||
symbol = " "
|
||||
style = "bg:green"
|
||||
format = '[[ $symbol( $version) ](fg:crust bg:green)]($style)'
|
||||
|
||||
[kotlin]
|
||||
symbol = ""
|
||||
style = "bg:green"
|
||||
format = '[[ $symbol( $version) ](fg:crust bg:green)]($style)'
|
||||
|
||||
[haskell]
|
||||
symbol = ""
|
||||
style = "bg:green"
|
||||
format = '[[ $symbol( $version) ](fg:crust bg:green)]($style)'
|
||||
|
||||
[python]
|
||||
symbol = ""
|
||||
style = "bg:green"
|
||||
format = '[[ $symbol( $version)(\(#$virtualenv\)) ](fg:crust bg:green)]($style)'
|
||||
|
||||
[docker_context]
|
||||
symbol = ""
|
||||
style = "bg:sapphire"
|
||||
format = '[[ $symbol( $context) ](fg:crust bg:sapphire)]($style)'
|
||||
|
||||
[conda]
|
||||
symbol = " "
|
||||
style = "fg:crust bg:sapphire"
|
||||
format = '[$symbol$environment ]($style)'
|
||||
ignore_base = false
|
||||
|
||||
[time]
|
||||
disabled = false
|
||||
time_format = "%R"
|
||||
style = "bg:lavender"
|
||||
format = '[[ $time ](fg:crust bg:lavender)]($style)'
|
||||
|
||||
[line_break]
|
||||
disabled = false
|
||||
|
||||
[character]
|
||||
disabled = false
|
||||
success_symbol = '[❯](bold fg:green)'
|
||||
error_symbol = '[❯](bold fg:red)'
|
||||
vimcmd_symbol = '[❮](bold fg:green)'
|
||||
vimcmd_replace_one_symbol = '[❮](bold fg:lavender)'
|
||||
vimcmd_replace_symbol = '[❮](bold fg:lavender)'
|
||||
vimcmd_visual_symbol = '[❮](bold fg:yellow)'
|
||||
|
||||
[cmd_duration]
|
||||
show_milliseconds = true
|
||||
format = " in $duration "
|
||||
style = "bg:lavender"
|
||||
disabled = false
|
||||
show_notifications = true
|
||||
min_time_to_notify = 45000
|
||||
|
||||
[palettes.catppuccin_mocha]
|
||||
rosewater = "#f5e0dc"
|
||||
flamingo = "#f2cdcd"
|
||||
pink = "#f5c2e7"
|
||||
mauve = "#cba6f7"
|
||||
red = "#f38ba8"
|
||||
maroon = "#eba0ac"
|
||||
peach = "#fab387"
|
||||
yellow = "#f9e2af"
|
||||
green = "#a6e3a1"
|
||||
teal = "#94e2d5"
|
||||
sky = "#89dceb"
|
||||
sapphire = "#74c7ec"
|
||||
blue = "#89b4fa"
|
||||
lavender = "#b4befe"
|
||||
text = "#cdd6f4"
|
||||
subtext1 = "#bac2de"
|
||||
subtext0 = "#a6adc8"
|
||||
overlay2 = "#9399b2"
|
||||
overlay1 = "#7f849c"
|
||||
overlay0 = "#6c7086"
|
||||
surface2 = "#585b70"
|
||||
surface1 = "#45475a"
|
||||
surface0 = "#313244"
|
||||
base = "#1e1e2e"
|
||||
mantle = "#181825"
|
||||
crust = "#11111b"
|
||||
|
||||
[palettes.catppuccin_frappe]
|
||||
rosewater = "#f2d5cf"
|
||||
flamingo = "#eebebe"
|
||||
pink = "#f4b8e4"
|
||||
mauve = "#ca9ee6"
|
||||
red = "#e78284"
|
||||
maroon = "#ea999c"
|
||||
peach = "#ef9f76"
|
||||
yellow = "#e5c890"
|
||||
green = "#a6d189"
|
||||
teal = "#81c8be"
|
||||
sky = "#99d1db"
|
||||
sapphire = "#85c1dc"
|
||||
blue = "#8caaee"
|
||||
lavender = "#babbf1"
|
||||
text = "#c6d0f5"
|
||||
subtext1 = "#b5bfe2"
|
||||
subtext0 = "#a5adce"
|
||||
overlay2 = "#949cbb"
|
||||
overlay1 = "#838ba7"
|
||||
overlay0 = "#737994"
|
||||
surface2 = "#626880"
|
||||
surface1 = "#51576d"
|
||||
surface0 = "#414559"
|
||||
base = "#303446"
|
||||
mantle = "#292c3c"
|
||||
crust = "#232634"
|
||||
|
||||
[palettes.catppuccin_latte]
|
||||
rosewater = "#dc8a78"
|
||||
flamingo = "#dd7878"
|
||||
pink = "#ea76cb"
|
||||
mauve = "#8839ef"
|
||||
red = "#d20f39"
|
||||
maroon = "#e64553"
|
||||
peach = "#fe640b"
|
||||
yellow = "#df8e1d"
|
||||
green = "#40a02b"
|
||||
teal = "#179299"
|
||||
sky = "#04a5e5"
|
||||
sapphire = "#209fb5"
|
||||
blue = "#1e66f5"
|
||||
lavender = "#7287fd"
|
||||
text = "#4c4f69"
|
||||
subtext1 = "#5c5f77"
|
||||
subtext0 = "#6c6f85"
|
||||
overlay2 = "#7c7f93"
|
||||
overlay1 = "#8c8fa1"
|
||||
overlay0 = "#9ca0b0"
|
||||
surface2 = "#acb0be"
|
||||
surface1 = "#bcc0cc"
|
||||
surface0 = "#ccd0da"
|
||||
base = "#eff1f5"
|
||||
mantle = "#e6e9ef"
|
||||
crust = "#dce0e8"
|
||||
|
||||
[palettes.catppuccin_macchiato]
|
||||
rosewater = "#f4dbd6"
|
||||
flamingo = "#f0c6c6"
|
||||
pink = "#f5bde6"
|
||||
mauve = "#c6a0f6"
|
||||
red = "#ed8796"
|
||||
maroon = "#ee99a0"
|
||||
peach = "#f5a97f"
|
||||
yellow = "#eed49f"
|
||||
green = "#a6da95"
|
||||
teal = "#8bd5ca"
|
||||
sky = "#91d7e3"
|
||||
sapphire = "#7dc4e4"
|
||||
blue = "#8aadf4"
|
||||
lavender = "#b7bdf8"
|
||||
text = "#cad3f5"
|
||||
subtext1 = "#b8c0e0"
|
||||
subtext0 = "#a5adcb"
|
||||
overlay2 = "#939ab7"
|
||||
overlay1 = "#8087a2"
|
||||
overlay0 = "#6e738d"
|
||||
surface2 = "#5b6078"
|
||||
surface1 = "#494d64"
|
||||
surface0 = "#363a4f"
|
||||
base = "#24273a"
|
||||
mantle = "#1e2030"
|
||||
crust = "#181926"
|
||||
```
|
||||
|
||||
### 切换主题
|
||||
|
||||
修改 `palette` 字段即可切换主题:
|
||||
|
||||
```toml
|
||||
# 可选值:catppuccin_mocha(默认)、catppuccin_frappe、catppuccin_latte、catppuccin_macchiato
|
||||
palette = 'catppuccin_mocha'
|
||||
```
|
||||
|
||||
### 验证配置
|
||||
|
||||
```powershell
|
||||
# 检查 Starship 版本
|
||||
starship --version
|
||||
|
||||
# 测试配置是否正确
|
||||
starship config
|
||||
```
|
||||
|
||||
## 扩展模块
|
||||
|
||||
### PowerShellGet
|
||||
@@ -121,6 +468,399 @@ PowerShellGet\Install-Module posh-git -Scope CurrentUser -Force
|
||||
Install-Module PSReadLine -Force
|
||||
```
|
||||
|
||||
### [PSFzf](https://github.com/kelleymaureen/PSFzf)
|
||||
|
||||
> [PSFzf](https://github.com/kelleymaureen/PSFzf) 是 fzf 的 PowerShell 集成模块,提供模糊搜索历史命令和文件功能。
|
||||
|
||||
```powershell
|
||||
# 安装 PSFzf 模块
|
||||
Install-Module PSFzf -Scope CurrentUser -Force
|
||||
|
||||
# 安装 fzf 本体(PSFzf 的底层依赖)
|
||||
winget install junegunn.fzf
|
||||
```
|
||||
|
||||
## 终端增强配置(PSReadLine + PSFzf)
|
||||
|
||||
> 参考:[PowerShell 终端增强配置指南](https://mp.weixin.qq.com/s/DV-T4Tr4KaonFdgutuzhQQ)
|
||||
|
||||
### 前置准备
|
||||
|
||||
#### 确认 PowerShell 版本
|
||||
|
||||
```powershell
|
||||
$PSVersionTable.PSVersion
|
||||
```
|
||||
|
||||
- 主版本号为 `5` → 使用 **PS5.1 方案**
|
||||
- 主版本号为 `7` → 使用 **PS7+ 方案**
|
||||
|
||||
#### 确认 Profile 文件路径
|
||||
|
||||
```powershell
|
||||
# 查看路径
|
||||
echo $PROFILE
|
||||
|
||||
# 若文件不存在则创建
|
||||
if (!(Test-Path $PROFILE)) {
|
||||
New-Item -ItemType File -Path $PROFILE -Force
|
||||
}
|
||||
|
||||
# 用 VSCode 打开编辑
|
||||
code $PROFILE
|
||||
```
|
||||
|
||||
> PS5.1 的 Profile 路径通常为:`C:\Users\<用户名>\Documents\WindowsPowerShell\Microsoft.PowerShell_profile.ps1`
|
||||
>
|
||||
> PS7+ 的 Profile 路径通常为:`C:\Users\<用户名>\Documents\PowerShell\Microsoft.PowerShell_profile.ps1`
|
||||
>
|
||||
> 两个版本的 Profile **互相独立**,需分别配置。
|
||||
|
||||
#### 设置执行策略(如遇权限报错)
|
||||
|
||||
```powershell
|
||||
Set-ExecutionPolicy -ExecutionPolicy RemoteSigned -Scope CurrentUser
|
||||
```
|
||||
|
||||
### 一次性安装依赖
|
||||
|
||||
#### PowerShell 7+ 安装依赖
|
||||
|
||||
```powershell
|
||||
# 1. 信任 PSGallery
|
||||
Set-PSRepository -Name PSGallery -InstallationPolicy Trusted
|
||||
|
||||
# 2. 安装最新版 PSReadLine
|
||||
Install-Module PSReadLine -Force -Scope CurrentUser
|
||||
|
||||
# 3. 安装 posh-git
|
||||
Install-Module posh-git -Scope CurrentUser -Force
|
||||
|
||||
# 4. 安装 PSFzf
|
||||
Install-Module PSFzf -Scope CurrentUser -Force
|
||||
|
||||
# 5. 安装 fzf 本体
|
||||
winget install junegunn.fzf
|
||||
|
||||
# 6. 安装 winget 命令未找到 提示工具
|
||||
Install-PSResource -Name Microsoft.WinGet.CommandNotFound
|
||||
```
|
||||
|
||||
#### PowerShell 5.1 安装依赖
|
||||
|
||||
```powershell
|
||||
# 1. 信任 PSGallery
|
||||
Set-PSRepository -Name PSGallery -InstallationPolicy Trusted
|
||||
|
||||
# 2. 安装 PSReadLine(PS5.1 最高兼容 2.3.x,必须指定版本)
|
||||
Install-Module PSReadLine -RequiredVersion 2.3.4 -Force -Scope CurrentUser -SkipPublisherCheck
|
||||
|
||||
# 3. 安装 posh-git
|
||||
Install-Module posh-git -Scope CurrentUser -Force
|
||||
|
||||
# 4. 安装 PSFzf
|
||||
Install-Module PSFzf -Scope CurrentUser -Force
|
||||
|
||||
# 5. 安装 fzf 本体
|
||||
winget install junegunn.fzf
|
||||
```
|
||||
|
||||
### 完整 Profile 配置
|
||||
|
||||
#### PowerShell 7+ Profile
|
||||
|
||||
将以下内容完整粘贴到 `$PROFILE` 文件中:
|
||||
|
||||
```powershell
|
||||
# ════════════════════════════════════════════════════════════
|
||||
# PowerShell 7+ Profile
|
||||
# 功能:动态窗口标题 + 智能自动补全 + Starship 集成
|
||||
# ════════════════════════════════════════════════════════════
|
||||
|
||||
# ── 模块导入 ─────────────────────────────────────────────────
|
||||
Import-Module PSReadLine
|
||||
Import-Module posh-git -ErrorAction SilentlyContinue
|
||||
Import-Module PSFzf -ErrorAction SilentlyContinue
|
||||
|
||||
# ── PSReadLine 配置 ──────────────────────────────────────────
|
||||
# PS7+ 支持 HistoryAndPlugin(结合历史和插件两种来源预测)
|
||||
Set-PSReadLineOption -PredictionSource HistoryAndPlugin
|
||||
|
||||
# PS7+ 支持 ListView(下拉候选列表,比 InlineView 更直观)
|
||||
Set-PSReadLineOption -PredictionViewStyle ListView
|
||||
|
||||
Set-PSReadLineOption -HistorySearchCursorMovesToEnd
|
||||
Set-PSReadLineOption -MaximumHistoryCount 10000
|
||||
|
||||
Set-PSReadLineOption -Colors @{
|
||||
Command = 'Cyan'
|
||||
Parameter = 'DarkCyan'
|
||||
String = 'Yellow'
|
||||
Operator = 'Magenta'
|
||||
Variable = 'Green'
|
||||
Comment = 'DarkGray'
|
||||
InlinePrediction = 'DarkGray'
|
||||
ListPrediction = 'DarkCyan'
|
||||
}
|
||||
|
||||
# ── 快捷键绑定 ───────────────────────────────────────────────
|
||||
Set-PSReadLineKeyHandler -Key Tab -Function MenuComplete
|
||||
Set-PSReadLineKeyHandler -Key Shift+Tab -Function MenuComplete
|
||||
Set-PSReadLineKeyHandler -Key Ctrl+Spacebar -Function PossibleCompletions
|
||||
Set-PSReadLineKeyHandler -Key UpArrow -Function HistorySearchBackward
|
||||
Set-PSReadLineKeyHandler -Key DownArrow -Function HistorySearchForward
|
||||
Set-PSReadLineKeyHandler -Key Ctrl+r -Function ReverseSearchHistory
|
||||
# F2 可在 InlineView 和 ListView 之间实时切换(PS7+ 专属)
|
||||
Set-PSReadLineKeyHandler -Key F2 -Function SwitchPredictionView
|
||||
|
||||
# ── PSFzf 配置 ───────────────────────────────────────────────
|
||||
if (Get-Module PSFzf -ErrorAction SilentlyContinue) {
|
||||
Set-PSFzfOption -PSReadLineChordProvider 'Ctrl+t'
|
||||
Set-PSFzfOption -PSReadLineChordReverseHistory 'Ctrl+r'
|
||||
}
|
||||
|
||||
# ── WinGet 补全 ──────────────────────────────────────────────
|
||||
if (Get-Command winget -ErrorAction SilentlyContinue) {
|
||||
Register-ArgumentCompleter -Native -CommandName winget -ScriptBlock {
|
||||
param($wordToComplete, $commandAst, $cursorPosition)
|
||||
# PS7+ 推荐显式设置编码,避免中文路径乱码
|
||||
[Console]::InputEncoding = [System.Text.Utf8Encoding]::new()
|
||||
[Console]::OutputEncoding = [System.Text.Utf8Encoding]::new()
|
||||
$word = $wordToComplete.Replace('"', '""')
|
||||
$ast = $commandAst.ToString().Replace('"', '""')
|
||||
winget complete --word="$word" --commandline "$ast" --position $cursorPosition |
|
||||
ForEach-Object {
|
||||
[System.Management.Automation.CompletionResult]::new($_, $_, 'ParameterValue', $_)
|
||||
}
|
||||
}
|
||||
}
|
||||
|
||||
# ── 动态窗口标题(Starship 钩子)────────────────────────────
|
||||
# Starship 会在每次渲染 Prompt 前自动调用此函数
|
||||
function Invoke-Starship-PreCommand {
|
||||
$dirName = Split-Path -Leaf $PWD.Path
|
||||
$branch = ""
|
||||
if (Test-Path ".git" -PathType Container) {
|
||||
try {
|
||||
$b = git branch --show-current 2>$null
|
||||
if ($b) { $branch = " [$b]" }
|
||||
} catch {}
|
||||
}
|
||||
$isAdmin = ([Security.Principal.WindowsPrincipal] `
|
||||
[Security.Principal.WindowsIdentity]::GetCurrent()).IsInRole(
|
||||
[Security.Principal.WindowsBuiltInRole]::Administrator)
|
||||
$adminTag = if ($isAdmin) { " ⚡ADMIN" } else { "" }
|
||||
$host.UI.RawUI.WindowTitle = "PS · $dirName$branch$adminTag"
|
||||
}
|
||||
|
||||
# ── PowerToys CommandNotFound ────────────────────────────────
|
||||
Import-Module -Name Microsoft.WinGet.CommandNotFound
|
||||
#f45873b3-b655-43a6-b217-97c00aa0db58
|
||||
|
||||
# ── Starship 初始化(必须放最后)────────────────────────────
|
||||
Invoke-Expression (&starship init powershell)
|
||||
```
|
||||
|
||||
#### PowerShell 5.1 Profile
|
||||
|
||||
```powershell
|
||||
# ════════════════════════════════════════════════════════════
|
||||
# PowerShell 5.1 Profile
|
||||
# 功能:动态窗口标题 + 智能自动补全 + Starship 集成
|
||||
# ════════════════════════════════════════════════════════════
|
||||
|
||||
# ── 模块导入 ─────────────────────────────────────────────────
|
||||
Import-Module PSReadLine
|
||||
Import-Module posh-git -ErrorAction SilentlyContinue
|
||||
Import-Module PSFzf -ErrorAction SilentlyContinue
|
||||
|
||||
# ── PSReadLine 配置 ──────────────────────────────────────────
|
||||
# PS5.1 仅支持 History,不支持 HistoryAndPlugin
|
||||
Set-PSReadLineOption -PredictionSource History
|
||||
|
||||
# PS5.1 仅支持 InlineView,不支持 ListView
|
||||
Set-PSReadLineOption -PredictionViewStyle InlineView
|
||||
|
||||
Set-PSReadLineOption -HistorySearchCursorMovesToEnd
|
||||
Set-PSReadLineOption -MaximumHistoryCount 10000
|
||||
|
||||
Set-PSReadLineOption -Colors @{
|
||||
Command = 'Cyan'
|
||||
Parameter = 'DarkCyan'
|
||||
String = 'Yellow'
|
||||
Operator = 'Magenta'
|
||||
Variable = 'Green'
|
||||
Comment = 'DarkGray'
|
||||
InlinePrediction = 'DarkGray'
|
||||
}
|
||||
|
||||
# ── 快捷键绑定 ───────────────────────────────────────────────
|
||||
Set-PSReadLineKeyHandler -Key Tab -Function MenuComplete
|
||||
Set-PSReadLineKeyHandler -Key Shift+Tab -Function MenuComplete
|
||||
Set-PSReadLineKeyHandler -Key Ctrl+Spacebar -Function PossibleCompletions
|
||||
Set-PSReadLineKeyHandler -Key UpArrow -Function HistorySearchBackward
|
||||
Set-PSReadLineKeyHandler -Key DownArrow -Function HistorySearchForward
|
||||
Set-PSReadLineKeyHandler -Key Ctrl+r -Function ReverseSearchHistory
|
||||
|
||||
# ── PSFzf 配置 ───────────────────────────────────────────────
|
||||
if (Get-Module PSFzf -ErrorAction SilentlyContinue) {
|
||||
Set-PSFzfOption -PSReadLineChordProvider 'Ctrl+t'
|
||||
Set-PSFzfOption -PSReadLineChordReverseHistory 'Ctrl+r'
|
||||
}
|
||||
|
||||
# ── WinGet 补全 ──────────────────────────────────────────────
|
||||
if (Get-Command winget -ErrorAction SilentlyContinue) {
|
||||
Register-ArgumentCompleter -Native -CommandName winget -ScriptBlock {
|
||||
param($wordToComplete, $commandAst, $cursorPosition)
|
||||
$word = $wordToComplete.Replace('"', '""')
|
||||
$ast = $commandAst.ToString().Replace('"', '""')
|
||||
winget complete --word="$word" --commandline "$ast" --position $cursorPosition |
|
||||
ForEach-Object {
|
||||
[System.Management.Automation.CompletionResult]::new($_, $_, 'ParameterValue', $_)
|
||||
}
|
||||
}
|
||||
}
|
||||
|
||||
# ── 动态窗口标题(Starship 钩子)────────────────────────────
|
||||
function Invoke-Starship-PreCommand {
|
||||
$dirName = Split-Path -Leaf $PWD.Path
|
||||
$branch = ""
|
||||
if (Test-Path ".git" -PathType Container) {
|
||||
try {
|
||||
$b = git branch --show-current 2>$null
|
||||
if ($b) { $branch = " [$b]" }
|
||||
} catch {}
|
||||
}
|
||||
$isAdmin = ([Security.Principal.WindowsPrincipal] `
|
||||
[Security.Principal.WindowsIdentity]::GetCurrent()).IsInRole(
|
||||
[Security.Principal.WindowsBuiltInRole]::Administrator)
|
||||
$adminTag = if ($isAdmin) { " ⚡ADMIN" } else { "" }
|
||||
$host.UI.RawUI.WindowTitle = "PS · $dirName$branch$adminTag"
|
||||
}
|
||||
|
||||
# ── Starship 初始化(必须放最后)────────────────────────────
|
||||
Invoke-Expression (&starship init powershell)
|
||||
```
|
||||
|
||||
### 功能说明
|
||||
|
||||
#### 动态窗口标题
|
||||
|
||||
标题由以下三部分拼接而成:
|
||||
|
||||
```
|
||||
PS · <当前目录名> [<Git分支>] <管理员标识>
|
||||
```
|
||||
|
||||
**示例效果:**
|
||||
|
||||
| 场景 | 窗口标题 |
|
||||
| ------------ | --------------------------------- |
|
||||
| 普通目录 | `PS · Downloads` |
|
||||
| Git 仓库 | `PS · my-project [main]` |
|
||||
| 管理员身份 | `PS · System32 ⚡ADMIN` |
|
||||
| 管理员 + Git | `PS · infra [feat/deploy] ⚡ADMIN` |
|
||||
|
||||
**实现原理:** 利用 Starship 预留的 `Invoke-Starship-PreCommand` 钩子函数,在每次渲染 Prompt 之前执行,与 Starship 完全兼容,无冲突。
|
||||
|
||||
#### 自动补全配置
|
||||
|
||||
配置分为四个层次,可按需选择叠加:
|
||||
|
||||
| 层次 | 功能 | 说明 |
|
||||
| ------- | ------------------- | ----------------------------------------------------- |
|
||||
| Layer 1 | PSReadLine 历史预测 | 输入部分命令后,灰色文字实时预测完整命令,按 `→` 接受 |
|
||||
| Layer 2 | Tab 菜单补全 | 按 `Tab` 弹出候选菜单,上下键选择,`Enter` 确认 |
|
||||
| Layer 3 | posh-git 补全 | 为 `git` 命令提供子命令、分支名、远程名等补全 |
|
||||
| Layer 4 | PSFzf 模糊搜索 | `Ctrl+R` 调出交互式历史命令搜索窗口,支持模糊匹配 |
|
||||
|
||||
### 快捷键速查
|
||||
|
||||
| 快捷键 | 功能 | PS5.1 | PS7+ |
|
||||
| ------------ | -------------------------- | ----- | ---- |
|
||||
| `→` | 接受行内预测 | ✅ | ✅ |
|
||||
| `Tab` | 菜单补全,循环切换候选 | ✅ | ✅ |
|
||||
| `Shift+Tab` | 反向切换候选 | ✅ | ✅ |
|
||||
| `Ctrl+Space` | 显示所有候选项 | ✅ | ✅ |
|
||||
| `↑ / ↓` | 按前缀过滤历史记录 | ✅ | ✅ |
|
||||
| `Ctrl+R` | fzf 模糊历史搜索 | ✅ | ✅ |
|
||||
| `Ctrl+T` | fzf 模糊文件查找 | ✅ | ✅ |
|
||||
| `F2` | 切换 InlineView / ListView | ❌ | ✅ |
|
||||
|
||||
### 版本功能对照
|
||||
|
||||
| 功能 | PS5.1 | PS7+ | 说明 |
|
||||
| ----------------------------------- | ----- | ------ | ------------------ |
|
||||
| `PredictionSource History` | ✅ | ✅ | 基于历史命令预测 |
|
||||
| `PredictionSource HistoryAndPlugin` | ❌ | ✅ | 额外加入插件预测源 |
|
||||
| `PredictionViewStyle InlineView` | ✅ | ✅ | 行内灰字预测 |
|
||||
| `PredictionViewStyle ListView` | ❌ | ✅ | 下拉候选列表 |
|
||||
| `F2` 切换预测视图 | ❌ | ✅ | 实时切换两种视图 |
|
||||
| PSReadLine 最高版本 | 2.3.x | 最新版 | 安装时需注意 |
|
||||
| posh-git | ✅ | ✅ | 版本一致 |
|
||||
| PSFzf | ✅ | ✅ | 版本一致 |
|
||||
| WinGet 补全 | ✅ | ✅ | 编码处理略有差异 |
|
||||
| Starship 钩子 | ✅ | ✅ | 函数名一致 |
|
||||
| 动态窗口标题 | ✅ | ✅ | 实现方式一致 |
|
||||
|
||||
> PS5.1 缺少的 `ListView` 和 `HistoryAndPlugin` 可通过 PSFzf 的 `Ctrl+R` 模糊搜索弥补,日常体验差距不大。
|
||||
|
||||
### 常见问题
|
||||
|
||||
#### 执行 `. $PROFILE` 报执行策略错误
|
||||
|
||||
```powershell
|
||||
Set-ExecutionPolicy -ExecutionPolicy RemoteSigned -Scope CurrentUser
|
||||
```
|
||||
|
||||
#### 模块安装报 NuGet 错误
|
||||
|
||||
```powershell
|
||||
Install-PackageProvider -Name NuGet -MinimumVersion 2.8.5.201 -Force
|
||||
```
|
||||
|
||||
#### PSReadLine 安装后不生效
|
||||
|
||||
PS5.1 系统自带一个旧版 PSReadLine,新版安装在用户目录下,需确认加载的是新版:
|
||||
|
||||
```powershell
|
||||
Get-Module PSReadLine | Select-Object Name, Version, Path
|
||||
# Path 应包含 CurrentUser 路径,而非 System32
|
||||
```
|
||||
|
||||
如果仍加载旧版,在 Profile 最顶部显式指定:
|
||||
|
||||
```powershell
|
||||
Remove-Module PSReadLine -ErrorAction SilentlyContinue
|
||||
Import-Module PSReadLine -RequiredVersion 2.3.4
|
||||
```
|
||||
|
||||
#### fzf / PSFzf 的 Ctrl+R 不弹出窗口
|
||||
|
||||
确认 fzf 本体已安装且在 PATH 中:
|
||||
|
||||
```powershell
|
||||
fzf --version
|
||||
```
|
||||
|
||||
如果命令不存在,重新安装并重启终端:
|
||||
|
||||
```powershell
|
||||
winget install junegunn.fzf
|
||||
```
|
||||
|
||||
#### 窗口标题不更新
|
||||
|
||||
确认 `Invoke-Starship-PreCommand` 函数定义在 `Invoke-Expression (&starship init powershell)` **之前**,因为 Starship init 会注册对该钩子的调用,函数本身需要提前存在。
|
||||
|
||||
#### posh-git 导致启动变慢
|
||||
|
||||
posh-git 在大型仓库中可能扫描较慢,可设置跳过未跟踪文件统计:
|
||||
|
||||
```powershell
|
||||
$GitPromptSettings.EnableFileStatus = $false
|
||||
```
|
||||
|
||||
## 编辑oh-my-posh配置文件
|
||||
|
||||
打开**PowerShell**终端,执行以下命令编辑配置文件 `code $PROFILE`:
|
||||
|
||||
@@ -402,3 +402,453 @@ D:\tools\nssm-2.24\win64\nssm.exe install "Nginx 1.29.8"
|
||||
| 进程树清理 | 默认处理子进程 | 需显式指定 `--kill-process-tree` |
|
||||
| 最小系统 | Windows Server 2008 R2+ | Windows 10 / Server 2012 R2+ |
|
||||
| 适用场景 | 运维人员手动配置 | 自动化部署脚本 |
|
||||
|
||||
# 开发驱动器 (Dev Drive)
|
||||
|
||||
开发驱动器是 Windows 11 提供的一种新存储卷形式,基于 ReFS (Resilient File System) 技术构建,针对开发工作负载进行了文件系统优化,可显著提升编译、包恢复等开发操作的性能。
|
||||
|
||||
> **适用场景:** 源代码仓库、包缓存(npm/NuGet/pip/Cargo 等)、构建输出和中间文件。
|
||||
|
||||
## 先决条件
|
||||
|
||||
- Windows 11 版本 10.0.22621.2338 或更高版本
|
||||
- 建议 16 GB 内存(至少 8 GB,ReFS 比 NTFS 占用更多内存)
|
||||
- 最小 50 GB 可用磁盘空间
|
||||
- 本地管理员权限
|
||||
|
||||
> **注意:** 不能将 C: 驱动器指定为开发驱动器。开发人员工具(如 Visual Studio、.NET SDK)应保留在 C: 盘。
|
||||
|
||||
## 创建方式
|
||||
|
||||
### 方式一:通过 Windows 设置
|
||||
|
||||
1. 打开 **设置 > 系统 > 存储 > 高级存储设置 > 磁盘和卷**
|
||||
2. 选择 **创建开发人员驱动器**
|
||||
3. 选择创建方式:
|
||||
- **创建新的 VHD**:在虚拟硬盘上创建(推荐,灵活易管理)
|
||||
- **调整现有卷的大小**:从现有分区划分空间
|
||||
- **使用未分配空间**:利用磁盘上已有的未分配空间
|
||||
|
||||
### 方式二:通过命令行
|
||||
|
||||
以管理员身份运行:
|
||||
|
||||
```powershell
|
||||
# 使用 Format 命令
|
||||
Format D: /DevDrv /Q
|
||||
|
||||
# 或使用 PowerShell
|
||||
Format-Volume -DriveLetter D -DevDrive
|
||||
```
|
||||
|
||||
> 将 `D:` 替换为实际驱动器号。
|
||||
|
||||
## 磁盘分区 vs VHD
|
||||
|
||||
| 对比项 | 磁盘分区 | VHD(推荐) |
|
||||
| ---------- | ---------------------- | ------------------------------- |
|
||||
| 性能 | 更快(直接访问物理磁盘)| 略有开销(虚拟磁盘层) |
|
||||
| 灵活性 | 调整大小复杂且风险大 | 支持动态扩展,易于管理 |
|
||||
| 可移植性 | 与物理磁盘绑定 | VHD 文件可复制、移动、备份 |
|
||||
| 适用场景 | 追求极致性能 | 需要灵活管理或多设备使用 |
|
||||
|
||||
## 信任与安全性
|
||||
|
||||
开发驱动器默认使用 Microsoft Defender **性能模式**,在安全性和性能之间取得平衡。
|
||||
|
||||
### 设置为受信任驱动器
|
||||
|
||||
受信任的驱动器启用性能模式(推荐),不受信任的驱动器使用实时保护模式(性能较低)。
|
||||
|
||||
```powershell
|
||||
# 以管理员身份运行 PowerShell
|
||||
|
||||
# 设置为受信任
|
||||
fsutil devdrv trust D:
|
||||
|
||||
# 查询信任状态
|
||||
fsutil devdrv query D:
|
||||
```
|
||||
|
||||
> **重要:** 将开发驱动器移动到其他计算机后,需要重新设置信任。
|
||||
|
||||
### 防病毒筛选器配置
|
||||
|
||||
```powershell
|
||||
# 允许特定筛选器(适用于所有开发驱动器)
|
||||
fsutil devdrv setfiltersallowed "Filter-01, Filter-02"
|
||||
|
||||
# 禁用防病毒筛选器(不推荐,存在安全风险)
|
||||
fsutil devdrv enable /disallowAv
|
||||
|
||||
# 重新启用防病毒筛选器
|
||||
fsutil devdrv enable /allowAv
|
||||
```
|
||||
|
||||
### 常用筛选器列表
|
||||
|
||||
| 场景 | 筛选器名称 |
|
||||
| ------------------------------ | --------------------------------------------- |
|
||||
| Docker 容器 | `bindFlt`, `wcifs` |
|
||||
| Windows Defender | `WdFilter`(默认附加) |
|
||||
| Microsoft Defender for Endpoint | `MsSecFlt` |
|
||||
| GVFS (Git 虚拟文件系统) | `PrjFlt` |
|
||||
| 进程监视器 (ProcMon) | `ProcMon24` |
|
||||
| Windows 升级 | `WinSetupMon`(若 TEMP 在开发驱动器上则需要) |
|
||||
|
||||
## 包缓存迁移
|
||||
|
||||
将常用包缓存迁移到开发驱动器以获得最佳性能:
|
||||
|
||||
### npm (Node.js)
|
||||
|
||||
```powershell
|
||||
# 创建缓存目录
|
||||
mkdir D:\packages\npm
|
||||
|
||||
# 设置环境变量
|
||||
setx /M npm_config_cache D:\packages\npm
|
||||
|
||||
# 迁移现有缓存(如已安装)
|
||||
robocopy %AppData%\npm-cache D:\packages\npm /E
|
||||
```
|
||||
|
||||
#### nvm 用户配置全局包安装位置
|
||||
|
||||
使用 nvm (Node Version Manager) 管理 Node.js 版本时,每个版本有独立的全局包目录。为避免切换版本后全局包不可用,可将全局包目录配置到固定位置:
|
||||
|
||||
```powershell
|
||||
# 1. 创建全局包目录
|
||||
mkdir D:\packages\npm-global
|
||||
|
||||
# 2. 配置 npm 使用新目录作为 prefix
|
||||
npm config set prefix D:\packages\npm-global
|
||||
|
||||
# 3. 添加到 PATH 环境变量
|
||||
setx /M PATH "%PATH%;D:\packages\npm-global"
|
||||
|
||||
# 4. 验证配置
|
||||
npm config get prefix
|
||||
npm config get cache
|
||||
```
|
||||
|
||||
**配置说明:**
|
||||
- `prefix`:全局包安装目录,`npm install -g` 的包会安装到此目录下的 `node_modules` 子目录
|
||||
- `cache`:npm 缓存目录,存放下载的包压缩包
|
||||
- 配置后所有 Node.js 版本共享同一套全局包,切换版本无需重新安装
|
||||
|
||||
**验证全局包目录:**
|
||||
```powershell
|
||||
# 查看当前 prefix 配置
|
||||
npm config get prefix
|
||||
|
||||
# 查看全局包列表
|
||||
npm list -g --depth=0
|
||||
|
||||
# 测试安装全局包
|
||||
npm install -g opencode-ai
|
||||
```
|
||||
|
||||
### NuGet (.NET)
|
||||
|
||||
```powershell
|
||||
# 创建缓存目录
|
||||
mkdir D:\packages\nuget
|
||||
|
||||
# 设置环境变量
|
||||
setx /M NUGET_PACKAGES D:\packages\nuget
|
||||
|
||||
# 验证设置
|
||||
dotnet nuget locals global-packages --list
|
||||
```
|
||||
|
||||
### pip (Python)
|
||||
|
||||
```powershell
|
||||
# 创建缓存目录
|
||||
mkdir D:\packages\pip
|
||||
|
||||
# 设置环境变量
|
||||
setx /M PIP_CACHE_DIR D:\packages\pip
|
||||
|
||||
# 迁移现有缓存
|
||||
robocopy %LocalAppData%\pip\Cache D:\packages\pip /E
|
||||
```
|
||||
|
||||
### Cargo (Rust)
|
||||
|
||||
```powershell
|
||||
# 创建缓存目录
|
||||
mkdir D:\packages\cargo
|
||||
|
||||
# 设置环境变量
|
||||
setx /M CARGO_HOME D:\packages\cargo
|
||||
|
||||
# 迁移现有缓存
|
||||
robocopy %USERPROFILE%\.cargo D:\packages\cargo /E
|
||||
```
|
||||
|
||||
### Maven (Java)
|
||||
|
||||
```powershell
|
||||
# 创建缓存目录
|
||||
mkdir D:\packages\maven
|
||||
|
||||
# 设置环境变量
|
||||
setx /M MAVEN_OPTS "-Dmaven.repo.local=D:\packages\maven"
|
||||
|
||||
# 迁移现有缓存
|
||||
robocopy %USERPROFILE%\.m2\repository D:\packages\maven /E
|
||||
```
|
||||
|
||||
### Gradle (Java)
|
||||
|
||||
```powershell
|
||||
# 创建缓存目录
|
||||
mkdir D:\packages\gradle
|
||||
|
||||
# 设置环境变量
|
||||
setx /M GRADLE_USER_HOME D:\packages\gradle
|
||||
|
||||
# 迁移现有缓存
|
||||
robocopy %USERPROFILE%\.gradle D:\packages\gradle /E
|
||||
```
|
||||
|
||||
## 使用链接迁移包缓存
|
||||
|
||||
### 获取缓存默认目录
|
||||
|
||||
```powershell
|
||||
# npm 缓存目录
|
||||
npm config get cache
|
||||
|
||||
# npm 全局包安装目录(prefix)
|
||||
npm config get prefix
|
||||
|
||||
# yarn 缓存目录
|
||||
yarn cache dir
|
||||
|
||||
# pnpm 缓存目录
|
||||
pnpm store path
|
||||
|
||||
# NuGet 全局包目录
|
||||
dotnet nuget locals global-packages -l
|
||||
|
||||
# pip 缓存目录
|
||||
pip cache dir
|
||||
```
|
||||
|
||||
### 使用 Junction/Symlink 迁移
|
||||
|
||||
除了设置环境变量外,还可以使用 **目录联接 (Junction)** 或 **符号链接 (Symlink)** 将缓存目录迁移到开发驱动器,同时保持原有路径不变。
|
||||
|
||||
> **优势:** 无需修改环境变量,对应用程序完全透明,兼容性更好。
|
||||
|
||||
### 操作步骤
|
||||
|
||||
1. **迁移现有缓存**:使用 `robocopy` 将原目录内容移动到开发驱动器
|
||||
2. **创建链接**:在原位置创建指向新位置的 Junction/Symlink
|
||||
|
||||
### pnpm 缓存
|
||||
|
||||
```powershell
|
||||
# 迁移 pnpm 全局存储
|
||||
robocopy "C:\Users\你的用户名\.pnpm-store" "D:\Caches\.pnpm-store" /E /MOVE /R:3 /W:10
|
||||
|
||||
# 创建目录联接
|
||||
New-Item -ItemType Junction -Path "C:\Users\你的用户名\.pnpm-store" -Target "D:\Caches\.pnpm-store"
|
||||
```
|
||||
|
||||
### JetBrains 缓存
|
||||
|
||||
```powershell
|
||||
# 迁移 JetBrains 缓存(IDE 配置、索引等)
|
||||
robocopy "C:\Users\你的用户名\AppData\Local\JetBrains" "D:\Caches\JetBrains" /E /MOVE /R:3 /W:10
|
||||
|
||||
# 创建目录联接
|
||||
New-Item -ItemType Junction -Path "C:\Users\你的用户名\AppData\Local\JetBrains" -Target "D:\Caches\JetBrains"
|
||||
```
|
||||
|
||||
### npm 缓存
|
||||
|
||||
```powershell
|
||||
# 迁移 npm 缓存
|
||||
robocopy "C:\Users\你的用户名\AppData\Local\npm-cache" "D:\Caches\npm-cache" /E /MOVE /R:3 /W:10
|
||||
|
||||
# 创建目录联接
|
||||
New-Item -ItemType Junction -Path "C:\Users\你的用户名\AppData\Local\npm-cache" -Target "D:\Caches\npm-cache"
|
||||
```
|
||||
|
||||
### NuGet 缓存
|
||||
|
||||
```powershell
|
||||
# 迁移 NuGet 全局包
|
||||
robocopy "C:\Users\你的用户名\.nuget\packages" "D:\Caches\nuget-packages" /E /MOVE /R:3 /W:10
|
||||
|
||||
# 创建目录联接
|
||||
New-Item -ItemType Junction -Path "C:\Users\你的用户名\.nuget\packages" -Target "D:\Caches\nuget-packages"
|
||||
```
|
||||
|
||||
### pip 缓存
|
||||
|
||||
```powershell
|
||||
# 迁移 pip 缓存
|
||||
robocopy "C:\Users\你的用户名\AppData\Local\pip\Cache" "D:\Caches\pip-cache" /E /MOVE /R:3 /W:10
|
||||
|
||||
# 创建目录联接
|
||||
New-Item -ItemType Junction -Path "C:\Users\你的用户名\AppData\Local\pip\Cache" -Target "D:\Caches\pip-cache"
|
||||
```
|
||||
|
||||
### TEMP 目录
|
||||
|
||||
```powershell
|
||||
# 迁移临时文件目录(可选,需添加 WinSetupMon 筛选器)
|
||||
robocopy "$env:TEMP" "D:\Caches\TEMP" /E /MOVE /R:3 /W:10
|
||||
|
||||
# 创建目录联接
|
||||
New-Item -ItemType Junction -Path "$env:TEMP" -Target "D:\Caches\TEMP"
|
||||
|
||||
# 添加 Windows 升级所需的筛选器
|
||||
fsutil devdrv setfiltersallowed WinSetupMon
|
||||
```
|
||||
|
||||
### robocopy 参数说明
|
||||
|
||||
| 参数 | 说明 |
|
||||
| ------- | -------------------------------------- |
|
||||
| `/E` | 复制子目录,包括空目录 |
|
||||
| `/MOVE` | 移动文件和目录(复制后删除源) |
|
||||
| `/R:3` | 失败时重试 3 次 |
|
||||
| `/W:10` | 重试之间等待 10 秒 |
|
||||
|
||||
### Junction vs Symlink
|
||||
|
||||
| 类型 | 说明 | 需要管理员权限 |
|
||||
| ------------ | ------------------------------------------ | -------------- |
|
||||
| Junction | 目录联接,仅支持本地目录 | 否 |
|
||||
| Symlink | 符号链接,支持文件和远程路径 | 是(默认) |
|
||||
|
||||
> **推荐使用 Junction:** 开发场景下 Junction 兼容性更好,且不需要管理员权限创建。
|
||||
|
||||
### 验证链接
|
||||
|
||||
```powershell
|
||||
# 查看链接指向
|
||||
Get-Item "C:\Users\你的用户名\.pnpm-store" | Select-Object FullName, LinkType, Target
|
||||
|
||||
# 或使用 dir 命令
|
||||
cmd /c dir "C:\Users\你的用户名" /AL
|
||||
|
||||
# 查看目录是否为链接(Junction/Symlink)
|
||||
(Get-Item "C:\Users\你的用户名\.pnpm-store").Attributes -match "ReparsePoint"
|
||||
|
||||
# 批量检查常用缓存目录是否为链接
|
||||
@(
|
||||
"$env:USERPROFILE\.pnpm-store",
|
||||
"$env:USERPROFILE\AppData\Local\JetBrains",
|
||||
"$env:USERPROFILE\AppData\Local\npm-cache",
|
||||
"$env:USERPROFILE\.nuget\packages",
|
||||
"$env:USERPROFILE\AppData\Local\pip\Cache"
|
||||
) | ForEach-Object {
|
||||
$item = Get-Item $_ -ErrorAction SilentlyContinue
|
||||
[PSCustomObject]@{
|
||||
Path = $_
|
||||
IsLink = ($item.Attributes -match "ReparsePoint")
|
||||
Target = $item.Target
|
||||
}
|
||||
}
|
||||
```
|
||||
|
||||
## 限制与注意事项
|
||||
|
||||
- **不支持的场景:**
|
||||
- 可移动/热插拔磁盘(USB、外部驱动器)
|
||||
- 动态磁盘(请使用存储空间代替)
|
||||
- C: 驱动器
|
||||
|
||||
- **内存占用:** ReFS 比 NTFS 使用更多内存,建议至少 8 GB,推荐 16 GB
|
||||
|
||||
- **VHD 注意事项:**
|
||||
- 固定磁盘上的 VHD 不建议复制,应移动后重新挂载
|
||||
- 移动到新计算机后需重新指定为开发驱动器并配置筛选器策略
|
||||
|
||||
- **WSL 兼容性:** 可从 WSL 访问开发驱动器上的文件,但不会有性能提升。ReFS 不支持 WSL metadata 装载选项。
|
||||
|
||||
## 扩容开发驱动器
|
||||
|
||||
当开发驱动器空间不足时,可以通过以下步骤扩容 VHD 类型的开发驱动器。
|
||||
|
||||
### 步骤一:扩展 VHD 文件大小
|
||||
|
||||
以管理员身份打开 PowerShell,使用 `Resize-VHD` 命令扩展 VHD 文件:
|
||||
|
||||
```powershell
|
||||
# 扩展 VHD 文件到 60GB(根据实际需求调整大小)
|
||||
Resize-VHD -Path 'E:\DevDrives\SourceCode.vhdx' -SizeBytes 60GB
|
||||
```
|
||||
|
||||
> **注意:** 将路径和大小替换为实际的 VHD 文件路径和目标大小。`SizeBytes` 参数指定的是最终大小,不是增加量。
|
||||
|
||||
### 步骤二:挂载 VHD 并扩展分区
|
||||
|
||||
以管理员身份打开命令提示符,使用 diskpart 工具:
|
||||
|
||||
```cmd
|
||||
# 启动 diskpart
|
||||
diskpart
|
||||
|
||||
# 选择 VHD 文件
|
||||
select vdisk file="E:\DevDrives\SourceCode.vhdx"
|
||||
|
||||
# 挂载 VHD
|
||||
attach vdisk
|
||||
|
||||
# 查看磁盘列表,找到 VHD 对应的磁盘编号
|
||||
list disk
|
||||
|
||||
# 选择 VHD 磁盘(替换 X 为实际磁盘编号)
|
||||
select disk X
|
||||
|
||||
# 查看分区列表
|
||||
list partition
|
||||
|
||||
# 选择 Dev Drive 分区(替换 Y 为实际分区编号)
|
||||
select partition Y
|
||||
|
||||
# 扩展分区,使用所有未分配空间
|
||||
extend
|
||||
|
||||
# 退出 diskpart
|
||||
exit
|
||||
```
|
||||
|
||||
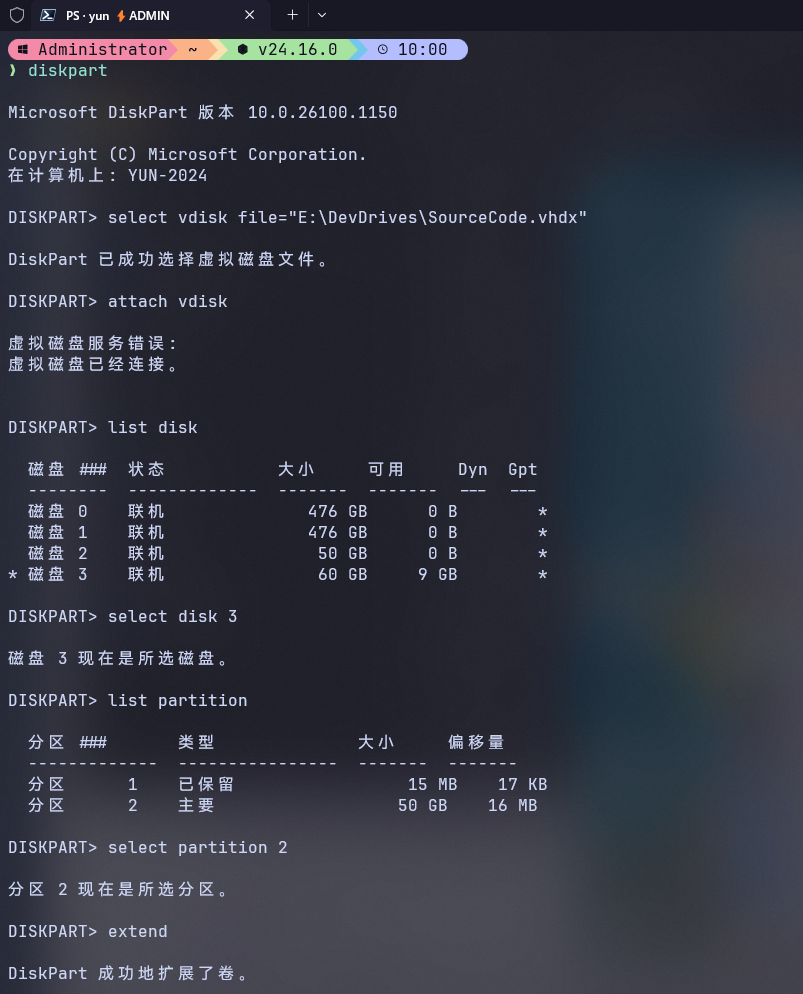
|
||||
|
||||
### 步骤三:验证扩容结果
|
||||
|
||||
```powershell
|
||||
# 检查 VHD 信息
|
||||
Get-VHD -Path 'E:\DevDrives\SourceCode.vhdx'
|
||||
|
||||
# 或在文件资源管理器中查看驱动器属性
|
||||
```
|
||||
|
||||
### 注意事项
|
||||
|
||||
- 扩容操作不会丢失数据,但建议提前备份重要文件
|
||||
- VHD 必须处于**分离(detach)状态**才能调整大小,如果已挂载需先分离
|
||||
- 扩展分区时,未分配空间必须紧邻目标分区(右侧)
|
||||
- 如果未分配空间不在目标分区右侧,可能需要使用第三方分区工具调整
|
||||
|
||||
## 删除开发驱动器
|
||||
|
||||
1. **设置 > 系统 > 存储 > 磁盘和卷**
|
||||
2. 选择开发驱动器旁的 **属性**
|
||||
3. 在格式标签下选择删除
|
||||
|
||||
> 如果是 VHD 创建的,删除卷后还需在磁盘管理中分离 VHD 才能删除 VHD 文件。
|
||||
|
||||
## 参考资料
|
||||
|
||||
- [在 Windows 11 上设置开发驱动器 - Microsoft Learn](https://learn.microsoft.com/zh-cn/windows/dev-drive/)
|
||||
- [利用 Dev Drive 提升 Visual Studio 和 Dev Boxes 的性能](https://devblogs.microsoft.com/visualstudio/devdriveperf/)
|
||||
|
||||
@@ -0,0 +1,46 @@
|
||||
---
|
||||
title: Windows注册表和组策略
|
||||
date: 2026-05-21 08:43:37
|
||||
tags:
|
||||
---
|
||||
|
||||
# Windows注册表和组策略
|
||||
|
||||
## 如何在Windows隐藏安装的程序
|
||||
|
||||
### 目的
|
||||
|
||||
由于维护人员或用户可能无意中通过"程序和功能"选项删除对业务至关重要的软件,这导致服务中断或安全风险。为了防止此类情况发生,确保只有授权的用户才能访问和管理系统中的程序。通过隐藏特定的安装程序,可以减少误操作的风险,同时保持系统管理的灵活性和安全性。
|
||||
|
||||
### 注册表键位置
|
||||
|
||||
Windows 根据以下注册表键中的条目生成在设置或控制面板中看到的已安装程序列表:
|
||||
|
||||
| 注册表路径 | 说明 |
|
||||
|------------|------|
|
||||
| `HKEY_LOCAL_MACHINE\SOFTWARE\Microsoft\Windows\CurrentVersion\Uninstall` | 所有设备用户的程序的通用列表 |
|
||||
| `HKEY_LOCAL_MACHINE\SOFTWARE\Wow6432Node\Microsoft\Windows\CurrentVersion\Uninstall` | x64 Windows 上安装的 x86 应用程序 |
|
||||
| `HKEY_CURRENT_USER\Software\Microsoft\Windows\CurrentVersion\Uninstall` | 当前用户安装的应用程序 |
|
||||
|
||||
### 操作步骤
|
||||
|
||||
1. 打开注册表编辑器(`regedit`)
|
||||
2. 导航到上述三个注册表键之一
|
||||
3. 找到要隐藏的应用程序的注册表键
|
||||
4. 创建一个新的 32 位 DWORD 注册表参数:
|
||||
- 名称:`SystemComponent`
|
||||
- 值:`1`
|
||||
5. 刷新程序和功能列表
|
||||
|
||||
### 效果
|
||||
|
||||
设置后,程序将从以下位置隐藏:
|
||||
- 控制面板的"程序和功能"列表
|
||||
- 现代设置界面(设置 -> 应用 -> 安装的应用)
|
||||
|
||||
### 注意事项
|
||||
|
||||
- 修改注册表前建议备份
|
||||
- 需要管理员权限
|
||||
- 隐藏后程序仍可正常使用
|
||||
- 只是隐藏显示,不会卸载程序
|
||||
@@ -0,0 +1,136 @@
|
||||
---
|
||||
title: Windows软件安装
|
||||
date: 2026-05-21 08:42:59
|
||||
tags:
|
||||
---
|
||||
|
||||
# Windows软件安装
|
||||
|
||||
## 包管理器
|
||||
|
||||
### winget 命令
|
||||
|
||||
Windows 程序包管理器,可从命令行安装应用程序和其他程序包。
|
||||
|
||||
#### 常用命令
|
||||
|
||||
```powershell
|
||||
# 安装程序包
|
||||
winget install <package>
|
||||
|
||||
# 显示包信息
|
||||
winget show <package>
|
||||
|
||||
# 搜索程序包
|
||||
winget search <package>
|
||||
|
||||
# 列出已安装的程序包
|
||||
winget list
|
||||
|
||||
# 升级程序包
|
||||
winget upgrade <package>
|
||||
|
||||
# 卸载程序包
|
||||
winget uninstall <package>
|
||||
|
||||
# 导出已安装程序包列表
|
||||
winget export -o export.json
|
||||
|
||||
# 从文件导入程序包
|
||||
winget import -i import.json
|
||||
|
||||
# 查看版本
|
||||
winget --version
|
||||
|
||||
# 查看帮助
|
||||
winget --help
|
||||
```
|
||||
|
||||
#### 命令详解
|
||||
|
||||
| 命令 | 说明 |
|
||||
|------|------|
|
||||
| `install` | 安装给定的程序包 |
|
||||
| `show` | 显示包的相关信息 |
|
||||
| `source` | 管理程序包的来源 |
|
||||
| `search` | 查找并显示程序包的基本信息 |
|
||||
| `list` | 显示已安装的程序包 |
|
||||
| `upgrade` | 显示并执行可用升级 |
|
||||
| `uninstall` | 卸载给定的程序包 |
|
||||
| `hash` | 哈希安装程序的帮助程序 |
|
||||
| `validate` | 验证清单文件 |
|
||||
| `settings` | 打开设置或设置管理员设置 |
|
||||
| `features` | 显示实验性功能的状态 |
|
||||
| `export` | 导出已安装程序包的列表 |
|
||||
| `import` | 安装文件中的所有程序包 |
|
||||
| `pin` | 管理包钉 |
|
||||
| `configure` | 将系统配置为所需状态 |
|
||||
| `download` | 从给定的程序包下载安装程序 |
|
||||
| `repair` | 修复所选包 |
|
||||
| `dscv3` | DSC v3 资源命令 |
|
||||
| `mcp` | MCP 信息 |
|
||||
|
||||
#### 常用选项
|
||||
|
||||
```powershell
|
||||
# 显示工具版本
|
||||
winget --version
|
||||
|
||||
# 显示工具信息
|
||||
winget --info
|
||||
|
||||
# 显示帮助信息
|
||||
winget --help
|
||||
|
||||
# 等待用户按键后退出
|
||||
winget --wait
|
||||
|
||||
# 打开日志位置
|
||||
winget --logs
|
||||
|
||||
# 启用详细日志记录
|
||||
winget --verbose
|
||||
|
||||
# 禁止显示警告
|
||||
winget --nowarn
|
||||
|
||||
# 禁用交互式提示
|
||||
winget --disable-interactivity
|
||||
|
||||
# 设置代理
|
||||
winget --proxy <url>
|
||||
|
||||
# 禁用代理
|
||||
winget --no-proxy
|
||||
```
|
||||
|
||||
#### 使用代理
|
||||
|
||||
##### 命令行参数(单次使用)
|
||||
|
||||
1. 开启配置(需要管理员权限)
|
||||
|
||||
```powershell
|
||||
winget settings --enable ProxyCommandLineOptions
|
||||
```
|
||||
|
||||
2. 使用
|
||||
|
||||
```powershell
|
||||
winget install Git.Git --proxy http://127.0.0.1:10809
|
||||
```
|
||||
|
||||
##### 管理员配置(全局生效)
|
||||
|
||||
开启配置(需要管理员权限)
|
||||
|
||||
```powershell
|
||||
winget settings set DefaultProxy http://127.0.0.1:10809
|
||||
```
|
||||
|
||||
关闭配置(需要管理员权限)
|
||||
|
||||
```powershell
|
||||
winget settings reset DefaultProxy
|
||||
```
|
||||
|
||||
Reference in New Issue
Block a user