1338 lines
44 KiB
Markdown
1338 lines
44 KiB
Markdown
---
|
||
title: ASP.NET Core
|
||
date: 2021-03-23 10:30:31
|
||
author: 文永达
|
||
top_img: https://gcore.jsdelivr.net/gh/volantis-x/cdn-wallpaper/abstract/67239FBB-E15D-4F4F-8EE8-0F1C9F3C4E7C.jpeg
|
||
---
|
||
# IDE智能提示优化
|
||
|
||
## .Net6 的汉化
|
||
|
||
### 本地化xml生成工具
|
||
|
||
工具以`dotnet cli`发布,使用`dotnet tool`进行安装
|
||
|
||
```shell
|
||
dotnet tool install -g islocalizer
|
||
```
|
||
|
||
`.net6`的汉化包已经有现成的了,可以直接进行安装
|
||
|
||
```shell
|
||
islocalizer install auto -m net6.0 -l zh-cn
|
||
```
|
||
|
||
工具会自动从`github`下载对应的包进行安装(可能需要访问加速)。
|
||
也可以通过`-cc`参数指定内容对照类型
|
||
|
||
- `OriginFirst`: 原始内容在前
|
||
- `LocaleFirst`: 本地化内容在前
|
||
- `None`: 没有对照
|
||
|
||
```shell
|
||
islocalizer install auto -m net6.0 -l zh-cn -cc OriginFirst
|
||
```
|
||
|
||
自定义生成
|
||
|
||
如下示例生成`.net6`的原始内容在前的`zh-cn`本地化包,并使用 `---------` 分隔原文和本地化内容,生成完成后的`包路径`会输出到控制台。
|
||
|
||
可以通过 `islocalizer build -h` 查看更多的构建参数信息。
|
||
|
||
首次构建过程可能非常缓慢(需要爬取所有的页面),相关文件会被缓存(单zh-cn内容大小约3.5G),再次构建时会比较快;
|
||
|
||
安装
|
||
|
||
```shell
|
||
islocalizer install {包路径}
|
||
```
|
||
|
||
`包路径`为build命令完成后输出的路径。
|
||
|
||
可以通过 `islocalizer -h` 查看更多的命令帮助。
|
||
|
||
# Web API 项目初始化搭建
|
||
|
||
首先打开Visual Studio 2022,然后选择创建新项目
|
||
|
||
之后筛选下拉框选择如红框标注
|
||
|
||

|
||
|
||
起一个项目名称及选择项目位置,下一步
|
||
|
||

|
||
|
||
框架选择.Net 6.0(长期支持)
|
||
|
||
选择启用Docker,为了之后可以部署到Docker容器
|
||
|
||
启用OpenAPI支持是为了可以输出Swagger接口文档,但如果使用Furion框架的话,需要勾掉
|
||
|
||
顶级语句是无需在Program.cs中显式包含Main方法,可以使用顶级语句功能最大程度地减少必须编写的代码
|
||
|
||

|
||
|
||
点击创建即可
|
||
|
||

|
||
|
||
# 集成Furion框架
|
||
|
||
在NuGet包管理器中搜索 `Furion`
|
||
|
||

|
||
|
||
选择安装的项目,然后安装即可
|
||
|
||
`Program.cs`配置
|
||
|
||
```c#
|
||
var builder = WebApplication.CreateBuilder(args).Inject();
|
||
builder.Services.AddControllers().AddInject();
|
||
app.UseInject();
|
||
```
|
||
|
||
# 可能遇到的问题
|
||
|
||
## 包降级
|
||
|
||

|
||
|
||
将提示的NuGet包升级到 前者的版本即可,比如图内的 Swashbuckle.AspNetCore 原有的版本是 6.2.3 那么升级到 6.5.0即可
|
||
|
||
# 部署到Docker
|
||
|
||
## 安装.Net SDK 6.0环境
|
||
|
||
```shell
|
||
sudo rpm -Uvh https://packages.microsoft.com/config/centos/7/packages-microsoft-prod.rpm
|
||
sudo yum install dotnet-sdk-6.0
|
||
dotnet --info
|
||
```
|
||
|
||
## Visual Studio添加Docker支持
|
||
|
||

|
||
|
||
## Linux下构建Docker镜像
|
||
|
||
```shell
|
||
docker image build -f ./XiaodaERP/Dockerfile -t aspnetcore .
|
||
docker images
|
||
```
|
||
|
||
## 运行Docker镜像
|
||
|
||
```shell
|
||
docker run --name=aspnetcore -p 9001:80 -d aspnetcore
|
||
docker ps
|
||
```
|
||
|
||
```shell
|
||
cd /usr/local/jenkins_home/workspace/XiaodaERP_NetCore
|
||
echo $PWD
|
||
docker image build -f ./XiaodaERP/Dockerfile -t xiaodaerp/netcore .
|
||
docker images
|
||
docker run --name xiaodaerp/netcore -p 7274:80 -d xiaodaerp/netcore
|
||
```
|
||
|
||
# 部署到 IIS
|
||
|
||
## IIS 介绍
|
||
|
||
Internet Information Services (IIS) 是一种灵活、安全且可管理的 Web 服务器,用于托管 Web 应用(包括 ASP.NET Core)。
|
||
|
||
## IIS 配置并安装
|
||
|
||
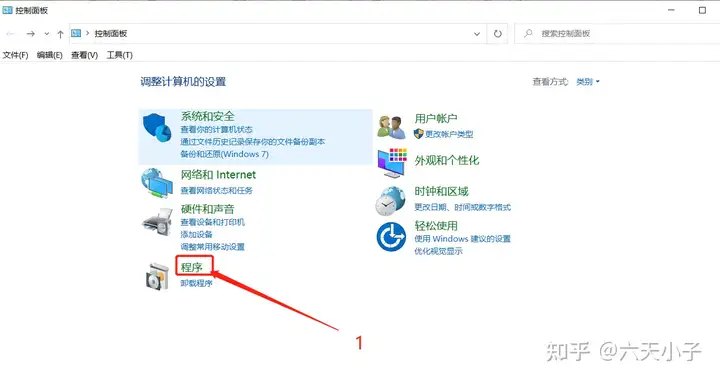
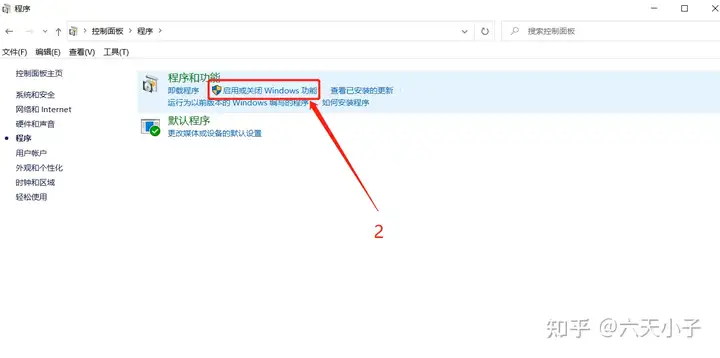
1. 打开控制面板 => 程序 => 启动或关闭Windows功能
|
||
|
||
|
||
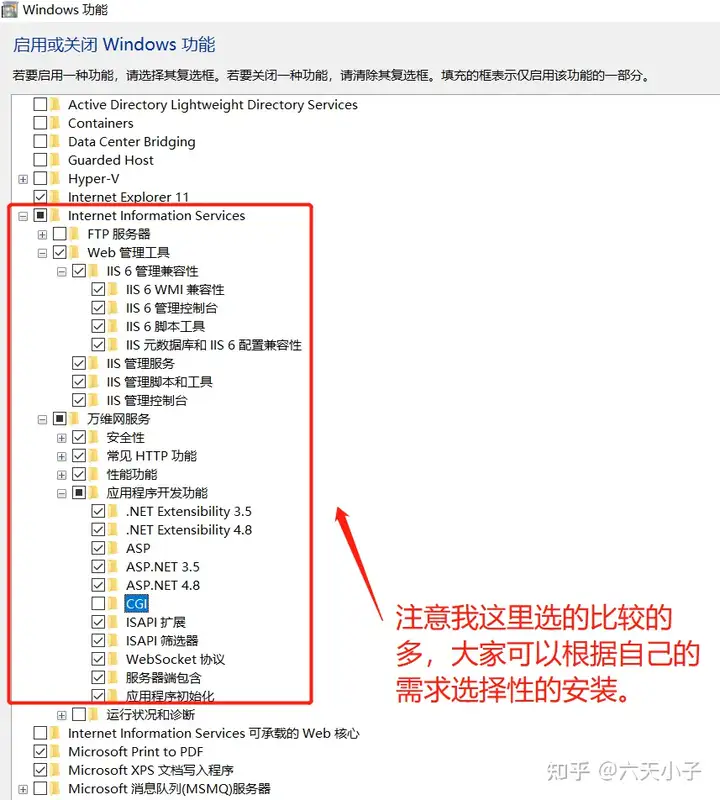
2. 选择Internet Information Services 安装 IIS
|
||
|
||
> 注意:无需选中"设置"下的所有Internet Information Services,按照自己的需要选择安装即可
|
||
|
||
|
||
|
||
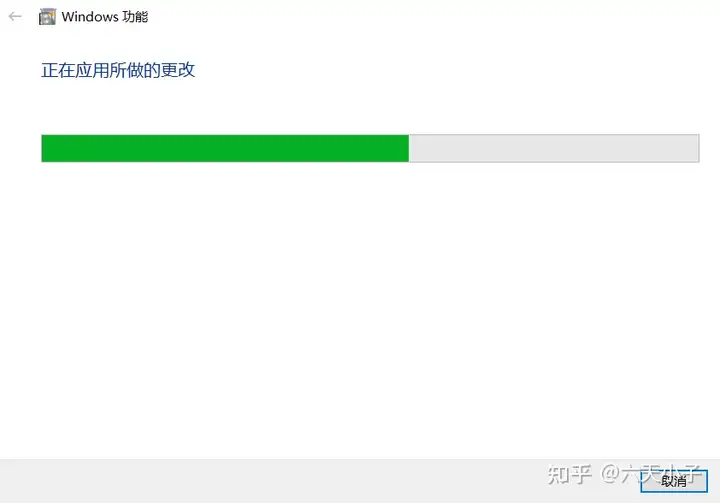
第一次安装时间比较久,耐心等待一会。
|
||
|
||
|
||
|
||
|
||
|
||
可能需要重启。
|
||
|
||
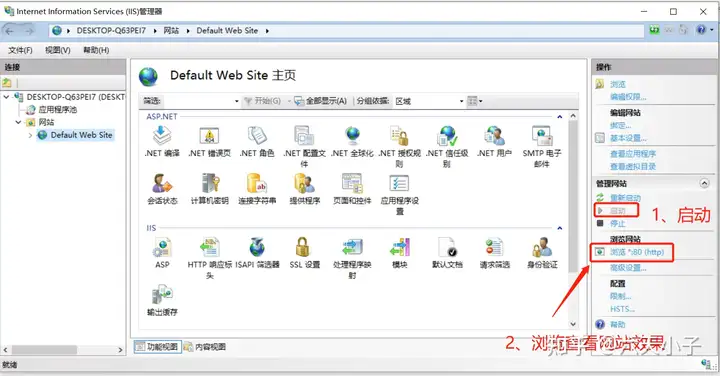
3. 验证 IIS 是否安装配置成功
|
||
找到Windows管理工具 => 打开IIS
|
||
运行 IIS 默认的 Default Web Site 查看是否正常
|
||
|
||
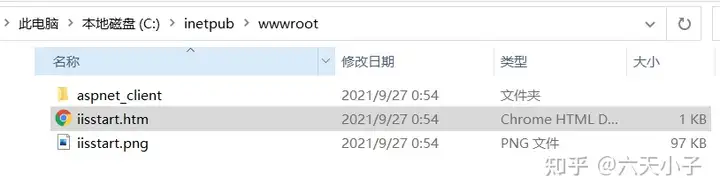
> **在C:\inetpub\wwwroot下IIS默认绑定了一个80端口的静态页面站点,我们将该站点浏览起来查看页面效果是否正常。**
|
||
> **站点地址:http://localhost:80**
|
||
|
||
|
||
|
||
|
||
|
||

|
||
|
||
访问成功
|
||
|
||
|
||
|
||
## 安装 ASP.Net Core 模块/托管捆绑包
|
||
|
||
使用以下链接下载最新安装程序:
|
||
|
||
[当前 .NET Core 托管捆绑包安装程序(直接下载)](https://dotnet.microsoft.com/permalink/dotnetcore-current-windows-runtime-bundle-installer)
|
||
|
||
## 重新启动 IIS
|
||
|
||
安装托管捆绑包后,可能需要手动重新启动 IIS。 例如,在运行 IIS 工作进程的路径上可能不存在 `dotnet` CLI 工具(命令)。
|
||
|
||
若要手动重启 IIS,请停止 Windows 进程激活服务 (WAS),然后重新启动 World Wide Web 发布服务 (W3SVC) 和所有相关服务。 在高级命令 shell 中执行以下命令:
|
||
|
||
```powershell
|
||
net stop was /y
|
||
net start w3svc
|
||
```
|
||
|
||
安装完成后,打开如下页面,打开IIS管理器
|
||
|
||
选择左侧数的根目录后,在右侧选择模块,如下图所示。
|
||
|
||

|
||
|
||
安装完成后在模块中会显示`AspNetCoreModuleV2`模块
|
||
|
||

|
||
|
||
## 添加网站
|
||
|
||
网站=>右键添加网站
|
||
|
||

|
||
|
||

|
||
|
||
在上图中,我们创建了一个网站名为:**RDICoreWeb50**,并指定了到我们网站的发布路径。
|
||
|
||
这儿最重要的一步就是要设置网站的“应用程序池”。
|
||
|
||
在IIS左侧选择“应用程序池”,在右则可以看到我们网站使用的“**RDICoreWeb50**”,双击打开,并做如图配置:
|
||
|
||

|
||
|
||
## 报错解决
|
||
|
||
**请求筛选模块被配置为拒绝包含的查询字符串过长的请求**
|
||
|
||
ASP中配置行为 => 限制属性 => `最大请求实体主体限制` 1073741824
|
||
|
||

|
||
|
||
配置编辑器中选择节 => system.webServer/serverRuntime
|
||
|
||

|
||
|
||
配置`maxRequestEntityAllowed`和`uploadReadAheadSize` 1073741824
|
||
|
||

|
||
|
||
项目目录`web.config`配置
|
||
|
||
```xml
|
||
<?xml version="1.0" encoding="utf-8"?>
|
||
<configuration>
|
||
<location path="." inheritInChildApplications="false">
|
||
<system.webServer>
|
||
<handlers>
|
||
<add name="aspNetCore" path="*" verb="*" modules="AspNetCoreModuleV2" resourceType="Unspecified" />
|
||
</handlers>
|
||
<aspNetCore processPath="dotnet" arguments=".\ZR.Admin.WebApi.dll" stdoutLogEnabled="false" stdoutLogFile=".\logs\stdout" hostingModel="inprocess" />
|
||
</system.webServer>
|
||
</location>
|
||
<system.webServer>
|
||
<security>
|
||
<requestFiltering>
|
||
<requestLimits maxQueryString="2097151" maxAllowedContentLength="1073741824" />
|
||
</requestFiltering>
|
||
</security>
|
||
</system.webServer>
|
||
</configuration>
|
||
```
|
||
|
||
|
||
|
||
# 托管到 Nginx
|
||
|
||
## 配置
|
||
|
||
```conf
|
||
|
||
#user nobody;
|
||
worker_processes 1;
|
||
|
||
#error_log logs/error.log;
|
||
#error_log logs/error.log notice;
|
||
#error_log logs/error.log info;
|
||
|
||
#pid logs/nginx.pid;
|
||
|
||
|
||
events {
|
||
worker_connections 1024;
|
||
}
|
||
|
||
|
||
http {
|
||
include mime.types;
|
||
default_type application/octet-stream;
|
||
|
||
#log_format main '$remote_addr - $remote_user [$time_local] "$request" '
|
||
# '$status $body_bytes_sent "$http_referer" '
|
||
# '"$http_user_agent" "$http_x_forwarded_for"';
|
||
|
||
#access_log logs/access.log main;
|
||
|
||
sendfile on;
|
||
#tcp_nopush on;
|
||
|
||
#keepalive_timeout 0;
|
||
keepalive_timeout 65;
|
||
|
||
#gzip on;
|
||
|
||
# map $http_upgrade $connection_upgrade {
|
||
# default upgrade;
|
||
# '' close;
|
||
# }
|
||
|
||
map $http_connection $connection_upgrade {
|
||
"~*Upgrade" $http_connection;
|
||
default keep-alive;
|
||
}
|
||
server {
|
||
listen 7779;
|
||
server_name localhost;
|
||
|
||
#charset koi8-r;
|
||
|
||
#access_log logs/host.access.log main;
|
||
|
||
#location / {
|
||
# root html;
|
||
# index index.html index.htm;
|
||
#}
|
||
|
||
root html/dist;
|
||
index index.html index.htm;
|
||
|
||
# 根请求会指向的页面
|
||
location / {
|
||
# 此处的 @router 实际上是引用下面的转发,否则在 Vue 路由刷新时可能会抛出 404
|
||
try_files $uri $uri/ @router;
|
||
# 请求指向的首页
|
||
index index.html;
|
||
}
|
||
|
||
location @router {
|
||
rewrite ^.*$ /index.html last;
|
||
}
|
||
|
||
#error_page 404 /404.html;
|
||
|
||
# redirect server error pages to the static page /50x.html
|
||
#
|
||
#error_page 500 502 503 504 /50x.html;
|
||
#location = /50x.html {
|
||
# root html;
|
||
#}
|
||
|
||
location /prod-api {
|
||
proxy_set_header Host $http_host;
|
||
proxy_set_header X-Real-IP $remote_addr;
|
||
#proxy_set_header REMOTE-HOST $remote_addr;
|
||
proxy_set_header X-Forwarded-For $proxy_add_x_forwarded_for;
|
||
proxy_set_header Cookie $http_cookie;
|
||
proxy_pass http://127.0.0.1:50;
|
||
proxy_redirect off;
|
||
|
||
proxy_set_header HTTP-X-REQUESTED-WITH $http_x_requested_with;
|
||
proxy_set_header HTTP_X_REQUESTED_WITH $http_x_requested_with;
|
||
proxy_set_header x-requested-with $http_x_requested_with;
|
||
client_max_body_size 10m;
|
||
client_body_buffer_size 128k;
|
||
proxy_connect_timeout 90;
|
||
proxy_send_timeout 90;
|
||
proxy_read_timeout 90;
|
||
proxy_buffer_size 128k;
|
||
proxy_buffers 32 32k;
|
||
proxy_busy_buffers_size 128k;
|
||
proxy_temp_file_write_size 128k;
|
||
rewrite ^/prod-api/(.*) /$1 break;
|
||
}
|
||
|
||
location /msghub {
|
||
proxy_pass http://127.0.0.1:50/msgHub;
|
||
|
||
# Configuration for WebSockets
|
||
proxy_set_header Upgrade $http_upgrade;
|
||
proxy_set_header Connection $connection_upgrade;
|
||
proxy_cache off;
|
||
# WebSockets were implemented after http/1.0
|
||
proxy_http_version 1.1;
|
||
|
||
# Configuration for ServerSentEvents
|
||
proxy_buffering off;
|
||
|
||
# Configuration for LongPolling or if your KeepAliveInterval is longer than 60 seconds
|
||
proxy_read_timeout 100s;
|
||
|
||
proxy_set_header Host $host;
|
||
proxy_set_header X-Forwarded-For $proxy_add_x_forwarded_for;
|
||
proxy_set_header X-Forwarded-Proto $scheme;
|
||
}
|
||
|
||
# proxy the PHP scripts to Apache listening on 127.0.0.1:80
|
||
#
|
||
#location ~ \.php$ {
|
||
# proxy_pass http://127.0.0.1;
|
||
#}
|
||
|
||
# pass the PHP scripts to FastCGI server listening on 127.0.0.1:9000
|
||
#
|
||
#location ~ \.php$ {
|
||
# root html;
|
||
# fastcgi_pass 127.0.0.1:9000;
|
||
# fastcgi_index index.php;
|
||
# fastcgi_param SCRIPT_FILENAME /scripts$fastcgi_script_name;
|
||
# include fastcgi_params;
|
||
#}
|
||
|
||
# deny access to .htaccess files, if Apache's document root
|
||
# concurs with nginx's one
|
||
#
|
||
#location ~ /\.ht {
|
||
# deny all;
|
||
#}
|
||
}
|
||
|
||
|
||
# another virtual host using mix of IP-, name-, and port-based configuration
|
||
#
|
||
#server {
|
||
# listen 8000;
|
||
# listen somename:8080;
|
||
# server_name somename alias another.alias;
|
||
|
||
# location / {
|
||
# root html;
|
||
# index index.html index.htm;
|
||
# }
|
||
#}
|
||
|
||
|
||
# HTTPS server
|
||
#
|
||
#server {
|
||
# listen 443 ssl;
|
||
# server_name localhost;
|
||
|
||
# ssl_certificate cert.pem;
|
||
# ssl_certificate_key cert.key;
|
||
|
||
# ssl_session_cache shared:SSL:1m;
|
||
# ssl_session_timeout 5m;
|
||
|
||
# ssl_ciphers HIGH:!aNULL:!MD5;
|
||
# ssl_prefer_server_ciphers on;
|
||
|
||
# location / {
|
||
# root html;
|
||
# index index.html index.htm;
|
||
# }
|
||
#}
|
||
|
||
}
|
||
|
||
```
|
||
|
||
其中有两个map块
|
||
|
||
1. 第一个`map`块:
|
||
```conf
|
||
map $http_upgrade $connection_upgrade {
|
||
default upgrade;
|
||
'' close;
|
||
}
|
||
```
|
||
- 如果`$http_upgrade`的值与`default`不匹配(通常是指`$http_upgrade`未设置或未匹配任何其他条件),则将`$connection_upgrade`设置为`upgrade`。
|
||
- 如果`$http_upgrade`的值为空字符串(''),则将`$connection_upgrade`设置为`close`。这意味着Nginx将关闭连接而不是升级。
|
||
|
||
2. 第二个`map`块(微软官方用法):
|
||
```conf
|
||
map $http_connection $connection_upgrade {
|
||
"~*Upgrade" $http_connection;
|
||
default keep-alive;
|
||
}
|
||
```
|
||
|
||
- 如果`$http_connection`的值匹配正则表达式`~*Upgrade`(不区分大小写地匹配包含"Upgrade"的值),则将`$connection_upgrade`设置为`$http_connection`的值,通常是`upgrade`。
|
||
- 如果没有匹配的值,将`$connection_upgrade`设置为`keep-alive`。这意味着Nginx将保持HTTP连接保持活动状态以进行进一步的请求和响应。
|
||
|
||
总的来说,这两个`map`块都涉及控制HTTP升级的行为,但它们使用不同的条件来决定何时将`$connection_upgrade`设置为`upgrade`或`close`。第一个`map`块根据`$http_upgrade`的值设置,而第二个`map`块根据`$http_connection`的值设置,通过正则表达式检查是否包含"Upgrade"。
|
||
|
||
# 顶级语句配置 `Program.cs`
|
||
|
||
## 取消默认JSON首字母小写命名
|
||
|
||
```c#
|
||
builder.Services.AddControllers().AddJsonOptions(options => {
|
||
options.JsonSerializerOptions.PropertyNamingPolicy = null;
|
||
});
|
||
```
|
||
|
||
## Json序列化时忽略属性为null的值
|
||
|
||
```c#
|
||
builder.Services.AddControllers().AddJsonOptions(options => {
|
||
options.JsonSerializerOptions.DefaultIgnoreCondition = JsonIgnoreCondition.WhenWritingNull;
|
||
});
|
||
```
|
||
|
||
## Json序列化时日期类型格式化输出
|
||
|
||
```c#
|
||
builder.Services.AddControllers().AddJsonOptions(options =>
|
||
{
|
||
options.JsonSerializerOptions.Converters.Add(new SystemTextJsonDateTimeJsonConverter("yyyy-MM-dd HH:mm:ss"));
|
||
});
|
||
```
|
||
|
||
## 使用Autofac自动注入Service
|
||
|
||
通过NuGet包管理器 安装NuGet包
|
||
|
||

|
||
|
||

|
||
|
||
Autofac
|
||
|
||
Autofac.Extensions.DependencyInjection
|
||
|
||
Autofac.Extras.DynamicProxy
|
||
|
||
新建 `ServiceAutofac.cs`类
|
||
|
||
```c#
|
||
using System.Reflection;
|
||
|
||
namespace XiaodaERP
|
||
{
|
||
public class ServiceAutofac
|
||
{
|
||
/// <summary>
|
||
/// 获取程序集名称
|
||
/// </summary>
|
||
/// <returns></returns>
|
||
public static string GetAssemblyName()
|
||
{
|
||
return Assembly.GetExecutingAssembly().GetName().Name;
|
||
}
|
||
}
|
||
}
|
||
```
|
||
|
||
`Program.cs`配置
|
||
|
||
```c#
|
||
builder.Host.UseServiceProviderFactory(new AutofacServiceProviderFactory());
|
||
builder.Host.ConfigureContainer<ContainerBuilder>(builder =>
|
||
{
|
||
Assembly assembly = Assembly.Load(ServiceAutofac.GetAssemblyName());//注入Service程序集 可以是其他程序集
|
||
builder.RegisterAssemblyTypes(assembly)
|
||
.AsImplementedInterfaces()
|
||
.InstancePerDependency();
|
||
});
|
||
```
|
||
|
||
## 注入Entity Framework Core 6 DbContext上下文
|
||
|
||
```c#
|
||
builder.Services.AddDbContext<OracleDbContext>(options =>
|
||
options.UseOracle(builder.Configuration.GetConnectionString("OracleDbContext")));
|
||
|
||
builder.Services.AddDbContext<SqlServerDbContext>(options => options.UseSqlServer(builder.Configuration.GetConnectionString("SqlServerDbContext")));
|
||
```
|
||
|
||
## 使用JWT进行授权与认证
|
||
|
||
安装NuGet包
|
||
|
||
`Microsoft.AspNetCore.Authentication.JwtBearer`
|
||
|
||

|
||
|
||
`appsettings.json`配置文件中配置
|
||
|
||
```json
|
||
"Authentication": {
|
||
"SecretKey": "nadjhfgkadshgoihfkajhkjdhsfaidkuahfhdksjaghidshyaukfhdjks",
|
||
"Issuer": "www.xiaoda",
|
||
"Audience": "www.xiaoda"
|
||
}
|
||
```
|
||
|
||
`Program.cs`顶级语句配置
|
||
|
||
```c#
|
||
// 使用Autofac自动注入Service
|
||
builder.Host.UseServiceProviderFactory(new AutofacServiceProviderFactory());
|
||
builder.Host.ConfigureContainer<ContainerBuilder>(builder =>
|
||
{
|
||
Assembly assembly = Assembly.Load(ServiceAutofac.GetAssemblyName());//注入Service程序集 可以是其他程序集
|
||
builder.RegisterAssemblyTypes(assembly)
|
||
.AsImplementedInterfaces()
|
||
.InstancePerDependency();
|
||
// 在IOC容器中注入
|
||
// 用于Jwt的各种操作
|
||
builder.RegisterType<JwtSecurityTokenHandler>().InstancePerLifetimeScope();
|
||
// 支持泛型存入Jwt
|
||
builder.RegisterType<TokenHelper>().InstancePerLifetimeScope();
|
||
});
|
||
|
||
//JWT认证
|
||
builder.Services.AddAuthentication(JwtBearerDefaults.AuthenticationScheme).AddJwtBearer(options =>
|
||
{
|
||
//取出私钥
|
||
var secretByte = Encoding.UTF8.GetBytes(builder.Configuration["Authentication:SecretKey"]);
|
||
options.TokenValidationParameters = new TokenValidationParameters()
|
||
{
|
||
//验证发布者
|
||
ValidateIssuer = true,
|
||
ValidIssuer = builder.Configuration["Authentication:Issuer"],
|
||
//验证接受者
|
||
ValidateAudience = true,
|
||
ValidAudience = builder.Configuration["Authentication:Audience"],
|
||
//验证是否过期
|
||
ValidateLifetime = true,
|
||
//验证私钥
|
||
IssuerSigningKey = new SymmetricSecurityKey(secretByte)
|
||
};
|
||
|
||
});
|
||
// 顺序不能颠倒
|
||
// 你是谁 授权
|
||
app.UseAuthentication();
|
||
// 你可以干什么 验证
|
||
app.UseAuthorization();
|
||
```
|
||
|
||
新建 `TokenHelper.cs`工具类
|
||
|
||
```c#
|
||
using Microsoft.IdentityModel.Tokens;
|
||
using System.IdentityModel.Tokens.Jwt;
|
||
using System.Reflection;
|
||
using System.Security.Claims;
|
||
using System.Text;
|
||
using XiaodaERP.Models;
|
||
|
||
namespace XiaodaERP.Utils
|
||
{
|
||
public class TokenHelper
|
||
{
|
||
private readonly IConfiguration _configuration;
|
||
private readonly JwtSecurityTokenHandler _jwtSecurityTokenHandler;
|
||
public TokenHelper(IConfiguration configuration, JwtSecurityTokenHandler jwtSecurityTokenHandler)
|
||
{
|
||
this._configuration = configuration;
|
||
this._jwtSecurityTokenHandler = jwtSecurityTokenHandler;
|
||
}
|
||
public static string? Token { get; set; }
|
||
// 生成Token
|
||
public string CreateJwtToken<T>(T user)
|
||
{
|
||
// 生成JWT
|
||
// Header,选择签名算法
|
||
var signingAlogorithm = SecurityAlgorithms.HmacSha256;
|
||
// Payload,存放用户信息,放用户ID,用户名
|
||
var claimList = this.CreateClaimList(user);
|
||
//Signature
|
||
//取出私钥并以utf8编码字节输出
|
||
var secretByte = Encoding.UTF8.GetBytes(_configuration["Authentication:SecretKey"]);
|
||
//使用非对称算法对私钥进行加密
|
||
var signingKey = new SymmetricSecurityKey(secretByte);
|
||
//使用HmacSha256来验证加密后的私钥生成数字签名
|
||
var signingCredentials = new SigningCredentials(signingKey, signingAlogorithm);
|
||
//生成Token
|
||
var Token = new JwtSecurityToken(
|
||
issuer: _configuration["Authentication:Issuer"], //发布者
|
||
audience: _configuration["Authentication:Audience"], //接收者
|
||
claims: claimList, //存放的用户信息
|
||
notBefore: DateTime.UtcNow, //发布时间
|
||
expires: DateTime.UtcNow.AddMinutes(30), //有效期设置为1天
|
||
signingCredentials //数字签名
|
||
);
|
||
//生成字符串token
|
||
var TokenStr = new JwtSecurityTokenHandler().WriteToken(Token);
|
||
return TokenStr;
|
||
}
|
||
// 获取Token Payload信息
|
||
public T GetToken<T>(string token)
|
||
{
|
||
Type t = typeof(T);
|
||
object obj = Activator.CreateInstance(t);
|
||
var b = _jwtSecurityTokenHandler.ReadJwtToken(token);
|
||
foreach (var item in b.Claims)
|
||
{
|
||
PropertyInfo propertyInfo = t.GetProperty(item.Type);
|
||
if (propertyInfo != null && propertyInfo.CanRead)
|
||
{
|
||
propertyInfo.SetValue(obj, item.Value, null);
|
||
}
|
||
}
|
||
return (T)obj;
|
||
}
|
||
// 根据类生成Token 断言列表
|
||
private List<Claim> CreateClaimList<T>(T authUser)
|
||
{
|
||
var Class = typeof(T);
|
||
List<Claim> claimList = new();
|
||
foreach (var item in Class.GetProperties())
|
||
{
|
||
// 不将PassWord放入Token中
|
||
if (item.Name == "PassWord")
|
||
{
|
||
continue;
|
||
}
|
||
// 将UserName属性名重命名为username存入Token中
|
||
if (item.Name == "UserName")
|
||
{
|
||
claimList.Add(new Claim("username", Convert.ToString(item.GetValue(authUser))));
|
||
continue;
|
||
}
|
||
claimList.Add(new Claim(item.Name, Convert.ToString(item.GetValue(authUser))));
|
||
}
|
||
return claimList;
|
||
}
|
||
}
|
||
}
|
||
|
||
```
|
||
|
||
在登录方法中加入
|
||
|
||
```c#
|
||
public ViewUser Login(string UserName, string PassWord)
|
||
{
|
||
var res = _sqlServerDbContext.Users.Include(user => user.Role).FirstOrDefault(x => x.UserName == UserName);
|
||
if (res != null)
|
||
{
|
||
if (res.PassWord == Md5Encoding(PassWord))
|
||
{
|
||
// 生成JWT
|
||
var TokenStr = _tokenHelper.CreateJwtToken(res);
|
||
var config = new MapperConfiguration(cfg => cfg.CreateMap<User, ViewUser>()
|
||
.ForMember(d => d.username, opt => opt.MapFrom(src => src.UserName))
|
||
.AfterMap((src, des) => des.Roles = new Role[1] { src.Role })
|
||
.AfterMap((src, des) => des.Token = "bearer " + TokenStr) // 需要加上bearer
|
||
.AfterMap((src, des) => des.HomePath = "/dashboard/analysis")
|
||
.AfterMap((src, des) => des.password = null));
|
||
var mapper = config.CreateMapper();
|
||
return mapper.Map<ViewUser>(res);
|
||
}
|
||
}
|
||
return null;
|
||
}
|
||
```
|
||
|
||
WebAPI 需要认证的加上 `[Authorize]`注解,注意登录不能加
|
||
|
||
```c#
|
||
[AuthFilter]
|
||
[HttpPost(Name = "login")]
|
||
public ResultUtil Login(ViewUser viewUser) =>
|
||
ResultUtil.ok(_userService.Login(viewUser.username, viewUser.password));
|
||
// 需要认证的API
|
||
[Authorize]
|
||
[AuthFilter]
|
||
[HttpGet(Name = "getUserInfo")]
|
||
public ResultUtil GetUserInfo()
|
||
{
|
||
Token = HttpContext.Request.Headers["Authorization"];
|
||
Token = Token.Split(" ")[1];
|
||
TokenHelper.Token = Token;
|
||
ViewUser us = _tokenHelper.GetToken<ViewUser>(Token);
|
||
return ResultUtil.ok(us);
|
||
}
|
||
```
|
||
|
||
访问登录接口
|
||
|
||

|
||
|
||
访问需要认证的接口,需要把Token放在请求头中,如果不携带Token,访问则报401
|
||
|
||

|
||
|
||
请求头Key 为 Authorization
|
||
|
||
访问成功
|
||
|
||

|
||
|
||
# 三大拦截器
|
||
|
||
认证拦截器 `AuthorizeAttribute`
|
||
|
||
方法拦截器 `ActionFilterAttribute`
|
||
|
||
```c#
|
||
using Microsoft.AspNetCore.Mvc.Controllers;
|
||
using Microsoft.AspNetCore.Mvc.Filters;
|
||
using Newtonsoft.Json;
|
||
using Newtonsoft.Json.Linq;
|
||
using System.IdentityModel.Tokens.Jwt;
|
||
using Castle.Core.Internal;
|
||
using XiaodaERP.Models;
|
||
using XiaodaERP.Utils;
|
||
using Microsoft.EntityFrameworkCore;
|
||
using Microsoft.Extensions.Options;
|
||
|
||
namespace XiaodaERP.Attributes
|
||
{
|
||
public class AuthFilter : ActionFilterAttribute
|
||
{
|
||
//private readonly TokenHelper _tokenHelper;
|
||
//public AuthFilter(TokenHelper tokenHelper)
|
||
//{
|
||
// this._tokenHelper = tokenHelper;
|
||
//}
|
||
private readonly SqlServerDbContext _sqlServerDbContext;
|
||
public AuthFilter(SqlServerDbContext sqlServerDbContext)
|
||
{
|
||
this._sqlServerDbContext = sqlServerDbContext;
|
||
}
|
||
|
||
private SysActionLog sysActionLog = new()
|
||
{
|
||
ActionId = Guid.NewGuid().ToString().Replace("-", "").ToUpper()
|
||
};
|
||
public override void OnActionExecuting(ActionExecutingContext context)
|
||
{
|
||
var descriptor = context.ActionDescriptor as ControllerActionDescriptor;
|
||
string param = string.Empty;
|
||
string globalParam = string.Empty;
|
||
|
||
var jsonSetting = new JsonSerializerSettings { NullValueHandling = NullValueHandling.Ignore };
|
||
foreach (var arg in context.ActionArguments)
|
||
{
|
||
string value = Newtonsoft.Json.JsonConvert.SerializeObject(arg.Value, Formatting.None, jsonSetting);
|
||
param += $"{arg.Key} : {value} \r\n";
|
||
globalParam += value;
|
||
}
|
||
// 方法名
|
||
Console.WriteLine(descriptor.ActionName);
|
||
// 参数值拼接
|
||
Console.WriteLine(globalParam);
|
||
// 参数名 与 值
|
||
Console.WriteLine(param);
|
||
sysActionLog.ActionName = descriptor.ActionName;
|
||
sysActionLog.RequestParams = param;
|
||
}
|
||
|
||
public override void OnActionExecuted(ActionExecutedContext context)
|
||
{
|
||
// 获取请求Host
|
||
Console.WriteLine(context.HttpContext.Request.Host);
|
||
sysActionLog.RequestHost = context.HttpContext.Request.Host.ToString();
|
||
// 获取请求方法
|
||
Console.WriteLine(context.HttpContext.Request.Method);
|
||
sysActionLog.RequestMethod = context.HttpContext.Request.Method;
|
||
// 获取请求Url
|
||
Console.WriteLine(context.HttpContext.Request.Path);
|
||
sysActionLog.RequestPath = context.HttpContext.Request.Path.ToString();
|
||
// 获取应答返回状态码
|
||
Console.WriteLine(context.HttpContext.Response.StatusCode);
|
||
if (context.HttpContext.Request.Path.Equals("/api/User/login"))
|
||
{
|
||
sysActionLog.ActionTime = DateTime.Now;
|
||
}
|
||
else
|
||
{
|
||
string Token = context.HttpContext.Request.Headers["Authorization"];
|
||
// Token失效
|
||
if (Token.IsNullOrEmpty())
|
||
{
|
||
|
||
}
|
||
else
|
||
{
|
||
Token = Token.Split(" ")[1];
|
||
TokenHelper.Token = Token;
|
||
ViewUser us = new TokenHelper(new JwtSecurityTokenHandler()).GetToken<ViewUser>(Token);
|
||
Console.WriteLine(us.UserId);
|
||
sysActionLog.ActionUserId = us.UserId;
|
||
Console.WriteLine(us.username);
|
||
sysActionLog.ActionUserName = us.username;
|
||
}
|
||
sysActionLog.ActionTime = DateTime.Now;
|
||
}
|
||
_sqlServerDbContext.SysActionLogs.Add(sysActionLog);
|
||
_sqlServerDbContext.SaveChanges();
|
||
}
|
||
}
|
||
}
|
||
|
||
```
|
||
|
||
接口上使用
|
||
|
||
```c#
|
||
//[AuthFilter]
|
||
[TypeFilter(typeof(AuthFilter))]
|
||
[HttpPost(Name = "login")]
|
||
public ResultUtil Login(ViewUser viewUser) =>
|
||
ResultUtil.ok(_userService.Login(viewUser.username, viewUser.password));
|
||
|
||
[Authorize]
|
||
//[AuthFilter] // 注解为拦截器类名
|
||
[TypeFilter(typeof(AuthFilter))] // 因为主键中使用了构造器依赖注入,所以需要使用TypeFilter,并需要在顶级语句中注入 AuthFilter
|
||
[HttpGet(Name = "getUserInfo")]
|
||
public ResultUtil GetUserInfo()
|
||
{
|
||
Token = HttpContext.Request.Headers["Authorization"];
|
||
Token = Token.Split(" ")[1];
|
||
TokenHelper.Token = Token;
|
||
ViewUser us = _tokenHelper.GetToken<ViewUser>(Token);
|
||
return ResultUtil.ok(us);
|
||
}
|
||
```
|
||
|
||
顶级语句中注入
|
||
|
||
```c#
|
||
builder.Services.AddScoped<AuthFilter>();
|
||
```
|
||
|
||
异常拦截器 `ExceptionFilterAttribute`
|
||
|
||
# AspNetCoreRateLimit 速率限制
|
||
|
||
## 介绍
|
||
|
||
[**AspNetCoreRateLimit**](https://github.com/stefanprodan/AspNetCoreRateLimit/)是一个ASP.NET Core速率限制的解决方案,旨在控制客户端根据IP地址或客户端ID向Web API或MVC应用发出的请求的速率。AspNetCoreRateLimit包含一个**IpRateLimitMiddleware**和**ClientRateLimitMiddleware**,每个中间件可以根据不同的场景配置限制允许IP或客户端,自定义这些限制策略,也可以将限制策略应用在每个API URL或具体的HTTP Method上。
|
||
|
||
## 使用
|
||
|
||
由上面介绍可知AspNetCoreRateLimit支持了两种方式:基于**客户端IP(\**IpRateLimitMiddleware)\**和客户端ID(\**ClientRateLimitMiddleware\**)速率限制** 接下来就分别说明使用方式
|
||
|
||
添加Nuget包引用:
|
||
|
||
```shell
|
||
Install-Package AspNetCoreRateLimit
|
||
```
|
||
|
||
### 基于客户端IP速率限制
|
||
|
||
新建 `IPRateExtension.cs`
|
||
|
||
```c#
|
||
public static class IPRateExtension
|
||
{
|
||
public static void AddIPRate(this IServiceCollection services, IConfiguration configuration)
|
||
{
|
||
if (services == null) throw new ArgumentNullException(nameof(services));
|
||
|
||
//从appsettings.json中加载常规配置,IpRateLimiting与配置文件中节点对应
|
||
services.Configure<IpRateLimitOptions>(configuration.GetSection("IpRateLimiting"));
|
||
|
||
//从appsettings.json中加载Ip规则
|
||
services.Configure<IpRateLimitPolicies>(configuration.GetSection("IpRateLimitPolicies"));
|
||
//注入计数器和规则存储
|
||
//分布式部署时,需要将速率限制计算器和ip规则存储到分布式缓存中如Redis
|
||
services.AddSingleton<IIpPolicyStore, DistributedCacheIpPolicyStore>();
|
||
services.AddSingleton<IClientPolicyStore, DistributedCacheClientPolicyStore>();
|
||
// services.AddSingleton<IIpPolicyStore, MemoryCacheIpPolicyStore>();
|
||
services.AddSingleton<IRateLimitCounterStore, DistributedCacheRateLimitCounterStore>();
|
||
// services.AddSingleton<IRateLimitCounterStore, MemoryCacheRateLimitCounterStore>();
|
||
//配置(解析器、计数器密钥生成器)
|
||
services.AddSingleton<IRateLimitConfiguration, RateLimitConfiguration>();
|
||
services.AddSingleton<IProcessingStrategy, AsyncKeyLockProcessingStrategy>();
|
||
}
|
||
}
|
||
```
|
||
|
||
`Program.cs`
|
||
|
||
```c#
|
||
builder.Services.AddSingleton<IHttpContextAccessor, HttpContextAccessor>();
|
||
//初始化限流器
|
||
builder.Services.AddIPRate(builder.Configuration);
|
||
//启用客户端IP限制速率
|
||
app.UseIpRateLimiting();
|
||
```
|
||
|
||
**在appsettings.json中添加通用配置项节点:**
|
||
|
||
```json
|
||
"IpRateLimiting": {
|
||
//false,则全局将应用限制,并且仅应用具有作为端点的规则*。例如,如果您设置每秒5次调用的限制,则对任何端点的任何HTTP调用都将计入该限制
|
||
//true, 则限制将应用于每个端点,如{HTTP_Verb}{PATH}。例如,如果您为*:/api/values客户端设置每秒5个呼叫的限制,
|
||
"EnableEndpointRateLimiting": false,
|
||
//false,拒绝的API调用不会添加到调用次数计数器上;如 客户端每秒发出3个请求并且您设置了每秒一个调用的限制,则每分钟或每天计数器等其他限制将仅记录第一个调用,即成功的API调用。如果您希望被拒绝的API调用计入其他时间的显示(分钟,小时等) //,则必须设置StackBlockedRequests为true。
|
||
"StackBlockedRequests": false,
|
||
//Kestrel 服务器背后是一个反向代理,如果你的代理服务器使用不同的页眉然后提取客户端IP X-Real-IP使用此选项来设置
|
||
"RealIpHeader": "X-Real-IP",
|
||
//取白名单的客户端ID。如果此标头中存在客户端ID并且与ClientWhitelist中指定的值匹配,则不应用速率限制。
|
||
"ClientIdHeader": "X-ClientId",
|
||
//限制状态码
|
||
"HttpStatusCode": 429,
|
||
////IP白名单:支持Ip v4和v6
|
||
//"IpWhitelist": [ "127.0.0.1", "::1/10", "192.168.0.0/24" ],
|
||
////端点白名单
|
||
//"EndpointWhitelist": [ "get:/api/license", "*:/api/status" ],
|
||
////客户端白名单
|
||
//"ClientWhitelist": [ "dev-id-1", "dev-id-2" ],
|
||
//通用规则
|
||
"GeneralRules": [
|
||
{
|
||
//端点路径
|
||
"Endpoint": "*",
|
||
//时间段,格式:{数字}{单位};可使用单位:s, m, h, d
|
||
"Period": "1s",
|
||
//限制
|
||
"Limit": 2
|
||
}, //15分钟只能调用100次
|
||
{"Endpoint": "*","Period": "15m","Limit": 100}, //12H只能调用1000
|
||
{"Endpoint": "*","Period": "12h","Limit": 1000}, //7天只能调用10000次
|
||
{"Endpoint": "*","Period": "7d","Limit": 10000}
|
||
]
|
||
}
|
||
```
|
||
|
||
配置节点已添加相应注释信息。
|
||
|
||
规则设置格式:
|
||
|
||
**端点格式:**`{HTTP_Verb}:{PATH}`,您可以使用asterix符号来定位任何HTTP谓词。
|
||
|
||
**期间格式:**`{INT}{PERIOD_TYPE}`,您可以使用以下期间类型之一:`s, m, h, d`。
|
||
|
||
**限制格式:**`{LONG}`
|
||
|
||
**特点Ip限制规则设置,在\**appsettings.json中添加 IP规则配置节点\****
|
||
|
||
```json
|
||
"IpRateLimitPolicies": {
|
||
//ip规则
|
||
"IpRules": [
|
||
{
|
||
//IP
|
||
"Ip": "84.247.85.224",
|
||
//规则内容
|
||
"Rules": [
|
||
//1s请求10次
|
||
{"Endpoint": "*","Period": "1s","Limit": 10},
|
||
//15分钟请求200次
|
||
{"Endpoint": "*","Period": "15m","Limit": 200}
|
||
]
|
||
},
|
||
{
|
||
//ip支持设置多个
|
||
"Ip": "192.168.3.22/25",
|
||
"Rules": [
|
||
//1秒请求5次
|
||
{"Endpoint": "*","Period": "1s","Limit": 5},
|
||
//15分钟请求150次
|
||
{"Endpoint": "*","Period": "15m","Limit": 150},
|
||
//12小时请求500次
|
||
{"Endpoint": "*","Period": "12h","Limit": 500}
|
||
]
|
||
}
|
||
]
|
||
}
|
||
```
|
||
|
||
为使特点Ip限制规则生效,需初始化 IP 限制策略
|
||
|
||
`Program.cs`
|
||
|
||
```c#
|
||
using (var serviceScope = app.Services.CreateScope())
|
||
{
|
||
var services = serviceScope.ServiceProvider;
|
||
|
||
// get the IpPolicyStore instance
|
||
var ipPolicyStore = services.GetRequiredService<IIpPolicyStore>();
|
||
|
||
// seed IP data from appsettings
|
||
ipPolicyStore.SeedAsync().GetAwaiter().GetResult();
|
||
|
||
var clientPolicyStore = services.GetRequiredService<IClientPolicyStore>();
|
||
clientPolicyStore.SeedAsync().GetAwaiter().GetResult();
|
||
}
|
||
```
|
||
|
||
### 运行时更新速率限制
|
||
|
||
添加 `IpRateLimitController`控制器
|
||
|
||
```c#
|
||
/// <summary>
|
||
/// IP限制控制器
|
||
/// </summary>
|
||
[Route("api/[controller]")]
|
||
[ApiController]
|
||
public class IpRateLimitController : ControllerBase
|
||
{
|
||
private readonly IpRateLimitOptions _options;
|
||
private readonly IIpPolicyStore _ipPolicyStore;
|
||
|
||
public IpRateLimitController(IOptions<IpRateLimitOptions> optionsAccessor, IIpPolicyStore ipPolicyStore)
|
||
{
|
||
_options = optionsAccessor.Value;
|
||
_ipPolicyStore = ipPolicyStore;
|
||
}
|
||
|
||
[HttpGet]
|
||
public IpRateLimitPolicies Get()
|
||
{
|
||
return _ipPolicyStore.Get(_options.IpPolicyPrefix);
|
||
}
|
||
|
||
[HttpPost]
|
||
public void Post()
|
||
{
|
||
var pol = _ipPolicyStore.Get(_options.IpPolicyPrefix);
|
||
|
||
pol.IpRules.Add(new IpRateLimitPolicy
|
||
{
|
||
Ip = "8.8.4.4",
|
||
Rules = new List<RateLimitRule>(new RateLimitRule[] {
|
||
new RateLimitRule {
|
||
Endpoint = "*:/api/testupdate",
|
||
Limit = 100,
|
||
Period = "1d" }
|
||
})
|
||
});
|
||
|
||
_ipPolicyStore.Set(_options.IpPolicyPrefix, pol);
|
||
}
|
||
}
|
||
```
|
||
|
||
### 自定义 `IpRateLimitMiddleware`中间件
|
||
|
||
新建 `CustomIpRateLimitMiddleware`类并继承 `IpRateLimitMiddleware`
|
||
|
||
```c#
|
||
public class CustomIpRateLimitMiddleware : IpRateLimitMiddleware
|
||
{
|
||
private static readonly Logger Logger = LogManager.GetCurrentClassLogger();
|
||
|
||
private readonly IIpRateLimitLogService _ipRateLimitLogService;
|
||
|
||
public CustomIpRateLimitMiddleware(RequestDelegate next, IProcessingStrategy processingStrategy,
|
||
IOptions<IpRateLimitOptions> options, IIpPolicyStore policyStore, IRateLimitConfiguration config,
|
||
ILogger<IpRateLimitMiddleware> logger, IIpRateLimitLogService ipRateLimitLogService) : base(next, processingStrategy, options, policyStore, config, logger)
|
||
{
|
||
_ipRateLimitLogService = ipRateLimitLogService;
|
||
}
|
||
|
||
// 重写 用于记录被阻止的请求的日志
|
||
protected override void LogBlockedRequest(HttpContext httpContext, ClientRequestIdentity identity,
|
||
RateLimitCounter counter, RateLimitRule rule)
|
||
{
|
||
// base.LogBlockedRequest(httpContext, identity, counter, rule);
|
||
var nowDate = DateTime.Now;
|
||
var ipRateLimitLog = new IpRateLimitLog
|
||
{
|
||
HttpVerb = identity.HttpVerb,
|
||
Path = identity.Path,
|
||
ClientIp = identity.ClientIp,
|
||
Limit = rule.Limit,
|
||
Period = rule.Period,
|
||
Exceeded = counter.Count - rule.Limit,
|
||
Endpoint = rule.Endpoint,
|
||
CreateTime = nowDate
|
||
};
|
||
var logStr = $"请求 {ipRateLimitLog.HttpVerb}:{ipRateLimitLog.Path} 来自 IP {ipRateLimitLog.ClientIp} 已被阻止, " +
|
||
$"配额 {ipRateLimitLog.Limit}/{ipRateLimitLog.Period} 超出次数 {ipRateLimitLog.Exceeded}. " +
|
||
$"被规则 {ipRateLimitLog.Endpoint} 阻止. 时间: {ipRateLimitLog.CreateTime}";
|
||
Logger.Info(logStr);
|
||
_ipRateLimitLogService.InsertIpRateLimitLogAsync(ipRateLimitLog);
|
||
}
|
||
}
|
||
```
|
||
|
||
# Quartz.Net 定时任务
|
||
|
||
## 介绍
|
||
|
||
在项目的开发过程中,难免会遇见后需要后台处理的任务,例如定时发送邮件通知、后台处理耗时的数据处理等,这个时候你就需要`Quartz.Net`了。
|
||
|
||
`Quartz.Net`是纯净的,它是一个.Net程序集,是非常流行的Java作业调度系统Quartz的C#实现。
|
||
`Quartz.Net`一款功能齐全的任务调度系统,从小型应用到大型企业级系统都能适用。功能齐全体现在触发器的多样性上面,即支持简单的定时器,也支持Cron表达式;即能执行重复的作业任务,也支持指定例外的日历;任务也可以是多样性的,只要继承IJob接口即可。
|
||
|
||
对于小型应用,`Quartz.Net`可以集成到你的系统中,对于企业级系统,它提供了Routing支持,提供了Group来组织和管理任务
|
||
|
||
## 使用
|
||
|
||
### Hello Quartz.Net
|
||
|
||
添加Quartz.Net的引用
|
||
|
||
```shell
|
||
Install-Package Quartz -Version 3.7.0
|
||
```
|
||
|
||
添加引用以后,来创建一个Job类`HelloQuartzJob`
|
||
|
||
```c#
|
||
public class HelloQuartzJob : IJob
|
||
{
|
||
public Task Execute(IJobExecutionContext context)
|
||
{
|
||
return Task.Factory.StartNew(() =>
|
||
{
|
||
Console.WriteLine("Hello Quartz.Net");
|
||
});
|
||
}
|
||
}
|
||
```
|
||
|
||
这是个非常简单的Job类,它在执行时输出文本`Hello Quartz.Net`。
|
||
|
||
接下来,我们在程序启动时创建调度器(Scheduler),并添加HelloQuartzJob的调度:
|
||
|
||
```c#
|
||
var schedulerFactory = new StdSchedulerFactory();
|
||
var scheduler = await schedulerFactory.GetScheduler();
|
||
await scheduler.Start();
|
||
Console.WriteLine($"任务调度器已启动");
|
||
|
||
//创建作业和触发器
|
||
var jobDetail = JobBuilder.Create<HelloQuartzJob>().Build();
|
||
var trigger = TriggerBuilder.Create()
|
||
.WithSimpleSchedule(m => {
|
||
m.WithRepeatCount(3).WithIntervalInSeconds(1);
|
||
})
|
||
.Build();
|
||
|
||
//添加调度
|
||
await scheduler.ScheduleJob(jobDetail, trigger);
|
||
```
|
||
然后运行程序
|
||
|
||
```shell
|
||
任务调度器已启动
|
||
Hello Quartz.Net
|
||
Hello Quartz.Net
|
||
Hello Quartz.Net
|
||
Hello Quartz.Net
|
||
```
|
||
|
||
通过演示可以看出,要执行一个定时任务,一般需要四步:
|
||
|
||
1. 创建任务调度器。调度器通常在应用程序启动时创建,一个应用程序实例通常只需要一个调度器即可。
|
||
2. 创建Job和JobDetail。Job是作业的类型,描述了作业是如何执行的,这个类是由我们定义的;JobDetail是Quartz对作业的封装,它包含Job类型,以及Job在执行时用到的数据,还包括是否要持久化、是否覆盖已存在的作业等选项。
|
||
3. 创建触发器。触发器描述了在何时执行作业。
|
||
4. 添加调度。当完成以上三步以后,就可以对作业进行调度了。
|
||
|
||
### 作业:Job和JobDetail
|
||
|
||
Job是作业的类型,描述了作业是如何执行的,这个类型是由我们定义的,例如上文的`HelloQuartzJob`。Job实现IJob接口,而IJob接口只有一个`Execute`方法,参数`context`中包含了与当前上下文中关联的Scheduler、JobDetail、Trigger等。
|
||
|
||
一个典型的Job定义如下:
|
||
|
||
```c#
|
||
public class HelloQuartzJob : IJob
|
||
{
|
||
public Task Execute(IJobExecutionContext context)
|
||
{
|
||
return Task.Factory.StartNew(() =>
|
||
{
|
||
Console.WriteLine("Hello Quartz.Net");
|
||
})
|
||
}
|
||
}
|
||
```
|
||
|
||
#### JobData
|
||
|
||
Job不是孤立存在的,它需要执行的参数,这些参数如何传递进来呢?我们来定义一个Job类进行演示。
|
||
|
||
```c#
|
||
public class SayHelloJob : IJob
|
||
{
|
||
public string UserName { get; set; }
|
||
|
||
public Task Execute(IJobExecutionContext context)
|
||
{
|
||
return Task.Factory.StartNew(() =>
|
||
{
|
||
Console.WriteLine($"Hello {UserName}!");
|
||
})
|
||
}
|
||
}
|
||
```
|
||
|
||
`SayHelloJob`在执行时需要参数`UserName`,这个参数被称为JobData,`Quartz.Net`通过JobDataMap的方式传递参数。代码如下:
|
||
|
||
```C#
|
||
// 创建作业
|
||
var jobDetail = JobBuilder.Create<SayHelloJob>()
|
||
.SetJobData(new JobDataMap() {
|
||
new KeyValuePair<string, object>("UserName", "Tom")
|
||
}).Build();
|
||
```
|
||
|
||
通过JobBuilder的SetJobData方法,传入JobDataMap对象,JobDataMap对象中可以包含多个参数,这些参数可以映射到Job类的属性上。我们完善代码运行示例,可以看到如下:
|
||
|
||
```shell
|
||
任务调度器已启动
|
||
Hello Tom!
|
||
Hello Tom!
|
||
Hello Tom!
|
||
Hello Tom!
|
||
```
|
||
|
||
#### JobDetail
|
||
|
||
JobDetail是Quartz.Net对作业的封装,它包含Job类型,以及Job在执行时用到的数据,还包括是否孤立存储、请求恢复作业等选项。
|
||
|
||
JobDetail是通过JobBuilder进行创建的。例如:
|
||
|
||
```c#
|
||
var jobDetail = JobBuilder.Create<SayHelloJob>()
|
||
.SetJobData(new JobDataMap(){
|
||
new KeyValuePair<string, object>("UserName", "Tom")
|
||
})
|
||
.StoreDurably(true)
|
||
.RequestRecovery(true)
|
||
.WithIdentity("SayHelloJob-Tom", "DemoGroup")
|
||
.WithDescription("Say hello to Tom job")
|
||
.Build();
|
||
```
|
||
|
||
**参数说明:**
|
||
|
||
- SetJobData: 设置JobData
|
||
- StoreDurably: 孤立存储,指即使该JobDetail没有关联的Trigger,也会进行存储
|
||
- RequestRecovery: 请求恢复,指应用崩溃后再次启动,会重新执行该作业
|
||
- WithIdentity: 作业的描述信息
|
||
|
||
除此之外,`Quartz.Net`还支持两个非常有用的特性:
|
||
|
||
- DisallowConcurrentExecution: 禁止并行执行,该特性是针对JobDetail生效的
|
||
- PersistJobDataAfterExecution: 在执行完成后持久化JobData,该特性是针对Job类型生效的,意味着所有使用该Job的JobDetail都会在执行完成后持久化JobData。
|
||
|
||
# NLog 日志记录
|
||
|
||
## 介绍
|
||
|
||
## 使用
|